When it comes to how to paint furniture there are so many different furniture painting techniques. Because of this everyone can find their own style and their favorite paint technique. Furniture refinishing allows your inner artist to shine through, even if you didn’t realize you have one. This paint dripping effect is definitely more on the artistic and less inhibited side of the painted furniture finishes.

Disclosure: This how to paint furniture paint drip effect post contains affiliate links for your convenience. Click here for my full disclosure policy.

Supplies & Tools Needed to Paint Furniture with Paint Drip
Materials Needed / Source List:
Tools
- Zibra Paint Brushes or Cling On Brushes
- Furniture Tri Wheelies
- Sandpaper
- Rolgear screwdriver
- Bondo Wood Filler
- Shop-Vac
- Lint Free Cloth
- Find all of my favorite tools and products on my Amazon Page here
Paint
Before we begin, this drippy paint effect on painted furniture project is part of our monthly Furniture Fixer Uppers share. You know what that means! Make sure to stick around all the way to the end for more great painted furniture before and after projects. We have also added a new member and you won’t want to miss this.
Check out all of my furniture projects with over 90 painted furniture makeovers: Stunning painted furniture ideas.
Unfinished Wooden Cabinet
First, let me start by telling you that I scooped up this cabinet on one of those Facebook sale sites. From the photos, it appears to be a great candidate for sharing and creating a tutorial on how to paint wood furniture. But once it is in my shop I notice that I really have my work cut out for me.

Let’s start by propping your piece of furniture up onto these furniture wheelies. These make it easy to move the piece around while you work. You can get them online HERE. Next, we will need to remove the hardware from the piece. There is nothing wrong with the hardware and it suits the cabinet so we will keep it. Make sure to keep it somewhere safe. I am using my ratchet screwdriver with exchangeable bits to remove the hardware.

Damage Requiring Repairs
Let’s take a quick look around this cabinet at the condition of the wood. Even though we are painting furniture, we still need to address some of the damage and chipped veneer before we can begin. The inside of the cabinet has a shelf and is not in the best condition either. But let’s just look at the outside to start. There are some sort of gouges in the wood, basically more than a scratch but less than broken.

There are multiple small areas with chipped veneer. The top of the cabinet is also pretty rough.

More damage requiring repairs.

Preparing Wood Furniture for Paint
First, let’s start with basic sandpaper and sand the entire piece of furniture. Just like every other time we prep for painting furniture we will grab our medium grit sandpaper. The 150 grit tends to be a nice ‘go-to’. It’s rough enough to scuff the surface but not so rough as to scratch it up..

In many cases, when you learn how to paint furniture this would be enough to scuff the surface. But since we have so much damage to this piece it allows us to evaluate what needs more attention and what doesn’t. Some of the areas that appear to have damage may sand down enough with just sandpaper. While others need a bit more.

Sanding
Here is where I decide to break out my orbital sander. My shop is in my basement, and yes, I sand indoors. You can see how to sand indoors with an electric sander along with a few more helpful tips in my Secrets and Tips for Painting Furniture. I use the orbital to sand the shelf from inside the cabinet down to the original bare wood.

Sanding the shelf is a huge improvement. But we are going to make it even better. Later.

Since the orbital sander is out, we may as well tackle the top of the cabinet. At least this way we can smooth out that surface a bit more.

Remember I mentioned that the inside of the cabinet is not in great shape? Well, put it this way, we HAVE to do SOMETHING in there. As much as painting the inside of the cabinet seems like the obvious option to cover the current condition I plan to take another route. So, let’s sand the inside of the cabinet as well.

Repairing Wood Furniture
Now we can start with the repairs. I am using my favorite Bondo wood filler to patch and repair the damaged areas on this cabinet. You can get this filler online HERE. I also have a tutorial specifically for How to Repair Wood Furniture with Bondo Wood Filler if you need more info.

In short, mix your wood filler in a well-ventilated area, wear protective gloves and make sure to follow the safety precautions on the can.

Apply your wood filler to the areas needing repair.

Once the Bondo filler is dry you need to sand smooth and reapply as needed. Repeat until the area is repaired to your satisfaction.

Clean & Prep Furniture for Paint
Now that the damage is addressed we can continue on with cleaning our cabinet. The most important step in how to paint furniture is prep. Without a thorough prep, all of your work may not even last. So make sure to take your time and really clean and prep your piece of furniture. This is my standard process for prepping furniture for paint: How to Prep Painted Furniture.

If you are new to furniture painting and want to learn how to update old furniture with paint you can always start at the beginning with How to Paint Furniture – a Beginners Guide.
Using Primer Before Furniture Paint
We can finally get down to business. We are going to apply a clear prime to this piece of furniture before we begin painting. You don’t necessarily always need primer, but you will also never regret it. It is always a good idea to prime your piece when you are painting wood furniture. I am using a clear stain eliminating primer by Wise Owl for this project. You can order some online HERE (it comes in clear or white).

Make sure to give your primer a good stir first. As you can see the primer appears white. But trust me, it is in fact clear.

Go grab your favorite brush and make sure it’s clean. I am using one of my Cling On brushes. I like to swap back and forth between Cling Ons and Zibra brushes. They both have soft bristles, are easy to work with and clean up well. (I abuse my brushes) To be honest, I like them both. Zibra brushes are a bit more affordable and can be ordered online (HERE). Cling Ons can be ordered online (HERE).

With your brush go ahead and apply your stain eliminating primer the same way you would apply your furniture paint. You actually don’t even need to be as careful. Since the primer dries clear just make sure to get decent coverage over the entire piece without overthinking this step.

Depending on the condition of the piece and your intentions with how you intend to paint your furniture you may want to apply a second coat for good measure.

Once the primer is dry you won’t see anything on the piece but there should be a slight dull matte feel to the finish.

Painting Wood Furniture
Since we are going over how to paint furniture let’s review what steps we have taken already. So far we have:
- remove hardware
- sand
- repair
- clean
- prime
We can finally paint! (I think that is all of the steps so far, right?) 🙂 Go ahead and grab your favorite furniture paint. We will also be layering paint with this paint dripping effect technique. That is just another fantastic thing about furniture refinishing and painting wood furniture – techniques that involve layers are always unique and can rarely be duplicated. You can attempt to copy, but always put your own spin on it.
For this cabinet makeover, I am starting with a deep dark green called Charleston green by Wise Owl. This gorgeous green can also be seen on the back of a gorgeous bookcase makeover here: The Best Decoupage Paper and How to Apply it to Painted Furniture. It was in that project that I show you how to transfer chalk paint from the can to this nifty FIFO squeeze bottle. Once in the bottle you simply squeeze your paint out like a ketchup bottle – no mess! You can get these bottles online HERE

Squirt some of your furniture paint onto a paper plate, because we are not fancy over here!

Next, go ahead, and paint your wood furniture with one complete coat of paint. This is simply our base coat, so you don’t have to go crazy. This is a dark color and has amazing coverage, so the first coat goes on really nicely.

I am loving this shade of dark green on this piece.

This is just one coat of paint! How pretty is this color?

Furniture Painting Quick Tip
Here is a quick tip regarding your furniture painting brush. As you can (or can’t see) from the photo my brush has paint on mostly the bottom half of the brush. As soon as you finish with your painting you will need to clean your brush. Do not let the paint dry on your brush, especially when using a quality brush that you most likely paid more than $2 for. As long as you take care of your brushes they should last you. This goes for both Cling On and Zibra brushes.

Literally, all I do is run my brush under warm water and bounce the brush on the bottom of my sink. I do this until the water remains clear and all of the paint is removed from the brush. Nothing fancy. I don’t use solvents or cleaners or anything else.

The Second Layer in the Drip Paint Effect Process
For the second furniture paint color in this project, I am working with a light, almost mint green called Islandic Mist from Wise Owl. But as you can see this paint is still in the can.

We need to transfer this to a FIFO bottle for easier use. Give your chalk paint a stir and carefully pour into your FIFO bottle. You can get these bottles online HERE.

Remember to add a label of some sort and then go ahead and squirt some paint on to your paper plate so we can continue.

With your brush, go ahead and apply a less than perfect coat of paint on just the top half of your piece. As we get to the bottom you will want to almost drag the paint downwards for a rough and edgy look.

Once the top color is finished I notice that I may have splattered a little bit of the light paint onto the dark paint. Oops. No worries, I grab my cute little Cling On mini brush to go back and touch up. If you don’t have a mini handle Cling On you can get them online HERE.

At this point, you will both touch up as needed, but also bring the dark green paint upwards as needed in case you went a little crazy with the light green.

Starting the Dripping Paint Effect on Furniture
Now that we are about to add the drippy paint look we should give the top a quick light sanding to knock down any other bumps that may be there. I am using a finer grit for this, (320 grit sandpaper).

Anytime we sand or distress our painted furniture we always need to go back with a lint-free cloth to remove any dust before applying another coat of furniture paint. I keep a bucket of these handy cloths in my shop, you can get some online HERE. They get tossed into the laundry after each project and are re-used often.

Now let’s get that drippy paint look. Grab your brush, apply more of your light green paint towards the top and spray with water. As the water drips down the paint will too. Don’t worry, I have a video for you.

Do this around the entire piece. The more water you use, the more dripping paint you will get, naturally.

At this point, you can decide if you would like to stick with just one layer of drippy paint or if you would like more. I am opting for more. Going back over the top again, this time with the same dark green as the bottom we use the same furniture painting technique with the paint and water.

By adding the dark green again we create almost a tie-dye or watercolor effect on the cabinet.

Video Tutorial for How to Achieve a Dripping Paint Effect When Painting Furniture
If you need a bit more of a visual instruction I have a video tutorial showing the step by step process of applying these drippy paint layers.
Distressing Painted Furniture
Once the dripping paint is completely dry we are going to distress the edges. The cool part about this step is that since we have a few layers on the piece we will reveal bits of all of the colors with the distressing process. Using a 220 grit sandpaper we will lightly distress the edges of the piece.

As long as you distress with gentle pressure you should be able to reveal the paint color underneath the top layer.

Don’t forget the top. Give a light sanding to the top of the piece just like earlier to create a smooth feel. Apply a little more pressure along the edges to reveal that light green furniture paint underneath.

Make sure to wipe away the dust again. This is probably most important at this stage. We will be sealing the piece next and you don’t want to drag the paint dust from distressing of one color into another. A hair dryer works well to blow dust out of any corners and hard to reach spaces too.

Sealing Painted Furniture
Next, we will need to seal out paint drip painted furniture. Like all of my painted furniture projects, we are using my all time favorite yellow applicator sponge. If you don’t have any of these nifty sponges, you can get them online HERE. (I know they do tend to go in and out of stock – so I stock up when I order just to play it safe).

For no particular reason, I am using a combination of matte and satin varnish from Wise Owl. Sometimes, I just don’t want super matte, or super satin so I opt for a combination of the two. I do love that this varnish is a water-based clear topcoat. It has a clear resin which makes it non-yellowing. You can get some online HERE.

Using your damp sponge go ahead and apply your sealer to the entire piece.

If you ever have questions about sealing your painted furniture project you can find a full tutorial with video on how to apply clear sealer here: Sealing Painted Furniture

Updating Vintage Hardware
Remember we set aside the hardware for the cabinet? Let’s give the hardware a little refresh as well.

I actually like metallic bronze for the hardware and Wise Owl has a metallic bronze glaze that will work great for this.

First, make sure to scuff and clean your hardware. Then, use a small artist brush and paint your hardware with the bronze glaze. As I paint the hardware I kept thinking to myself “I am painting bronze hardware bronze” and wondering if I am in fact losing my mind. But, the new bronze looks much nicer than the old worn out bronze. Or at least that’s how I justify it to myself. 🙂 Make sure to apply the clear sealer to your hardware once the metallic bronze is dry.

Restoring the Inside of the Cabinet
The inside of the cabinet needs something. The first thought is to paint inside. But we sanded the shelf and the inside during our prep. I’m opting for a more natural finish on this furniture makeover. Let’s preserve the wood inside with a natural furniture salve. I bounce between my two favorite scents of Tobacco Flower and Lemon Verbena. Lemon Verbena worked wonders on a steamer trunk restoration project and Tobacco Flower refreshed the inside of the drawers for these decoupaged and painted nightstands.

I am in the mood for the sweet floral scent of Tobacco Flower. You can get Wise Owls furniture salve in this scent or numerous other amazing scents online HERE.

You will need to apply the salve with a wax type brush like this one HERE. I never use the same brush as I would with paint to apply the salve.

Liberally, apply your salve onto the wood inside the cabinet. Make sure to get into the corners and even the sides.

You’ll be amazed that a little goes a long way.

Next, grab a clean dry cloth aka old T-shirt and buff the salve rubbing it into the wood. If you are concerned with the salve leaving a film, don’t be. Once the salve dries it isn’t tacky at all. Just make sure you don’t glob it on, and make sure you do buff it well.

Do the same thing to the removable shelf. Here is the shelf before and after:

The inside of the cabinet now looks refreshed and maintains a portion of natural wood to go along with the painted finish on the outside. Otherwise, it may have looked a bit overdone if we paint the inside too. But to each their own. That’s the beauty of furniture refinishing – we all get to put our own personal spin on things. I think to keep the inside natural compliments the piece beautifully. 😉

Green Painted Cabinet with Fun Boho Drippy Paint Effect
This project, like many of my makeovers, is being donated. It is going to a local animal rescue called Fur Friends in need to help with their fundraising efforts. Click here to see all of my projects that have been donated to support local fundraisers, schools, and charities: Donation Projects.

Check out all of my furniture projects with over 90 painted furniture makeovers: Stunning painted furniture ideas.


You can get find all of these Wise Owl products and more online here: Wise Owl.
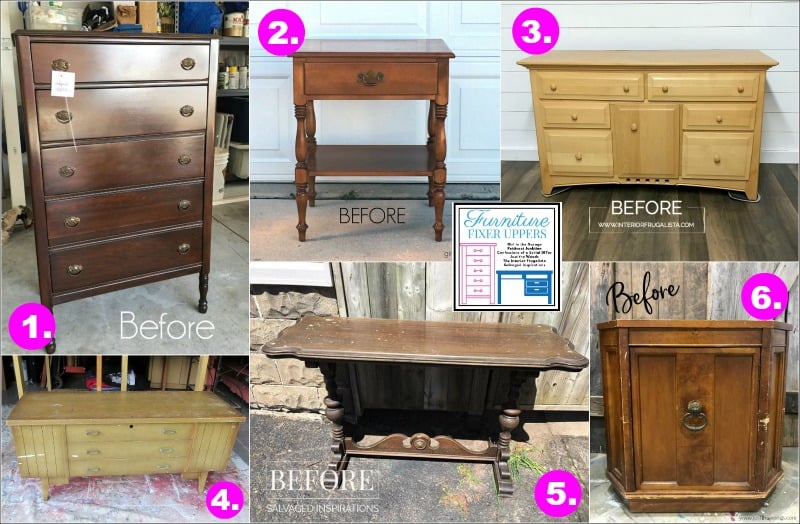
Furniture Fixer-Uppers
Its that time again where a few of my creative and talented blogger friends and I have joined together in our monthly Furniture Fixer Uppers share. We are sad to see Larissa from Prodigal Pieces go but are excited for her new ventures in DIY. We would also like to welcome and introduce you to Denise from Salvaged Inspirations. I think you will love her style. Let’s see what my friends are up to! Make sure to click the links below the image to check out all the amazing projects that my bloggy girls are working on this month.
1. Confessions of a Serial DIYer
6. Just the Woods (you are here)

Don’t Forget – Follow Just the Woods and Share this post to Inspire others:

FACEBOOK * INSTAGRAM * PINTEREST
Stay connected! For more tips and tricks sign up here : [mc4wp_form id=”1340″]


Denise Zdziennicki says
This was a REAL fixer-upper and I love how you gave it new life Kandice! Also, you’ve encouraged me to try my Zibra brushes. I have a few sitting in my stash but haven’t brought them for a test drive yet.???? Pinned! ????Have a great day! XO
Marie says
Okay, this is cool! I’ve never tried the paint drip effect but I’ve admired a few pieces on Pinterest. After watching your video tutorial I’m itching to give it a try! Love the colors and how they blended with the drips.
Christy James says
This poor piece needed someone like you to take it in and give it some love! Is it too late to vote for just the one layer…I really loved the blue on the top and green on the bottom! Either way the after is way cool! XO
kathy says
You went all out on this piece. I’ve never used Bondo! Have to try it.
Jen @ Girl in the Garage says
Girl I give you props for trying a creative new technique! I think this would look awesome in the right room!