• Home
    • About
    • Services & Policies
    • Just the Woods Media Kit
  • Furniture
    • Past Painted Projects- SOLD
  • Shop Products
    • Shop Wise Owl Chalk Synthesis Paint
    • Shop Dixie Belle Chalk Mineral Paint
    • Shop my Favorite Tools & Supplies
    • eBook
  • FREE Stuff
    • Affordable Back Drop Options
    • How to Paint Furniture – A Beginners Guide
  • Learn
    • Video Tutorials & Downloadable eBooks
  • Blog
    • Recipes
    • painted furniture
    • DIY / Crafts
    • Home Decor
    • Monthly Social Blog Hops with the Best DIY Blogs
  • About Me
    • Nutrition & Health Coaching
  • 0 items

Just the Woods, LLC | a Colorful Home & Healthy Lifestyle Blog

a Colorful Home & Healthy Lifestyle Blog

  • Blog
  • Recipes
  • Nutrition & Health Coaching
  • Painted Furniture
  • DIY / Crafts
    • Home Decor
  • About Me

How to Make a Fabric-Ribbon-Rag Backdrop

Share & Save for later!

104 shares
  • Share14
  • Tweet
  • Email

Disclosure: This fabric rag ribbon post contains affiliate links

How to Make a Fabric Ribbon Back Drop

This post is a little different than my usual.  Its an actual DIY tutorial on how to make a fabric-ribbon-rag backdrop.  I have a small staging addiction, whether props or backdrops, etc.  Everything staging!  I’ve seen these fabric backdrops online and think they are adorable.  My first step was to order a few random but pretty curtains, tablecloths, shower curtains, anything else that may work.  I made sure to add something with lace and something with satin for shimmer.  I’ve also added ribbons.  How to Make a Fabric Ribbon Backdrop by Just the Woods

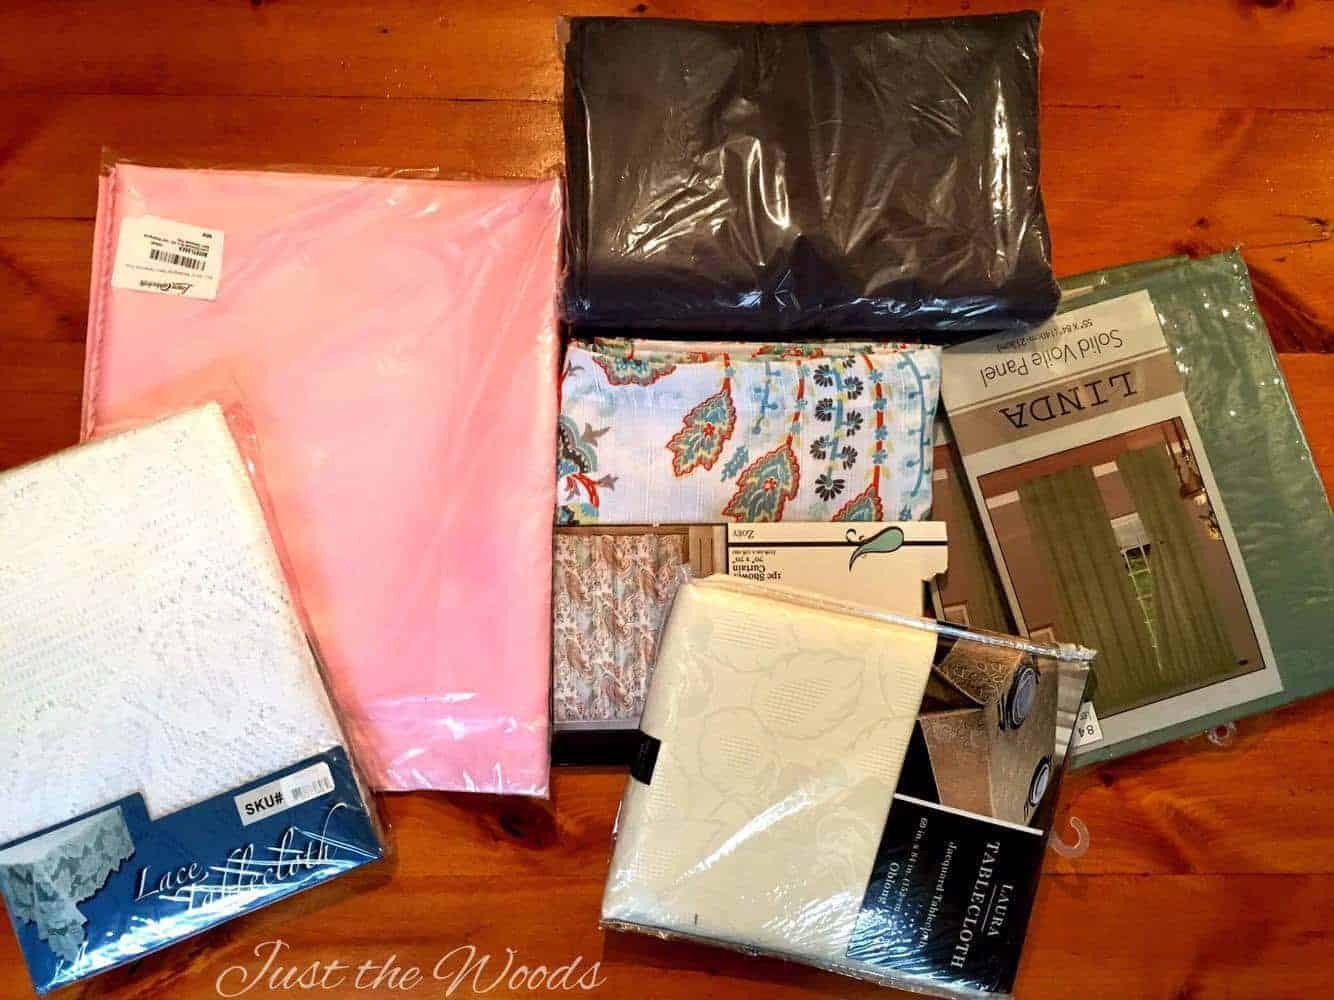
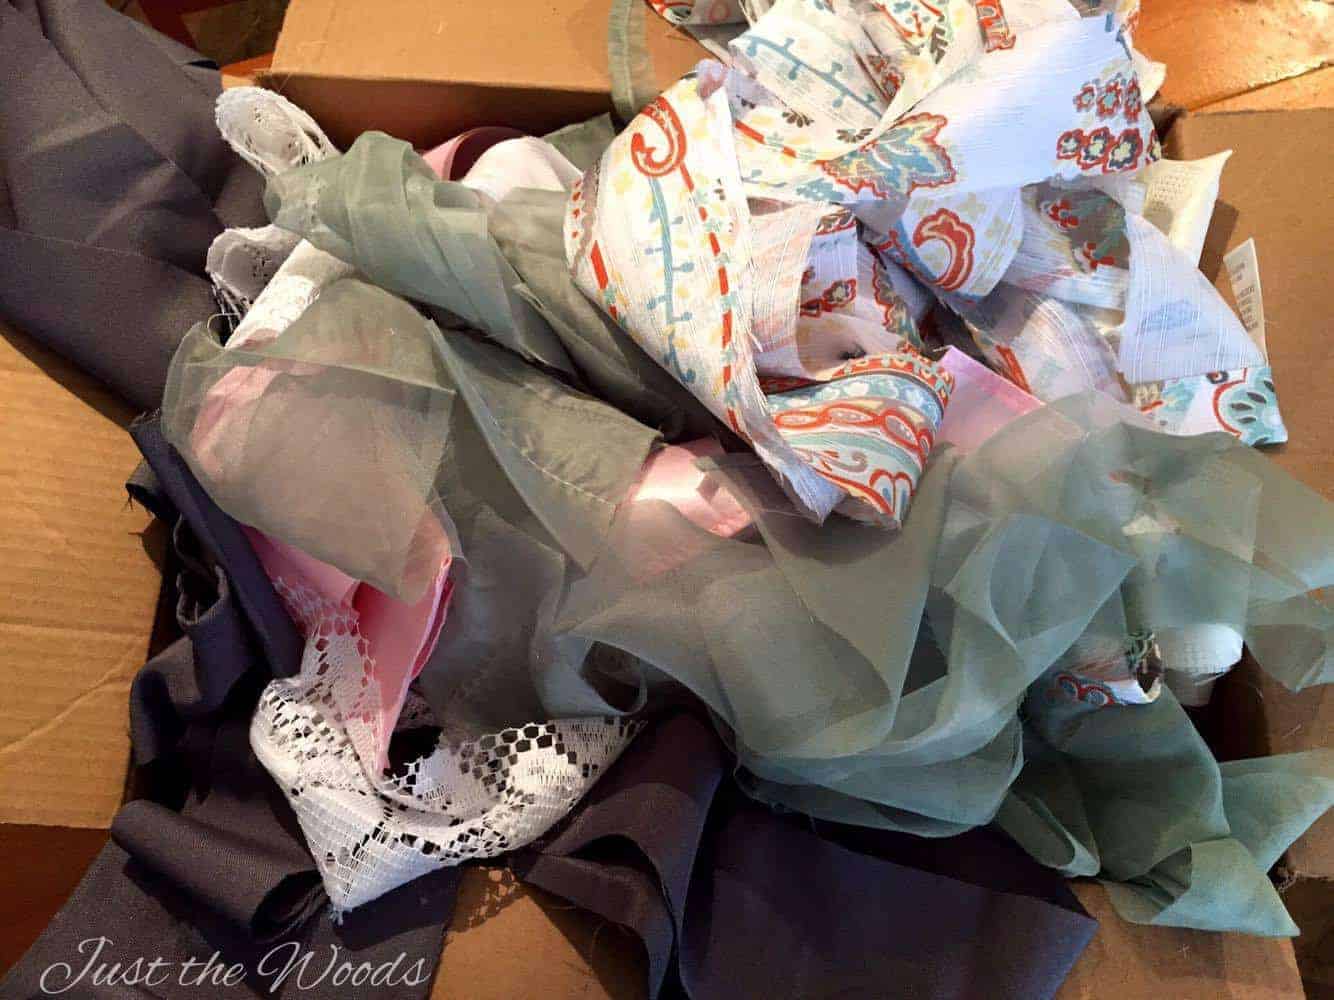
You can obviously use any fabric you may have laying around to avoid ordering.  Once all my fabrics arrived I broke out the scissors and cut them up into long strips.  Keep in mind that with cutting fabric you will have those little fabric “hairs” everywhere so keep the vacuum nearby for once you finish!How to Make a Fabric Ribbon Backdrop by Just the Woods

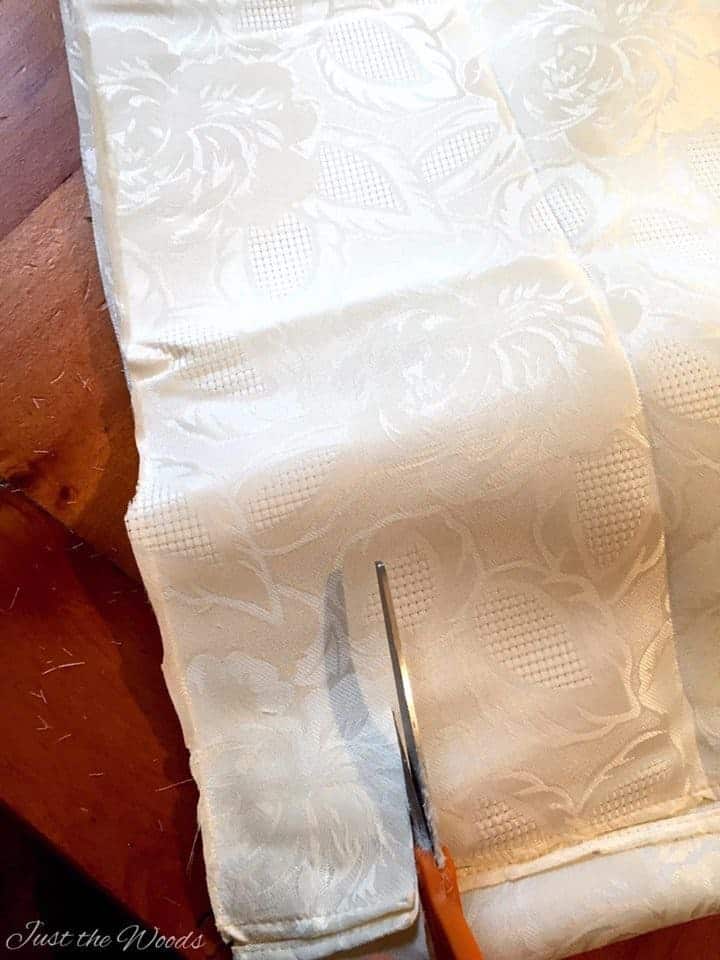
What kind of crazy person buys fabric to cut it up? ..  Me!!

How to Make a Fabric Ribbon Backdrop by Just the WoodsNext I grabbed a role of thick jute rope to tie all the fabric ribbons to.How to Make a Fabric Ribbon Backdrop by Just the Woods

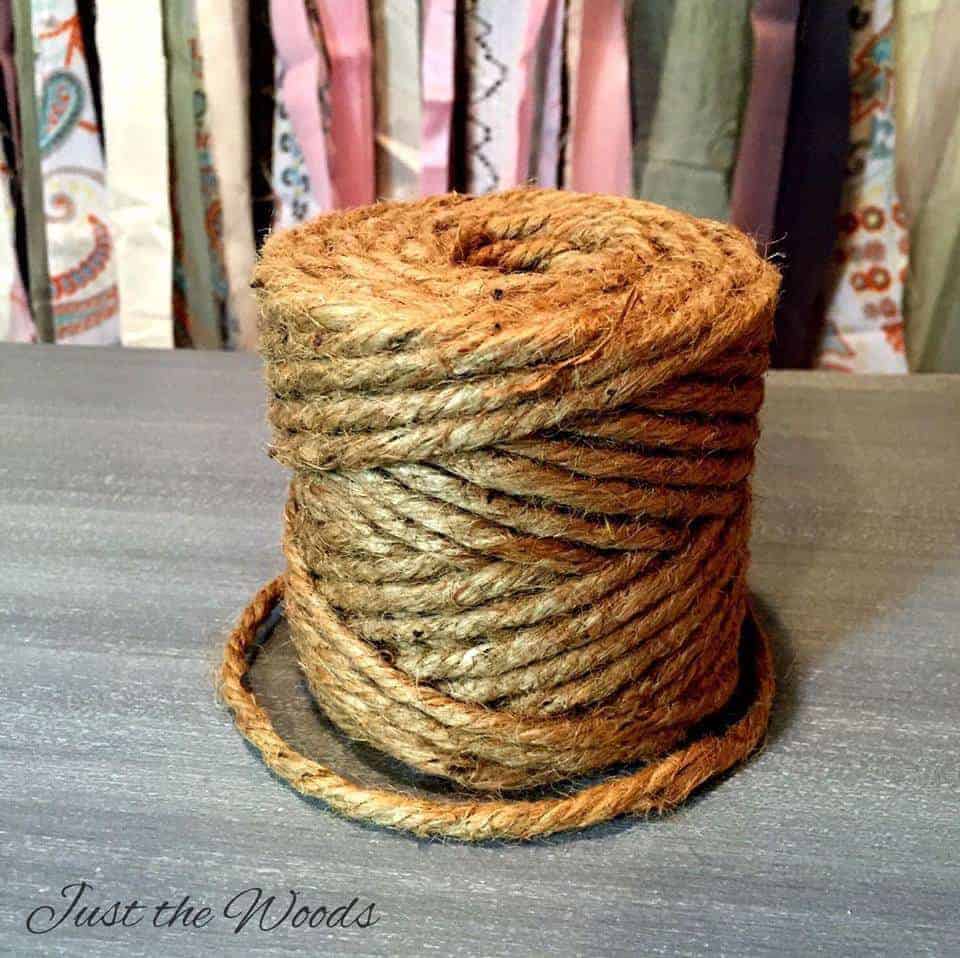
Once all the ribbon was tied to the jute I trimmed the extra long pieces and tied a loop on either end making it ready for use.  I had just finished up this custom vintage desk so I decided to try out my new fabric-ribbon-rag backdrop with it.  In the future I would probably use this backdrop with a more solid colored piece since the backdrop is so colorful.  What do you think?How to Make a Fabric Ribbon Backdrop by Just the Woods
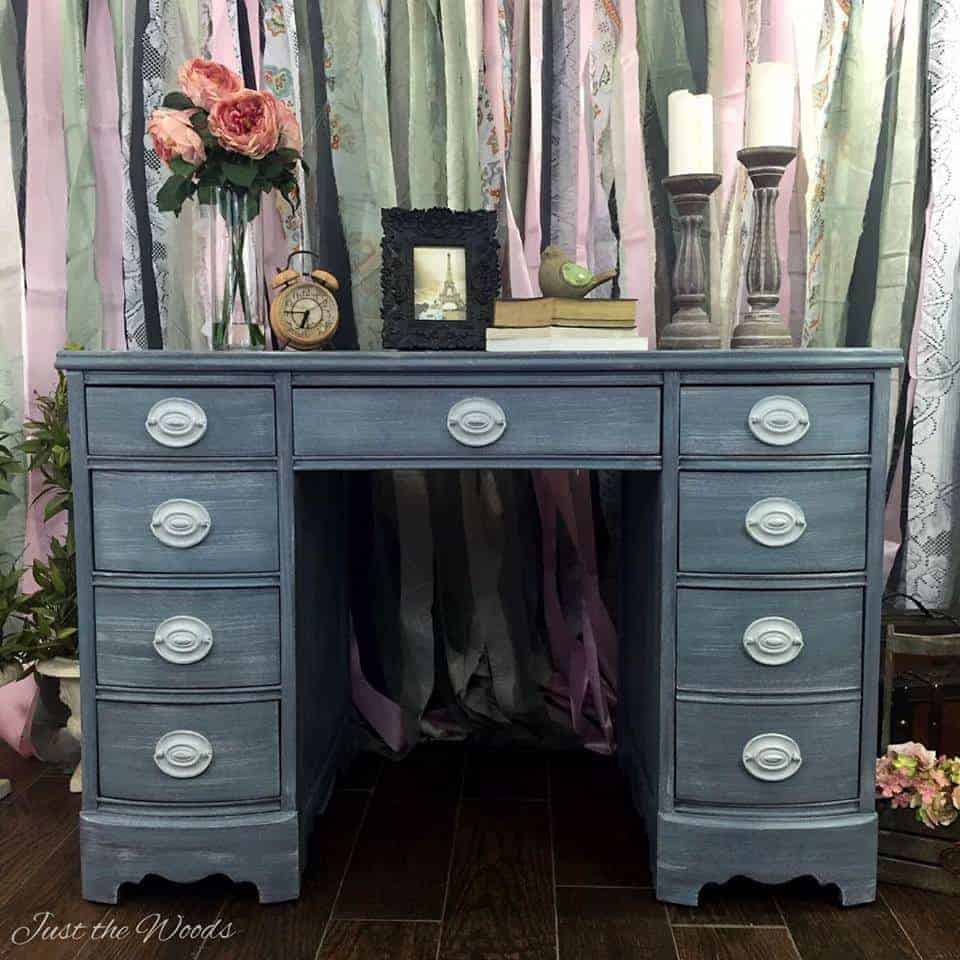
This is the backdrop I mainly used for this desk, but I do love having a variety of options!How to Make a Fabric Ribbon Backdrop by Just the Woods


**  I’m sharing this post at these awesome Link Parties. **

If this is your first time visiting and would like to be added to the mailing list for new posts you can subscribe here:

More from my site

  • How to Add Bronze Metallic Glaze to Painted FurnitureHow to Add Bronze Metallic Glaze to Painted Furniture
  • Creative DIY Toy Storage Ideas to Organize the Kids MessCreative DIY Toy Storage Ideas to Organize the Kids Mess
  • The Amazing Benefits of Using Natural Essential OilsThe Amazing Benefits of Using Natural Essential Oils
  • Shabby Chic Cabinet from an Old Worn Out CupboardShabby Chic Cabinet from an Old Worn Out Cupboard
  • Last Minute Christmas Gift: Blanket with Printable Gift Tag Last Minute Christmas Gift: Blanket with Printable Gift Tag 
  • Beautiful Bold Painted Furniture MakeoversBeautiful Bold Painted Furniture Makeovers

Share & Save for later!

104 shares
  • Share14
  • Tweet
  • Email
« Hardwood Hamper Makeover
Shabby Chic Hepplewhite Desk in Painted Layers »

Comments

  1. Barbara Hill says

    February 7, 2016 at 2:17 pm

    What are the dimensions? Also, how did you hang the completed back drop once it was on the jute? Wonderful idea..

    Reply
    • Kandice says

      February 7, 2016 at 2:49 pm

      Its appx 6′ high by 8′ wide .. I tied a loop on each end and hooked on the top of a photography stand pole (I think thats what its called) 🙂

      Reply
  2. Terri Ross says

    February 7, 2016 at 3:47 pm

    I’m a little confused on how you put the pieces on the jute? Did you lay the jute out and tie the pieces along it? Or did you do some kind of loop? Is there a knot? I’m a visual learner!

    Reply
    • Kandice says

      February 7, 2016 at 4:04 pm

      Each piece is tied in a knot on the jute.. Here’s a larger photo.. ribbon rag backdrop

      Reply
  3. chris aka monkey says

    February 7, 2016 at 5:32 pm

    came over from hometalk and i think it is a very cool idea, i am not a blogger but i thought with the right material and neat tying at the top it would make a great curtain xx

    Reply
    • Kandice says

      February 7, 2016 at 10:38 pm

      thank you. it would definitely make a cool curtain 🙂

      Reply

Leave a Reply Cancel reply

Your email address will not be published. Required fields are marked *

Meet the Artist

Meet the Artist – Hey there and welcome to my blog!

Click Here to get to know me better and visit my blog.

Click to Order Furniture Paint

dixie belle, dixie belle paint, chalk paint, chalk mineral paint, order paint, order dixie belle
wise owl, wise owl paint, chalk paint, chalk synthesis paint, furniture paint, non toxix paint

Categories

Copyright


All content on this blog is the property of Just the Woods, LLC. You are welcome to share my content (to include one photo only) as long as you provide a link back the original post. DO NOT copy entire posts, or crop, edit, or remove watermarks from photos without written permission from me first. Sharing a post from Just the Woods in a capacity where YOU will be compensated is not permitted. Thank you!

  • Privacy & Disclosure

QUICK LINKS

  • Home
  • About
  • Services
  • Galleries
  • Contact Us

OUR LOCATION

Saint Johns
Florida
32259
United States
[email protected]

Copyright © 2023 · Market Theme on Genesis Framework · WordPress · Log in

104 shares
  • Pinterest
  • Facebook
  • Twitter
  • Email