How to Build a Curio Cabinet from the Top of a China Hutch
Build a Curio Cabinet from the Top of a China Hutch. Repurpose the top of a china cabinet by adding feet to make your own curio cabinet or bookcase.
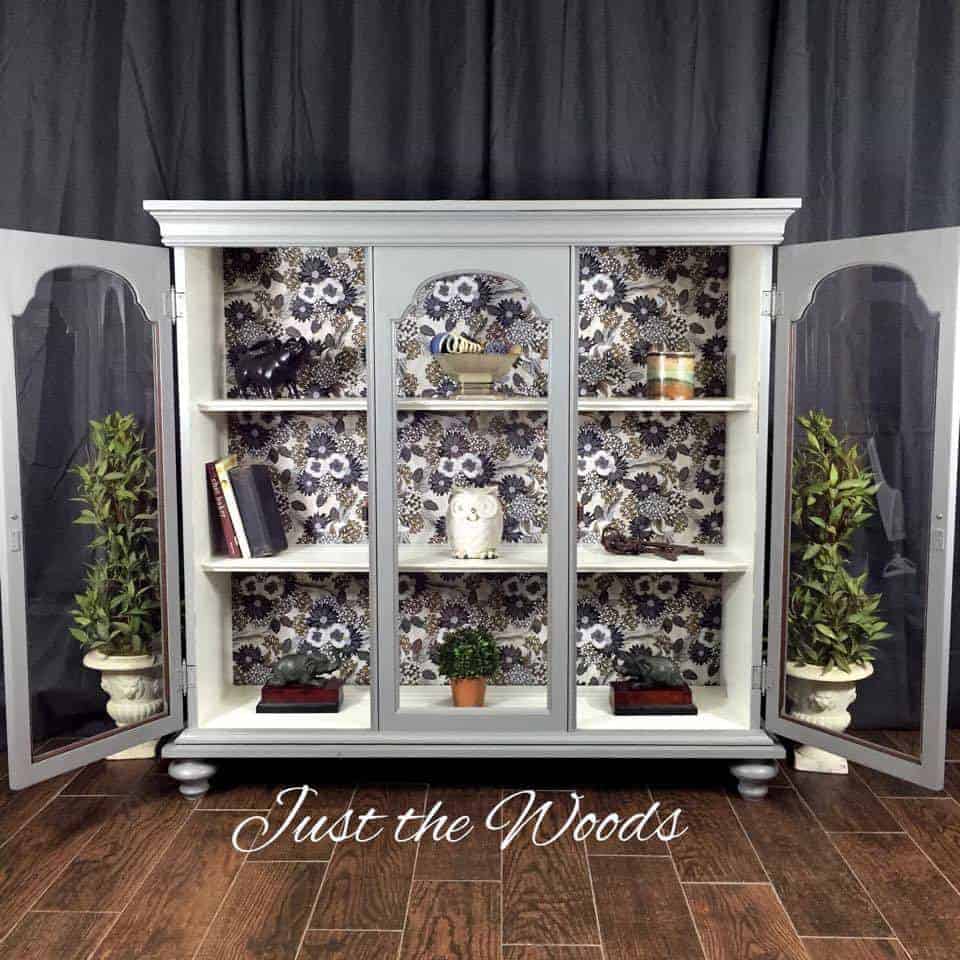
DIY Curio Cabinet – Just Add Feet
Make your own DIY chic curio cabinet? Who knew? Can you believe that I was going to throw the top half of this china cabinet in the trash? I admit it, I’m embarrassed by it, but I admit it. When this china cabinet came into the shop I was only interested in the bottom part. I hadn’t considered transforming it into anything, no less a curio cabinet. The piece as a whole is vintage, solid wood (Spanish oak according to the label) and has great details and hardware, not to mention its in really nice shape. Then I remembered seeing what my friend Carrie, over at Thirty-Eighth Street had done.

I decided to transform the top half into a modern chic curio cabinet!

Disclosure: This post contains affiliate links for your convenience. Click here for my full disclosure policy.
The Project – Adding Feet
Let’s rewind and I’ll show you how I did this.
- The first step was to flip the piece over and add a new wood base as well as cute feet. The feet were added using attachment plates, you can find them here.

- This worked out well, because having the cabinet upside down gave me the opportunity to paint the undersides of everything thoroughly. The curves on the feet work nicely with the curves of the glass panel doors.


Adding Decoupage Fabric to the Back of a Curio Cabinet
Once the feet and underside are finished you can flip it back over onto its feet. Next, go ahead and pop the back panel off and decoupage a pretty print. This print is full of neutral grays, creams, gold/brown, whites, and black. I have been holding on to this waiting for the perfect piece to use it on. I love that the colors are all neutral but not boring, making it easy to work with a room in both the grays tones or brown tones. If you love this pattern you can find it or maybe something like it HERE through my affiliate link. Click here for more decoupage projects: DECOUPAGE


Paint & Hardware
Keeping with a neutral color palette the inside of this chic curio cabinet is painted in a creamy off-white and the outside in a mushroom gray. The original hardware is cleaned and refreshed to a vintage pewter. You can find great paint color options HERE.

A chic curio cabinet is a perfect place to store your trinkets and your most beloved treasures! I’m sure glad I decided to keep this from the trash.
Not ready to DIY your own modern chic curio cabinet? That’s ok, you can find so many available online HERE

Check out all of my furniture projects with over 90 painted furniture makeovers: Stunning painted furniture ideas.
If you would like to see what I did with the bottom portion of the china cabinet you can see that makeover project here: Vintage Painted Blue Buffet.

Don’t Forget – Follow Just the Woods:
FACEBOOK * INSTAGRAM * PINTEREST
If you like these paint colors you can get this look with Stone & White Linen
Feel free to pin:

Love it! Sharing tonight on The Painted Drawer Link Party!
thank you so much!!
Saw this on facebook and loved it so wanted to check out your blog. You have a new fan! Have a cabinet like this but not really wanting the top part so trying to figure out what to do with it…now I’m inspired to use it like yours! Thanks!
Thank you so much! Glad you decided to keep yours too. We’re often so quick to ditch the top piece (I almost did!) 🙂
Hi! This is a lovely interpretation of a curio cabinet top and the pattern/fabric/paper works so well. Nicely done! 🙂
thank you so much!
You are clever. Such a treat idea and so very pretty!
Thanks so much for sharing at AMAZE ME MONDAY.
Blessings,
Cindy
thank you!!!
How were you able to remove the top part of the cabinet?
I lifted it off… it wasnt attached 😉
What a cute upcycle! I love that you removed it from the base. It looks great as a stand alone.
What a fantastic makeover! Thank you for submitting it to DIY Furniture Makeovers. I will email you and let you know when it will be featured. 🙂 Have a wonderful weekend!
Awesome!! thank you so much! you too 🙂
Love your vision for this hutch. I would love to do something like this with a hutch I have in my basement. I would like to know how you put the material on the back . Thanks for the inspiration.
thank you Wanda, I used Mod Podge to attach the backing 😉
Where did you purchase the feet for your cabinet and how did you attach them? I’m repurposing mine as well. Thanks!
I bought the ones with the screws in them already and also bought the attachment plates. (the feet were around $10 each) You should be able to find them at a local hardware store. They also have them online here (Aff link: http://amzn.to/1rfQudY )
Oh wow, Kandice what a stunning cabinet! Such a gorgeous way to repurpose the top a china cabinet The large but curvy feet add so much class, the color is gorgeous and the pretty papered back gives it the Wow factor – just lovely! Pinned and sharing
Great work – beautiful upcycle! I’m just wondering about the very top of it. Was this a solid piece and you painted it as well? I’m upcycling a china cabinet top as well but the top isn’t a solid piece there’s bumps and holes and wondering if you had the same issue and how you tackled it? Thanks in advance!
thanks Kate. The top of this one was a solid piece actually and painted. But there’s also a molding along the top which also helps. Maybe add a solid piece of wood just like the bottom to the top?
I was wondering about the top also. Is there a big drop from the top of the crown molding to the top of the cabinet? You suggested putting on a piece of wood to give it a solid top. I think I may do that, but have seen others without it. Also, did you sand the cabinet at all? I love the idea of the fabric back. I have a very similar piece that I got for free. It is 46.5″ tall including the crown molding. If I took it off and put on a solid top it would be about 43″. How tall is your piece? I’m in love!
Hi! This project is a few years old so I dont remember the measurements. I do always sand and prep all pieces first 🙂
Lovely DIY Did you replace the glass in the doors with tempered glass for safety now that its ‘on the floor’ ?
I did not. I kept the original glass 🙂
Love it! I just bought one but can’t figure out what to do about the very top that is unfinished. It’s not completely flat and has a sort of “gutter” around the edges. Ideas?