How to Clean, Prep and Paint Hardware for Painted Furniture
How to clean, prep, and paint hardware.
There’s something undeniably charming about the nostalgic allure of old hardware. However, as time marches on, they often accumulate dust, grime, and neglect, losing their luster along the way. Fear not, for with a little tender loving care and the right techniques, you can breathe new life into your cherished old metal hardware.
There are so many options when it comes to painting hardware. But no matter which method you choose, you know that you want to keep that vintage hardware.
I often prefer to keep the original vintage hardware with the piece of furniture over replacing it. The old hardware is more often than not made very well, has great details, and often suits the piece perfectly.
Understandably there are cases where a piece requires new knobs and pulls and that’s ok too, but I am a huge fan of holding on to original hardware when possible. I am sharing a step-by-step process on how to paint hardware. See all the projects with painted hardware here to see how often and easy it is, as well as different finishes that can be achieved on old hardware: Painted hardware

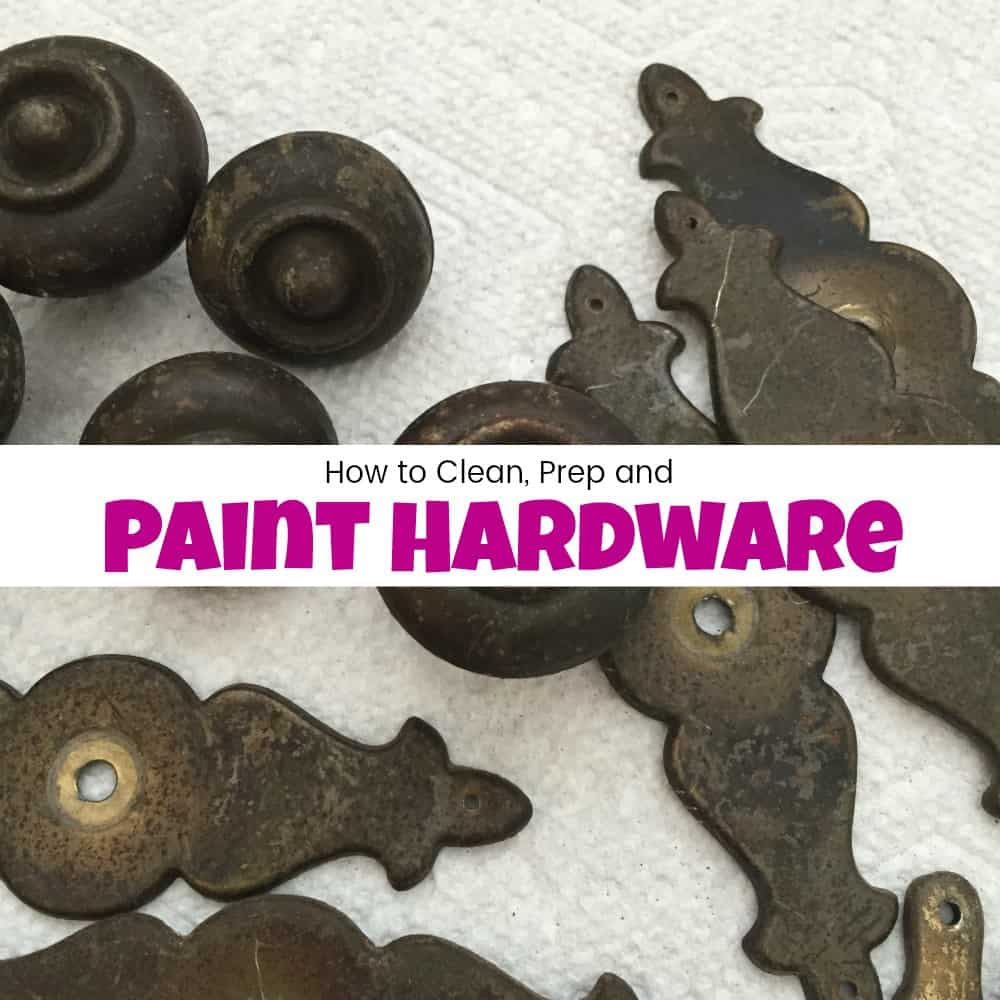
Vintage Hardware Before Paint
Here is a glimpse of the hardware taken right off the piece. It has many years of dirt and grime but they are solid quality pulls.

As you can see in the zoomed-in photo, this hardware is pretty ‘icky’ BUT completely savable! With just a few simple steps you can prep and paint hardware to make it pretty again.

Cleaning Hardware
This next step hasn’t failed me yet when it comes to cleaning the layers of gunk off of old hardware. All you need is a large pot, stove, and good old-fashioned baking soda.

Drop your dirty hardware in a pot with water, heat it, and add some baking soda.

I don’t even measure how much I use. I just dump some in. If I had to guess it’s maybe around half of a cup.

I would suggest keeping an eye on the pot to make sure the bubbles don’t boil over.

After around fifteen minutes you can drain the water, don’t be surprised by the nasty brown color it turns.

Then with an old toothbrush, scrub the hardware and rinse with clean water to remove the baking soda residue.

Once rinsed your hardware should be clean of the grime.

Click here to Pin this post for later.
I should also mention that the top of your stove will have splatter marks that turn white when dry, so please make sure to clean the stove when finished. My husband wants to kill me if I clean hardware and forget to wipe off the splatter. Since we have a black stove a simple wipe-down can save a marriage.

Prep for Paint
Next, take a piece of sandpaper and scuff up the hardware. By scuffing you will give the hardware a bit of ‘tooth’ for the paint to grab a hold of.

Make sure to wipe away any dust left on the hardware as a result of scuffing.

Disclosure: This post contains affiliate links for your convenience. Click here for my full disclosure policy
Painting Hardware
Once your hardware is all ready you can paint. For this project, in particular, we are making the hardware a matte black, so I start with a true black chalk type paint. You can find great paint options online HERE If you want a true black then you’ll want to get the color caviar.

Go ahead and paint the hardware in your color of choice. You can put your hardware on a paper plate to paint them.

You don’t have to worry about being super tidy with this step as you can see. I probably got the same amount of paint on the paper plate as I did on the hardware.

Sealing Painted Hardware
Lastly, when you paint hardware you also need to seal it for protection. You can use the same sealer as you use on your painted furniture. I prefer to seal my painted hardware with the clear sealer from Dixie Belle found HERE. When sealing black painted hardware like these, I will often add a little black paint or black sealer to my sealer as well.

When all else fails, and either your old hardware can’t be saved, or you prefer to replace, then you can find a wide selection of vintage style furnitrue hardware online here: hardware.
Click here to Pin this post for later.
This same method is used to remove old paint and clean brass hardware. You can find multiple projects with painted hardware here: Painted Hardware Projects.

If you are new to furniture painting and want to learn how to update old furniture with paint you can always start at the beginning with How to Paint Furniture – a Beginners Guide.

Don’t Forget – Follow Just the Woods and Share this post to Inspire others:
FACEBOOK * Furniture INSTAGRAM * Healthy Food INSTAGRAM * PINTEREST * RECIPES

Very informative Kandice. Thanks for these great tips. I am in the process of redoing an old metal suitcase, but I need to shine up the metalwork and it also cannot be removed. Do you think some vinegar might work to get the gunk off?
hi Mary! I would definitely try a little vinegar and water, maybe add a little dawn soap with a toothbrush. Id love for you to let me know what you end up doing and how it works out. 🙂
This is great information. I usually change out hardware to update a piece but there are times I prefer the original and usually have a terrible time getting it really clean. I pinned this so I will have your instructions to look at.
thank you so much!
Baking soda?!! This comes at just the right time, I have hooks from a coat rack I am redoing that need cleaned and painted.
yes maam! Id love to know how it works for you once you finish! 🙂
Great tutorial! Thank you for sharing at Vintage Charm.
thank you!
I have placed hardware in a crockpot to get layers of paint off, but I’ve never “cooked” it with baking soda to get grime off- thanks for that tip!!
Ive never tried the crock pot method.. I dont have the patience lol
I love the old stuff myself as well, but I had no idea you could boil in baking soda! Great info. Love the finished product too! Thanks for joining TaDa! Thursdays link party
thank you! 🙂
Great information. Thank you. I want to clean my hardware and change it’s color with rub ‘n buff. Any advice? Would the same cleaning method work for this?
hi Pam, I would think that the same method would work fine since it removes all the dirt and grime.
Thank you so much!
Great info. Just wondering how you removed the decorative piece behind the knob. Mine is tacked with tiny nails. Can’t get them off without damaging the wood. 😞 any ideas would be appreciated!
I would try to carefully lift the tiny nail and get it out. In the past Id use something super thin like a flat razor blade to get under the nail to lift it just enough, then a credit card or flat head screwdriver or even a tack lifter. It may take a little time, but eventually you should be able to get it. (hopefully). Good luck!