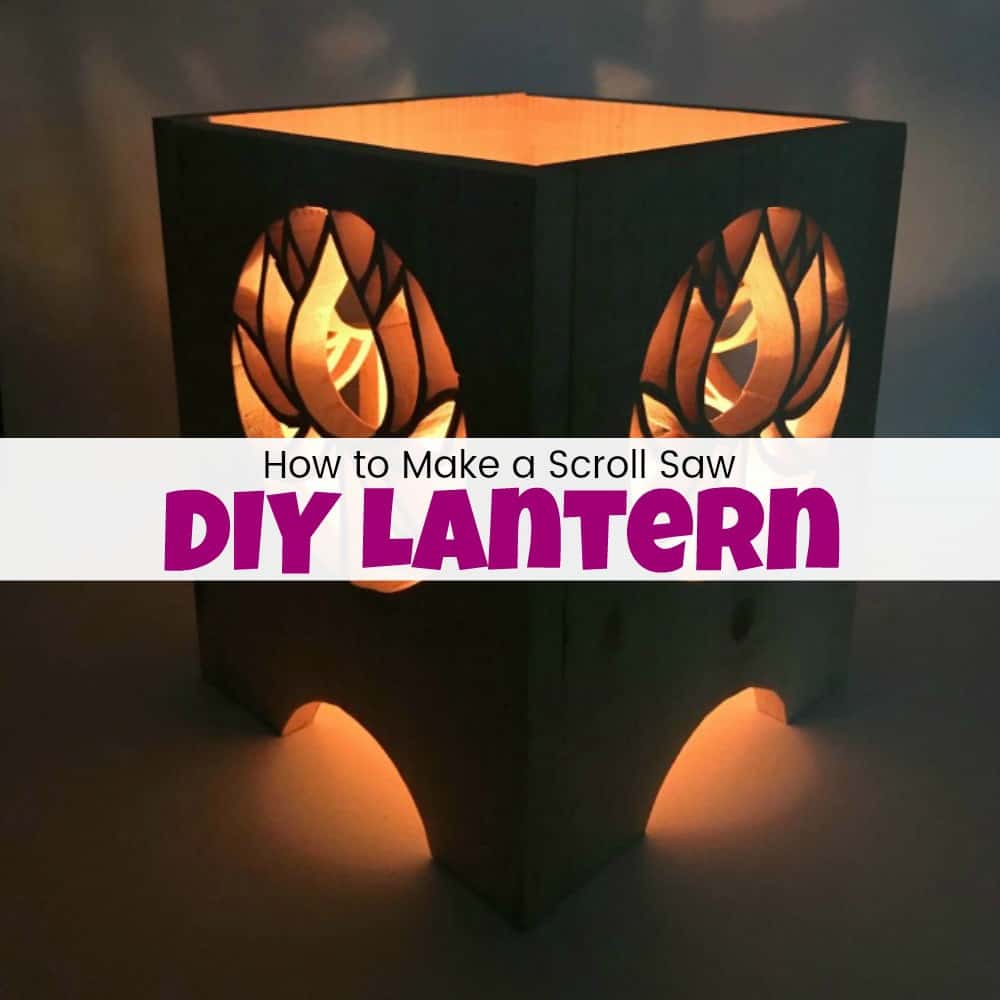
How to Make an Awesome Scroll Saw DIY Lantern
Light up your home or your yard with this DIY lantern project. See how to make wooden lanterns with a scroll saw. Pick a lantern pattern and get creative.
When you think DIY lantern do you think about those simple farmhouse style rustic lanterns? Or a paper lantern? Maybe something made with a mason jar? But no matter what, a DIY lantern often creates a romantic soft lighting for whatever the occasion. I’ve been dying for an excuse to use my scroll saw more and more, so of course, I’m jumping on board for DIY wooden lanterns made with the scroll saw. Believe it or not, it is easier than you think to make this DIY lantern. All you need is a scroll saw and a little patience.
This DIY lantern project is also part of the monthly Power Tool Challenge. Make sure to stick around through to the end to find all of my Power Tool Challenge team friends’ creative lantern and lighting projects. 
Disclosure: This DIY lantern post contains affiliate links for your convenience. Click here for my full disclosure policy.

Supplies & Tools Needed to Make a Lantern
Materials Needed / Source List:
- Wood
- Painters Tape
- Circular Saw (or Table Saw)
- Mod Podge(or Spray Adhesive)
- Clear Packing Tape
- Cordless Nailer
- Scroll Saw (this is the one that I have: Scroll saw
- Orbital Sander
- Electric Drill
- Find all of my favorite tools and products on my Amazon Page here
How to Make a Lantern
The very first step in your DIY lantern making would have to be choosing a lantern design. Luckily there are many sites out there that offer free patterns or designs that can be used for personal use. There are also many that you can purchase for a small fee, or you can always draw and make your own. After searching through many free scroll saw patterns I found this one that I love and is perfect for this DIY lantern project. Depending on your style, you can create your own rustic lantern, farmhouse lantern or a lantern with flowers. There are so many patterns that you can get overwhelmed with great lantern ideas.
Since we are making a DIY lantern with 4 sides make sure to print out your lantern design 4 times. If adjustments are needed with the size, make sure to adjust accordingly. Since the paper fits nicely on the wood board I am not changing the size of my lantern pattern, lucky me! 
Next, grab your pencil and measuring tape and cut your wood into 4 matching pieces. I am measuring each piece to be 12″ tall. 
Cut your wood with a circular saw or table saw. To be honest, I had every intention of using the table saw, but being lazy, I used the circular saw instead. 
Preparing Wood for Scroll Saw
Now that you have cut your wood for your DIY wooden lantern you will want to wipe the wood with a lint-free cloth to remove any sawdust. 
Next, cover your wood with painters tape, one strip at a time. 
Once you cover the entire board with tape go ahead and flip it over. 
Using an Exacto knife, trim the edges and remove the excess tape from your wood. 
Do this for all 4 pieces of wood for your DIY lantern. 
Adding DIY Lantern Pattern to Wood
In case you are wondering why we just put tape all over our wood, it is because the tape will peel off nice and clean once we are finished creating our homemade lantern. Now we need to place our lantern pattern on to the wooden boards. First, cover the tape with a thin layer of Mod Podge (or you can use adhesive spray) 
Then gently place your lantern pattern down onto the sticky glue. Smooth the paper down to make sure there are no bubbles.
Do this for all 4 sides of your DIY lantern project. 
As an added step, once the glue is completely dry I also add clear packing tape over the paper lantern pattern. 

DIY Lantern Making with Scroll Saw
Before you can begin scroll sawing your DIY lantern pattern into the wood you will need starter holes. You can use a drill press for this step. Since the areas to be cut are not very small and precise I am using my Dewalt cordless drill. 
Make sure to drill straight down through the wood in the open areas that we will be removing. 
Repeat this in every space where we will be cutting with the scroll saw. 
DIY Scroll Saw Homemade Lantern
Now you can finally get the scroll saw going. First, you must secure your blade into the scroll saw. These are the basic steps for installing your blade:
- set blade tension lever to 0
- tighten blade into top blade clamp
- raise arm lift
- place blade through the wood project
- tighten blade through lower blade clamp
- adjust tension lever
- adjust dust blower
If this sounds confusing, don’t worry, it will make sense when you are physically doing it yourself. 
Now you can begin cutting out your lantern pattern. Here is a quick time-lapse video showing how easy it is to make your own scroll saw DIY lantern.
To be honest, I probably only cut one side a day because life tends to get crazy in June with kids. But there is no rush to making a homemade lantern. As long as you have your lantern design you can take as long as you need. This just gave me an excuse to break out my DIY shirts every day this week 😛 
Since you have to do this 4 times don’t be surprised if you need to change your blade at least once. All of the releasing, resetting of the blade in and out of the project may lead to slight blade abuse. 😛 
Once you cut out all of the interior areas your wooden DIY lantern pattern should look something like this. 
At this point, you are able to lift and remove the tape and paper pattern. Go ahead and do this for all 4 sides. 
Sanding Your DIY Lantern
Once all 4 sides of your wooden lantern are cut you can grab your orbital and give a quick sanding to both sides of each board. 
Curious about sanding indoors without making a huge mess? I explain more in my Tips & Hacks for Painting Furniture post. 
While we are speaking of sanding inside, go ahead and give a quick sanding inside your cut areas as well. 
Adding a Standing Arch to Your DIY Lantern
To add an arch and to give your DIY lantern a bit more of a lantern look you will want to cut an area at the lower portion of your homemade lantern. Grab a bowl or anything round to pencil an arch onto the wood. Make sure that the arch is centered. This part is easy because you don’t have to reset the blade. You can simply cut right up from the outer edge of the wood. 
After you cut one, you can go ahead and just copy the arch for each of the other sides. 
Assembling Your DIY Lantern
Let’s put this wooden lantern together! Keeping your DIY lantern project as easy as possible let’s grab some wood glue and the brad nailer. First, apply your wood glue along one edge of the lantern. 
Next, press the glue into the edge of the lantern side and make sure that there are no overlaps. Grab your nailer. This is the one that I use and love – because it’s cordless – Cordless nailer. 
Add a few short brad nails into the wood to secure and hold your DIY wooden lantern together. 
Repeat this step around all sides. Your DIY lantern is assembled and finished. You can go ahead and paint, stain or leave the wood natural. I am leaving mine natural. If you do choose to paint or stain yours make sure to check out all of the colors, stains, and sealers over at Dixie Belle. 
Homemade DIY Lantern Project
The great thing about wooden lanterns is they can be used in so many ways. This homemade lantern is that you can use it indoors with a scented candle to add ambiance to a room. 
The size of this DIY lantern makes it easy to use almost any type of candle inside. And the open top and bottom allow for easy lift and move to avoid burns or accidents. 
Feel like heading out to the yard to enjoy a relaxing evening outside? We place a citronella candle inside our backyard lantern for when we go out back. The kids seem to enjoy our homemade lantern too. 
Power Tool Challenge Team
This is a power tool challenge project where a few of my fellow bloggers and myself get together and create a project based on one theme. This months theme is Lanterns and Lighting. Each project must be created using at least one power tool. Make sure to check out these other projects. Links to each project are below the image.
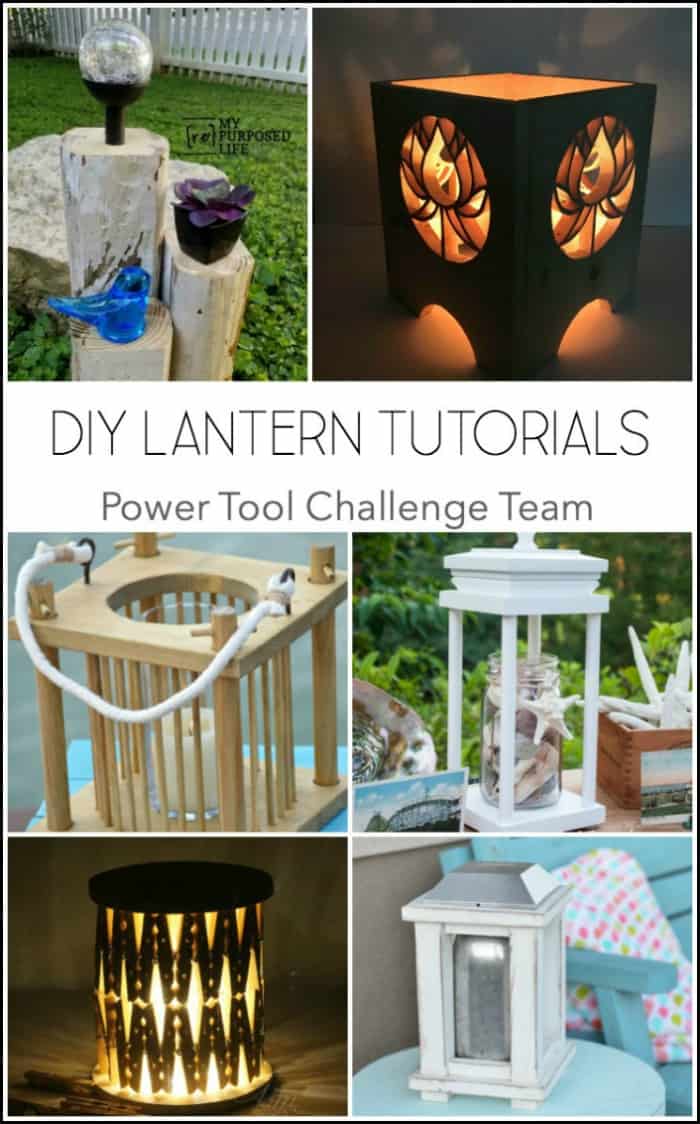
My Repurposed Life – Landscape Timer Solar Light
Just the Woods – Scroll Saw DIY Lantern
H2OBungalow – DIY Wood Lantern Tutorial
Virginia Sweet Pea – Easy DIY Decorative Lantern
The Kim Six Fix – Clothespin Lantern
Her Tool Belt – Wood and Mason Jar Solar Lantern
Don’t Forget – Follow Just the Woods and Share this post to Inspire others:
FACEBOOK * INSTAGRAM * PINTEREST
Stay connected! For more tips and tricks sign up here : [mc4wp_form id=”1340″]


Wow! Your lantern is beautiful! I have not used a scroll saw and enjoyed all of your tips. Now I’m wanting to try a scroll saw project.
Kandice…This is gorgeous! LOVE the design and your tutorial was fabulous! Pinned 🙂
Kandice,
I’m in awe of your patience! My sister use to do stuff like this which told me SHE got all the patience in our family. 🙂
Love your diy lantern.
Pinned!
gail