A painted bench makeover. With distressed edges and a French stencil, this painted bench will surely wow any entryway. French Bench makeover
A painted bench transformed into a painted bench. Seems silly right? But it won’t seem so silly when you see the difference. It’s amazing what we put our furniture through. This little bench had some bizarre damage on top when it was brought to me. I’m not quite sure what it was, whether scratches or something spilled. Needless to say, it needs to be addressed! 
Disclosure: This post contains affiliate links for your convenience. Click here for my full disclosure policy
Painted Bench with French Stencil
Materials Needed / Source List:
-
- Cling on Brush
- 150/220/320 Sand Paper
The Before – Unfinished Bench
This bench came with a sleek black finish and red distressed edges. Both features that I plan to get rid of.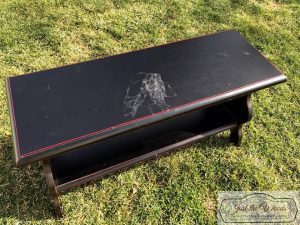
Here is a close up of the damage to the top of the bench. If you are uncertain of how to paint a bench, no worries, it’s easier than it may seem.
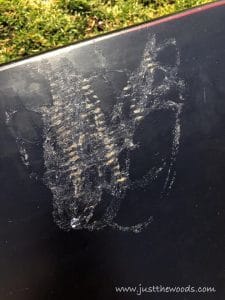

The kids are off from school for winter break and the weather has been amazing so I grabbed my favorite electric sander and my full of energy kids and took to the backyard. I sanded away that mystery damage while they ran amuck around the yard tiring themselves out. And after three days home from school, they’ve completely tired me out too. 
Sanding the entire bench with the sander actually made my prep a bit easier, next, all I have to do is wipe the bench clean. This is my process for How to Prep Painted Furniture. I’m always down for making prep work easier! Once the sanding was done and the kids were worn out we headed back inside. Since they have been home I was only able to work in small time frames at a time.
Painting the Bench
Lucky for me, the kids decided to take a nap! What?! They don’t even nap anymore, there must be a full moon! While they recharged themselves I went on ahead and started to paint the bench. Since the bench was originally made by Ballard Designs I decided to remove that sticker before painting. Bye bye Ballard Designs, hello Just the Woods designs. 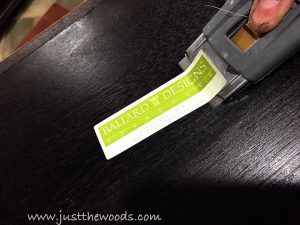
The bench also came with that red distressed edge, so in an attempt to work around that I started off by painting the bench in a pretty gray paint, which is a darker gray than my next layer will be. You can find some great quality paint HERE. Oops, I forget to mention that I also flipped the bench over and started with the underside first. When painting a bench or any piece of furniture, I always flip it over when possible to paint the underneath first. 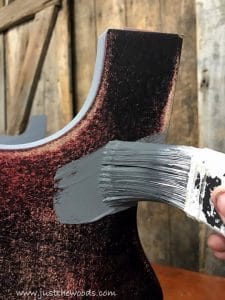
After the first coat, the bench is painted in a much lighter gray, followed by a custom mix (1:1) of both light and dark gray for the perfect shade of gray. 
Adding Stencil to the Painted Bench
It just so happens that when my customer came by to discuss the design plan for her bench I pulled out this stencil that I had in my shop. Believe me, when I say that this French stencil has seen better days, it’s been used for previous makeovers as well as been trimmed and cut for whatever reasons in the past. Sometimes something just clicks, she loved it and it fit perfectly for the bench seat. I measured the center and marked with chalk before taping down the French stencil. Check out more stenciled projects by clicking here: STENCIL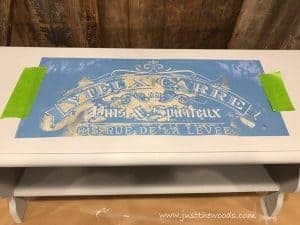
Once in place, I used my foam roller and added the stencil using that same dark gray color that was used for the base coat. 
For a more detailed tutorial on adding stencils to your painted furniture makeovers make sure to check out How to Stencil Painted Furniture. There’s even a video included in the post. 
Wet Distressing the Edges of a French Bench
The edges are distressed using the wet distress method. Normally I will go to town with sandpaper to distress edges, but in the case of this painted French bench, I want to make sure to not expose that red edge from the original finish. So I gently distressed using my flexible sandpaper wrapped around a sanding block. It was lightly dampened and I made sure to distress the light gray paint while leaving the dark gray paint exposed. I also lightly sanded the entire flat surface of the painted bench with a fine grit sandpaper for a super smooth finish. For a more detailed tutorial on the wet distress technique click here: How to Wet Distress Painted Furniture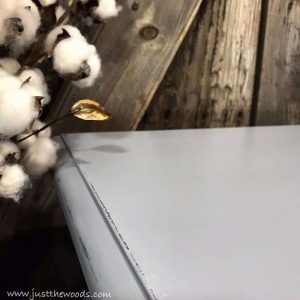
For more painted furniture before and after projects, and makeovers, make sure to check out all of my chalk paint furniture tutorials with over 90 projects here: The Ultimate Guide for Stunning Painted Furniture Ideas

The Result – Painted Bench with French Stencil
Take a seat because that black and red bench with mystery damage is a thing of the past, making room for the new soft gray and french stencil entry bench. 


Need a bench but prefer not to DIY? Find fantastic benches for sale here: Beautiful Benches or here: Benches for sale 



If you liked this makeover then you may also like the Farmhouse Bench with Storage.
Love stencils? I’m sharing my favorite online shop to order stencils. Click here to see where I get my stencils: Stencil Shop
Don’t Forget – Follow Just the Woods and Share this Post to Inspire others :
FACEBOOK * INSTAGRAM * PINTEREST
Let’s stay in touch – Subscribe to our mailing list here: [mc4wp_form id=”1340″]
PINTEREST PIN READY TO SHARE




Debbie says
Love what you did with this bench! Looks great!
Kandice says
thank you Debbie, and thank you for stopping by xoxo
Lina says
Thanks for the tutorial! 😀 The bench looks great!
Leanna says
The french stencil you added was the perfect final touch. The bench was nice before but now its beautiful.
Beverly says
I just love your bench. Your colors are so lovely. I just wanted you to know that you are my personal pick and feature at Wonderful Wednesday Blog Hop this week. Hope you stop by.
Hugs,
Bev
Kandice says
thank you so much Bev!!