I was forced to face my fears with this painted media console makeover. It’s not too often that I have to completely deconstruct a piece prior to working on it. And thank goodness, because it can be a bit scary. As I slowly take everything apart I secretly pray that I will be able to put it back together again the right way. I meticulously keep each and every piece separate from one another and label them accordingly. Somehow this still isn’t always enough. Much to my surprise, I also didn’t realize that this would be the case for this media console until after it arrived. Before we continue, I just want to give you the heads up that my friends are joining us again towards the bottom of the post. It’s another month of Furniture Fixer Uppers.

Disclosure: This post contains affiliate links for your convenience. Click here for my full disclosure policy.
Painted Media Console with French Image Transfer
Materials Needed / Source List
Just a little Media Console Info

First things first. This modern media console, originally made by Ethan Allen is much heavier than it looks. That’s where helpful husbands come in. Once brought into the shop, the heavier than it appears piece was propped up onto my furniture dollies so I could easily scoot it around to work on it.
I should also mention that this makeover is the last of three for one customer. She also had her Painted Pineapple Pedestal Table and Painted Bench with French Stencil finished. Should you check those out, you will get a better feel for the customer and the look that she is hoping for by making her dark furniture lighter. Moving on.
Taking Apart the Media Console to Paint
Thankfully, the back of the media console had removable panels which were the first to come off. This allows me a little bit easier access inside the storage area of the piece.

The glass in the doors was held in by rubber strips that peeled out easily. Once all of the rubber strips were removed the glass inserts came right out as well.

The next part was a bit scary. Removing the doors! I’m often terrified that they will never go back in the same way and open and close smoothly. I made sure to take a few extra photos of how they were installed to use as a reference if needed later on. They are almost always needed.

Labeling and Sorting
To make sure not to screw things up I also kept the hinge hardware separate and labeled the bowls so I know which hinge goes where when it’s time to put them back. Screws hold the shelves inside the media console in place. It helps to make a note of which shelf came from which side when removing them from the piece.

I bet it seems like I’ve thought of everything and covered my tracks right? Nope.

I even taped off the power strip that was affixed inside the back of the storage area of the media console to protect it.

Painting the Media Console Prior to Image Transfer
The entire piece was fully prepped and taped off. See my entire process on how I Prep Painted Furniture. We plan to leave the dark metal legs alone so those were taped to keep them clean and the top was taped as well.

The top of the media console along with the shelves for inside is painted in a creamy off-white. You can find great quality furniture paint options online HERE

The body of the media console was hand painted both inside and out in a light baby blue color.

One thing I have never claimed is to be a neat painter. 🙂 Sometimes I don’t even know how this happens. I get paint on my legs, and I swear I’m wearing pants. How paint manages to make its way all over my body is something I will never know.

Adding a French Image Transfer
Before applying the image transfer, I like to seal the top of the painted media console first with a clear sealer. This image transfer is actually left over from another project. The great thing about these image transfers is that you can use a portion and save the rest for something else, which is exactly what happened here. I first used this particular image on the Image Transfer on Painted Toy Box. In that project, I only used a section of the transfer itself and was able to use the rest for this project.

With the rest of the image transfer, I trimmed the part that I plan to use and set it aside. I then measured and marked with chalk where the center of the media console is. You can’t go wrong with chalk because it wipes right off when done.

Once I had my center marked, I placed my French image transfer down for proper placement on the media console. Now that I have my placement I can go ahead and transfer the image. I confess, that I did do a video while applying the image transfer, but I was so tired while doing it that I sounded drunk and couldn’t bring myself to share it.

After the image was thoroughly transferred to the media console I added another coat of clear sealer, lightly sanded again and sealed again.

If you are a visual person and need to see the application in action, I have a video tutorial in this post: Transfer Images like a Pro
Putting Everything Back Together
Remember I thought I covered all of my bases while taking this apart? Well, the back panels were put back on, no problem there. The magnetic door close pieces that were also removed were screwed back in, they were easy to just line back up to the old holes.

The doors were reattached with the fancy hinges. That step was surprisingly easier than I had expected.

And the shelves were placed back inside and screwed into place.

Wait a second! They are uneven! The center shelf and the side shelves are not lined up properly. Of course, it wasn’t until they were all screwed back in place that I noticed that the side shelves were flush to the front and the center shelf was back about an inch.

Can you feel my pain? I then went back and removed the side shelves because those were, in fact, the ones installed incorrectly, and I flipped them around and reinstalled them the right way. Back together at last.

Final Touches
The entire painted media console is distressed along the edges and sealed for protection. The old hardware was removed and replaced with a pair of dark knobs. The dark knobs seem to suit the piece much better and tie together the dark words from the image transfer and the dark leg base creating a perfect balance. These dark knobs were removed from a vintage buffet that was also transformed with an image transfer.

The Result – Painted Media Console with French Image Transfer
All that deconstructing and reconstructing paid off. This painted media console is ready to head home.

Check out all of my furniture projects with over 90 painted furniture makeovers: Stunning painted furniture ideas.


[clickToTweet tweet=”Painted Media Console with French Image Transfer. Update your furniture with an image transfer.” quote=”If you love Image Transfers tell the world, shout it from rooftops and click to tweet” theme=”style5″]


If you love image transfers you can find them online here- Image Transfers
For more image transfer inspiration make sure to check out:
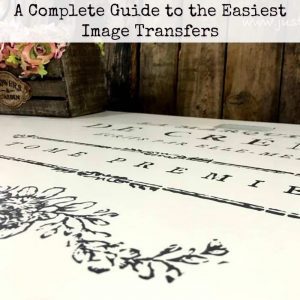
A Complete Guide to the Easiest Image Transfers
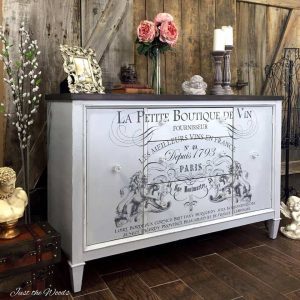
French Image Transfer on Vintage Buffet
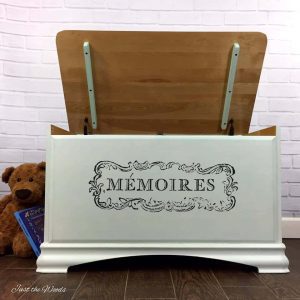
and Image Transfer on Painted Toy Box
For painted media console inspiration:
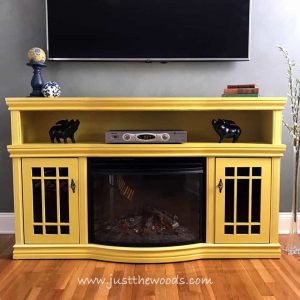
Media Console in Sunshine Yellow
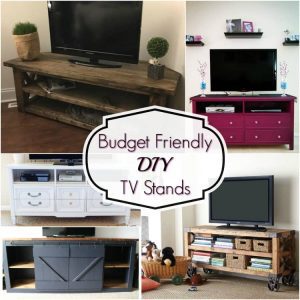
20 Budget Friendly DIY TV Stands
Wait! Don’t Go! It’s that time of the month again for:
Furniture Fixer Uppers
A few of my creative and talented blogger friends and I have joined together in our monthly Furniture Fixer Uppers share. Let’s see what my friends are up to! Make sure to click the links below the image to check out all the amazing projects that my bloggy girls are working on this month.

- Petticoat Junktion
- Prodigal Pieces
- The Interior Frugalista
- Confessions of a Serial DIYer
- Girl in the Garage

Don’t Forget – Follow Just the Woods and Share this post to Inspire others:
FACEBOOK * INSTAGRAM * PINTEREST
Subscribe to our mailing list here: [mc4wp_form id=”1340″]
PINTEREST PIN READY TO SHARE


Larissa ~ Prodigal Pieces says
Wow! You did such a fabulous job and bravo for getting it back together! 😀 I know how that can be, trust me.
Kandice says
I feel like I hold my breath until its back together properly lol
Christy says
This turned out so pretty, Kandice!! I know your client was thrilled with the results! XO
Kandice says
thank you xoxo
Marcie Lovett says
What a beautiful piece this turned out to be! The French transfer adds just the right touch.
Kandice says
Thank you so much Marcie, it was a last minute decision to add the image, but definitely the right choice 🙂
Kathy Owen says
I absolutely love it. That was a big job and mage transfers scare me. I may have to try it though. When you mention messy painting you’re talking my language. You did an outstanding job on the media console Kandice.
Kandice says
thank you Kathy! I totally understand paint on my hands, but I can never figure out how I get it on my legs lol
Jen @ Girl in the Garage says
Funny, I’m always nervous about doors not going back on properly also! I’ve had problems before…. Love the image transfer and the whole new look!
Janice says
Love the console cabinet. Like you, I get paint all over me (on my hands, legs, feet, and even in my hair). I think my body chemistry has a magnet in it to paint. My husband always asks me “how do you get paint all over you.” I feel your pain.
Kandice says
haha its crazy right? I can never figure out how I get paint on my legs 😛
Charlee says
Beautiful job! What a great transformation. 🙂
Aloha,
Charlee
Kandice says
thank you!
Brenda Young says
Beautiful work Kandice as always, love ❤️ the color combo and those stencils are fab! Your customers place must be looking gorgeous with all your custom work! Thanks for sharing you project at Fridays Furniture Fix, pinning the tutorial.
Colette says
So Pretty! I love how you explain everything step by step. The magic of transforming an ugly duckling into a beautiful piece of furniture.
I have watched your videos and have learned so much from you. I just painted a powder room vanity cabinet. I followed your advice and labeled EVERYTHING! I also refinished the master bath vanities. I labeled each drawer so they went back in the same place. Labeled left and right doors and their hardware. In the future I will be taking photos of hardware placement too! Thank goodness I did not have any problems. Thanks, in great part, to you!