Painting fabric furniture may seem overwhelming at first. But once you see how to paint fabric furniture you will be hooked. This is the story of an ugly upholstered chair in desperate need of an update. With some fabric paint and enamel paint, we can make this chair look like new again.

Disclosure: This how to paint fabric furniture tutorial contains affiliate links for your convenience.
Click here for my full disclosure policy.

Supplies & Tools Needed for Painting Fabric Furniture
Materials Needed / Source List:
Tools
- Zibra Paint Brushes or Cling On Brushes
- Furniture Tri Wheelies
- Sandpaper
- Spray bottle
- Tack Lifter
- Shop-Vac
- Lint Free Cloth
- Find all of my favorite tools and products on my Amazon Page here
the Best Paint
- Wise Owl
- Stain Eliminating Primer – White
- Veronica Vaughn – Red Chalk Paint
- One Hour Enamel Paint
The Santa Chair
Before we begin painting fabric furniture, I should tell you that this project was not my idea. To be honest I wanted no part of this piece of furniture. I was ‘volunteered’ to spruce up the Santa chair for my kids’ school. A little background on the chair:
- the chair is handmade (I have no idea who made it)
- it is made from wooden fence posts and boards
- the fabric cushion is merely fabric and rug/carpet nailed to the chair itself
- its original color is silver spray paint (yuck)
- the word ‘Santa’ is painted across the top of the chair – it isn’t centered, it isn’t neat, and it isn’t pretty
- there are weird cutouts at the top of the chair in the shape of kidneys
- the upholstery fabric is filthy

From afar, you may not even notice these things very much. This is a photo of the chair from last year’s holiday fair. As you can see, a lot of the chair is covered by Santa, his helper elf and the children in the photo (my kids 🙂 ).
Check out all of my furniture projects with over 90 painted furniture makeovers: Stunning painted furniture ideas.
Prepping a Wooden & Fabric Chair for Paint
Another issue that I have with this project is that the chair weighs a ton. Because of this, I have to work on the chair at the school and not in my shop. This means I have to bring things back and forth to the school, and almost every time I realize that I forgot something. Sigh. Can you see the dismay in my face as I prepare to start this upholstery paint project? Thankfully I have the best fabric paints available to give this chair new life.

First things first. Let’s put down a drop cloth so that the principal of the school doesn’t hunt me down. I’m using a basic drop cloth like this one HERE.

Sanding Your Chair
Now we need to prep and clean this chair before we can begin to paint. Wrap a sanding block with sandpaper and sand the entire chair.

Make sure to get that “Santa” on the top of the chair. We will use a primer before we apply paint, but sanding will also help lighten the words up a bit.

Believe it or not, we will also sand the fabric. When painting fabric chairs it is a good idea to use the same prep process as you do for painting wood.

Cleaning Your Chair
Next, we need to clean this old chair using warm soapy water and a scrubby sponge.

Use your sponge to clean the wood after sanding. Clean the entire surface.

Also, go ahead and clean that fabric too.

Can you believe how gross and dirty the water is from cleaning this chair?

Once you finish the scrubbing and cleaning part, dump the dirty water and get fresh clean water for one more wipe down.

Give the chair and the fabric another wipe down with clean water. You want to make sure that your surface is as clean as possible before you start painting fabric and/or wood.

What to Do About Fraying Fabric
One more dilemma on this Santa chair is that the old fabric on the armrests is fraying. And not just fraying a little. It is fraying a lot! When considering the big picture, this will be a problem if we attempt to paint this fabric. But even if we trim the fray, what’s stopping it from fraying again? Nothing.

Unsure of what is underneath at this point I make the decision to remove the fabric covering from the armrests. Time to grab a few upholstery tools. These are the best tools for removing fabric for simple DIY projects like this:
- tack lifter (find online HERE)
- simple flathead screwdriver
- pliers

The tack lifter is my most favorite tool of all because it is able to slide under tight spaces to lift out the nails and tacks.

Using the tack lifter you can get underneath and pull out the staples and tacks.

The pliers come in handy to pull out any staples once the lifter loosens them. After some lifting and pulling, I am able to remove some of the fabric covering only to find a piece of old carpet under the red fabric. Ewwww.

One down, and one to go.

Painting fabric furniture doesn’t mean that you have to paint all of the fabric on the piece. Removing the fabric from the armrests turns out to be a great decision.

How to Paint Fabric
What do you need to paint fabric? The type of paint to use when painting fabric does matter.
- upholstery paint
- paint brush
- water
- sealer
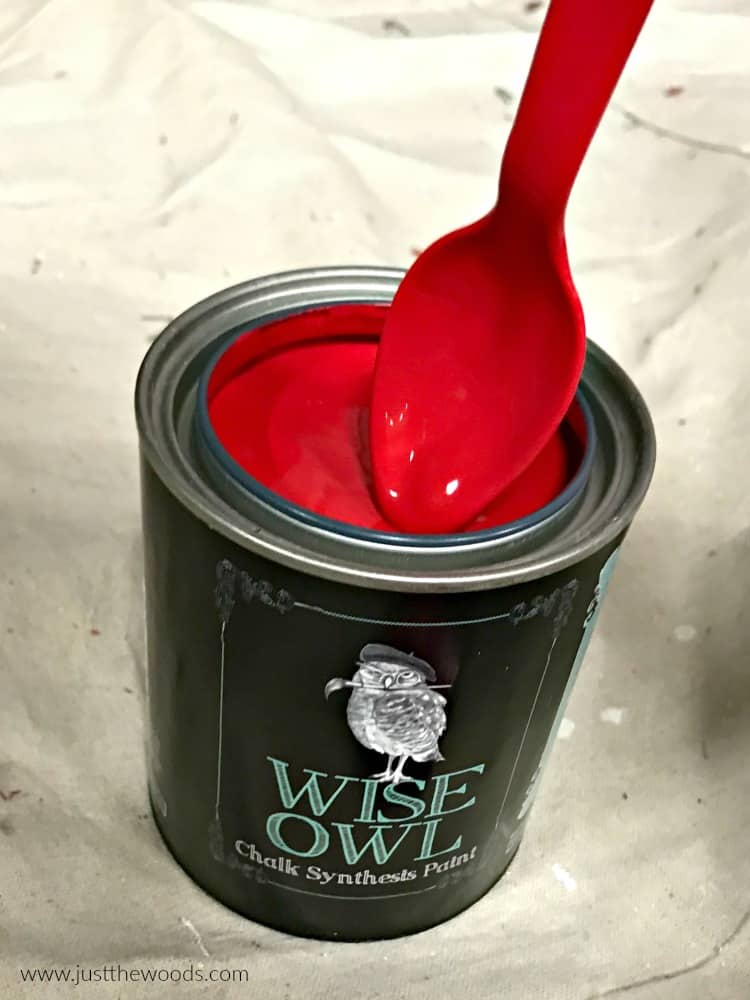
Once the chair and fabric are all prepped and clean we can finally begin. In case you are wondering what is the best fabric paint I can only tell you what I am using. Since painted furniture is my main niche I am going to use chalk paint on fabric with Wise Owls Veronica Vaughn. Personally, I like to refer to this color as sexy Santa red because it really is. This bold bright red chalk paint also comes in the super-easy one hour enamel and you can see it finished on this project here: Painting Furniture with Wise Owl Paint. But keep in mind that you do NOT want to use the one hour enamel on fabric. The chalk paint line works beautifully as upholstery paint while the enamel paint does not. This is where using the right paint for the job makes a difference. In the case of this chair, the chalk paint line with give you the best results for painting fabric.

You can grab some of this gorgeous red paint online HERE. It also works beautifully for holiday crafts since its the perfect red. Think Christmas, Valentines Day, Mothers Day, etc. 😉 Don’t you love painting with vibrant colors?
Along with your fabric paint, you will need a simple water spritzer. I have one like this HERE. You will also need a decent paintbrush. So grab your favorite brush and make sure it’s clean. I like to swap back and forth between Cling Ons and Zibra brushes. They both have soft bristles, are easy to work with and clean up well. (I abuse my brushes) To be honest, I like them both. Zibra brushes are a bit more affordable and can be ordered online (HERE). Cling Ons can be ordered online (HERE).

Today I am using my mini Cling On brush.

Painting Fabric Chairs
When you start painting fabric you will want to work in small sections at a time. First, spray the fabric with a little water.

Next, go ahead and liberally work your paint into the fabric. The water helps the paint move around a bit easier since it thins it out a little. You will notice the paint soak into the fabric a bit.

You can see here where the first coat of paint on the right already looks better compared to the unpainted side.

Go ahead and paint the fabric chair and cover the entire rear cushion. I have to stop and work in sessions due to working at the school around their schedule. So I snapped a quick photo while waiting for paint to dry. 🙂

Next, we move onto painting the fabric seat. As you can see the seat is pretty much a mess, even after the prep and cleaning.

Even the first coat of fabric paint is looking much better.

Keep in mind that painting fabric furniture does require a bit of patience, but it’s worth it. This is after just one coat of paint on the fabric. We now need to wait for the paint to dry. Since I am working on this at the school I leave it overnight and wait until the following day to continue.

Primer for Painting a Chair
While we wait for the fabric paint to dry we also need to tend to the ugly silver portion of the chair. We are going to start with a white primer from Wise Owl. This stain eliminating primer dries white but also comes in clear or gray options. You can find it online HERE.

Paint the primer onto your chair in the same way you would apply paint. This is after one messy coat of white primer.

Second Coat of Painting Fabric Chairs
While we wait for the primer to dry we may as well apply our second coat of paint to the fabric. Depending on the project itself you will need a minimum of two coats of paint for full coverage. You’ll see there is a lot of back and forth with this particular painted furniture project. Since we are using water with our chalk paint on fabric we need to protect the white area from drips. I use a simple piece of cardboard to catch any water and paint from getting on the wood.

This simple method does a pretty nice job of keeping the red fabric paint on the fabric and not on the wood.

How to Paint a Chair to Last
Back and forth yet again. While waiting for the red fabric paint to dry go ahead and apply a second coat of white primer to the wood portion of your chair. Once that dries we can paint the chair with our white paint. But because this chair will get a lot of use and because Santa will need this paint job to hold up and look nice for photos with all the kids we are going to use the best furniture paint. It is a high-quality enamel paint from Wise Owl that dries rock hard. We are using the one hour enamel in Snow Owl, which is a pure snow white. You can also see where I used this same paint to paint my metal radiator covers in my home here: How to Paint Metal Radiator Covers. (Yes, you can use this paint on metal, wood, front doors, cabinets and more). You can also get it online HERE.

The white enamel paint is a much better choice than the original silver spray paint. See how the solid color white looks so crisp and clean now!

You will want to give the chair two coats of the white enamel paint for solid coverage. Make sure to let it dry in between, which isn’t a problem since the paint fully dries in one hour (hence the name)!

The red fabric paint and white wood paint looks amazing so far. The one hour enamel does not need an additional topcoat but the fabric does. That’s next.

How to Protect Your Upholstery Paint Project
I admit that I was a little unsure about this next step. Seriously, could it really be this easy? To be sure, I checked with my friend Brent over at Foxtrot Woodworks & Design. He confirmed this little fabric paint protection process for me. If you’re on Facebook, make sure to go check him out HERE.
When painting fabric furniture you will also want to add a sealer. Since we are now done with the painting fabric portion of painting our chair we need to make sure to protect our work. I understand that there are different types of paint so I can’t speak for any other fabric paint but when you apply chalk paint on fabric you should also add a protective sealer. We are going to protect our red painted fabric with Wise Owls furniture salve. If this product is new to you, or its your first time using it then you may want to see it in action in a few other projects like these:
- Restore an antique steamer trunk – How to Restore a Steamer Trunk
- Freshen up the inside of drawers- How to Save Wooden Drawers with Lemon Verbena
- Restore the inside of dresser drawers – Perfect Powder Blue Painted Dresser
- Freshen up the inside of a painted cabinet – Painting a Fun Boho Style Cabinet with Drip Effect
You can get Wise Owl furniture salve online HERE. It comes in a variety of amazing scents.

Grab your furniture salve and a wax type brush like this one HERE. Dab your brush into the salve to get a decent amount onto your brush.

Work in sections and apply the salve into the fabric liberally by working in circles. You want to massage the salve into the painted fabric. Here you can see how the salve will appear as you work it into the fabric.

The salve will give the painted fabric a bit of a leather-like sheen and an amazing scent as an added bonus.

Allow the salve to sit/dry/cure for about a day and then go back and rub the fabric with a clean cloth or basic sock. You want to buff the salve a bit now that it’s had some time to absorb.

Simple Added Touches
Remember I mentioned those weird kidney-shaped cut-outs on the top of the chair? Well, initially the plan was to cut them. I came to school with my jigsaw in hand and every intention of trimming that center area down. But it just so happened that the kids were practicing for their Living Nativity performance that day and my plans were shut down. My back up plan is now kicked in to place. I trot myself to the local craft and decor store to see what I can find. This metal sign might do the trick. Lucky for me it is on sale and marked down from $40 to $16. Score!

Using some simple picture hanging wire I wrap the festive Christmas sign around the top of the chair to hide the hideous cutouts. This option turns out to much simpler than breaking out the power tools.

Video Tutorial
Prefer video? I always like to include some video tutorials for you in my projects. I apologize in advance that this one will have no sound because I am working while the kids are practicing in the auditorium one day, and another day the principal was hosting a meeting for the parents and I worked quietly like the wizard behind the curtain. You can see in the video the basic application of water spritzing, fabric paint application and then the process for sealing the chalk paint into the fabric with the furniture salve. If you are unable to see the video you may need to turn off ‘ad-blockers’ on your site. The video may also autoplay within the tutorial post.
Painting Fabric to Update an Upholstered Chair
As you can see painting fabric furniture can be so easy, especially with products like Wise Owl chalk Paint and their furniture salve. The Santa chair is a hit at the school Christmas fair and looks great with the Santa scene for photos with the kids. This project is more a donation of time where most of my makeovers, are donated to help with fundraising efforts. Click here to see all of my projects that have been donated to support local fundraisers, schools, and charities: Donation Projects.

The crisp white paint and red fabric paint look so much better now.

I made sure to force my kids to sit on Santa’s lap for a photo op as well. Because that what moms are for 🙂

Check out all of my furniture projects with over 90 painted furniture makeovers: Stunning painted furniture ideas.

If you have a project in mind and need to paint fabric furniture you can find all of these Wise Owl products and more for fabric painting and furniture painting in a variety of paint colors online here: Wise Owl.

Don’t Forget – Follow Just the Woods and Share this post to Inspire others:

FACEBOOK * INSTAGRAM * PINTEREST
Stay connected! For more tips and tricks sign up here : [mc4wp_form id=”1340″]

susan says
What a difference! It looks so much better now! I’ve never used the salve in painted upholstery. I usually wax it. What’s the difference in those two as a sealer for painted upholstery? Merry Christmas!
kandice kullmann says
hey Susan! I actually asked to get you an accurate answer and they said that the salve has higher-grade ingredients. 🙂 . Merry Christmas!