How to Refinish a Table with Metallic Paint and Fabulous Florals
Refinishing furniture can mean so many things. Whether you are painting a wood table or refinishing a table with chalk paint a stain. Today I am sharing how to refinish a table with metallic paint and a fabulous floral image transfer. We will walk step by step from the prep and how to sand wood all the way to sealing painted furniture.

Disclosure: This post on how to refinish a table contains affiliate links for your convenience. Click here for my full disclosure policy.

Supplies & Tools Needed to Refinish Furniture
Materials Needed / Source List:
Tools
- Zibra Paint Brushes or Cling On Brushes
- Furniture Tri Wheelies
- Sandpaper
- Floral Image Transfer
- wood glue
- Orbital Sander
- Shop-Vac
- Lint Free Cloth
- Find all of my favorite tools and products on my Amazon Page here
Paint
Before we begin painting a wood table, this makeover is part of our monthly Furniture Fixer Uppers share. You know what that means! Make sure to stick around all the way to the end for more great painted furniture before and after projects.
Check out all of my furniture projects with over 90 painted furniture makeovers: Stunning painted furniture ideas.
Unfinished Wooden Table
There are so many ways to acquire old furniture. A funny thing about how I came upon this wooden table. I actually ran into my old NYPD Sergeant at the gym who I haven’t seen in a while. It was totally random and as we chatted she mentioned a table that she’s been holding onto and meaning to contact me about. She couldn’t bring herself to throw it out but had no need for it anymore. It’s solid wood so of course I said yes, please and thank you. (Though not at all related to painted furniture, if you didn’t know that I am a retired NYPD Detective you can read about that here.)

This wooden table is perfect with its simple style and metal claw feet. The top has some wear which is to be expected due to age.

The first thing I like to do is flip the table over to look for any markings. This table still has the original label intact. With a quick search on Google, I find out that Ferguson Brothers Manufacturing Company (founded 1878 in New York City) was a wholesale manufacturer of furniture and accessories located in Hoboken, NJ from 1900 until the business closed in 1945. At least that gives us an idea of the age of the table. Yes, I do plan to paint over the table in this table refinishing project, so I advise you not to look any further if that will anger you.

Repairing Damage on a Wooded Pedestal Table
With the table flipped over, we are able to check for damage to the underside of the table. As you can see the legs are a bit loose and need to be resecured.

A few of the legs are actually coming loose and need repair. The dowels make it easy to pop the legs back into place.

Let’s grab our wood glue. This is the wood glue that I like to use HERE. Um, I confess that it’s been a while since I got my butt down into my shop that I accidentally let my wood glue dry out. Thankfully, I keep a few containers on hand 😉

Squirt a little wood glue into the open space of the pedestal and the leg and then firmly press the leg back into place. You may need to use something to keep the legs from falling out again while the wood dries. My clamps wouldn’t work due to the size and shape so I wrapped painters tape around the pedestal legs to keep them tight until the glue is dry.

Wipe away any excess wood glue with a damp cloth.

For a more in-depth and detailed tutorial on repairing wood furniture make sure to check out: how to repair furniture with Bondo wood filler.
Prep for Refinishing a Wood Table
-
Sanding
Now that the repair portion is complete we can move on to the prep portion. Leaving the table flipped over we can begin to sand the legs of the table. Not sure how to sand wood? Simply grab a piece of sandpaper with medium grit, you want it rough enough to scuff the surface but not damage it. I like to use 150 grit for the step. If the wood happens to be super shiny or damaged I may use a different grit but this wood table is in workable condition for a 150 grit. Give the entire surface a light scuff.

Once you finish with the legs and pedestal flip the table over. When you’re learning how to refinish a tabletop, just remember that the top gets as much or more attention than the rest of the table. So go ahead and scuff the top as well.

Once all of the sanding and scuffing is complete you can clean up the mess. I like to use my shop vac to get the bulk of it before I wipe it down. You can get a simple shop vac online HERE.

Once the mess is cleaned you can see that the tabletop still has some significant imperfections.

At this point, you can either choose to embrace the imperfections or reduce them. I decide to reduce them but using my orbital sander for a more intense sanding. You can click here to see how to sand indoors without a mess.

The orbital sander smooths out the wood, knocking out any bumps, gouges or imperfections. Because I do not intend to stain this table I do not sand down to bare wood.

-
Cleaning
Next, we need to clean the table to remove any dust and dirt. A plain blue scrubby sponge, some water, white vinegar, and dish soap will do the trick.

After you clean the entire table, make sure to go back and give it another wipe down with a clean damp cloth or paper towel.

How to Paint a Table
When it comes to refinishing a table using paint I always like to flip the table over first. This way we can work on the legs and underside without messing up the top.

If you are new to furniture painting and want to learn how to update old furniture with paint you can always start at the beginning with How to Paint Furniture – a Beginners Guide.
-
Storing Your Chalk Paint
We will be working with Carbon from Wise Owl for this project. Carbon is a dark charcoal gray paint. This is the chalk synthesis paint, but I also used Carbon in the one-hour enamel paint on my living room table project when I had to repaint over stain. As you can see my chalk paint is still in the can.

Let’s move the paint from the can to these nifty FIFO bottles.

Simply pour your paint into the bottles.

Screw the cap on and add a label. Now you can simply squeeze your paint out like a ketchup bottle – no mess! You can get these bottles online HERE.

This way when you need paint you simply squeeze some out onto a plate. I find that I don’t waste much paint this way either, because I squeeze out a little at a time. You can easily squeeze out more as you need it.

How to Refinish a Table with Paint
Moving forward, grab your favorite brush and make sure it’s clean. I am using my flat Cling On brush, but like to swap back and forth between Cling Ons and Zibra brushes. They both have soft bristles, are easy to work with and clean up well. (I abuse my brushes) To be honest, I like them both. Zibra brushes are a bit more affordable and can be ordered online (HERE). Cling Ons can be ordered online (HERE).

Let’s go ahead and paint the underside of our table.

When refinishing wood furniture with paint like to start with the legs and work my way down the pedestal.

By flipping the table upside down and working on the underside first you are able to see and paint the parts that you normally wouldn’t see with it right side up.

When you are painting a wood table and you are unsure whether or not you should paint the underside of the table – it comes down to personal preference. In the case of this wooden table, I decide to preserve the original label and with that, I do not paint the underside. If there were no markings or labels underneath I would most likely paint the entire underside of the wood table.

When your paint is dry, or if you are super smooth with your table-flipping skills go ahead and flip your wood table over onto its feet. Go ahead and paint the tabletop with your dark gray paint.

Once finished, allow your paint to dry before we move on.

Sanding a Painted TableTop
When you refinish a table you want to make sure that the surface is smooth to the touch. So, once your paint is dry you will need to lightly sand the tabletop for a smooth finish. I am using a 320 grit piece of sandpaper wrapped around a sanding block.

Lightly sand the tabletop making sure to sand in the same direction as your brush strokes. Don’t sand too hard.

Next, make sure to go back with a lint-free cloth to wipe away any dust you may create. I keep a bucket of these handy cloths in my shop, you can get some online HERE. They get tossed into the laundry after each project and are re-used often.

Keep in mind that the bottom portion of the table will get metallic paint glaze. I only apply a second coat of paint to the tabletop itself in this table refinishing project.
Floral Image Transfer
You may want to refinish a table with just paint and if that’s the case then the bulk of your work is already done. But, for this project, I am refinishing a table with paint, glaze and a floral image transfer for fun. This is the image that I intend to use. It is called Rose Celebration and can be ordered online HERE. <– that’s where I got it myself. 😉

I do include a full video tutorial for this project, but if you don’t want to watch the video my plan is to pull from the dark color inside these flowers.

-
Image Transfer Round 1
The image is lined up, taped down and the rubbing process begins.

But, in life and DIY things don’t always go as planned. I ran into a bit of an issue with the transfer. Thankfully, this happened early on in the project. But I have to sand down what I can on the portion of the transfer that made it onto the table. In short, the image itself stuck to the wrong side of the sheet (I explain more in the video).

The tabletop is now repainted again with Carbon. The top is sanded smooth first, and whatever parts of the image that isn’t sanded off get painted right over. Talk about frustrating, and I admit there were a lot of curse words used. But, it’s only paint – so we move along.

-
Image Transfer Round 2
Let’s try this again. But this time we will take a different approach and remove the entire backing to the image. Luckily, this image transfer comes in 6 sheets which allows me to throw away the portion that got messed up and still have more left over for the table refinish project.

So far so good this time.

Next is a slightly tricky part. Make sure to line up the image as neatly as you can. There is a small space gap on the outer edge of the image. Don’t line up the edges of the sheet, but line up the image itself. I hope that makes sense.

Once you are confident that your image is lined up you can begin the rubbing process. These flowers look so pretty on the dark painted tabletop.

Continue on with the third and last sheet of the image transfer. This is the wooden stick that comes with the image for rubbing the transfer onto your painted table or any other piece of furniture that you may be working on.

You use this giant popsicle stick to rub the transfer from the sheet onto your refinished furniture project.

We made it. The image is fully transferred to the tabletop without any issues as of yet. Whew. But we are not finished.

You can always find more image transfer projects here: Image Transfers.
Wipe and Sand that Image Transfer
The next step in our refinishing a table project includes double-checking our image transfer. You can run your hand lightly over the table or grab your lint-free cloth. Either way, lightly go over the table to see if there are any spots of the image that seem to be loose or peel up with you do this. If you notice little edges peeling up, go ahead and carefully press them down with your finger.

You may be completely satisfied at this point with your table refinish. But I’m not. To take things a step further I grab my fine-grit sandpaper and sanding block again. I’m using the 320 grit.

Next, lightly sand over the image transfer. I do this for a few reasons:
- we will knock down any small bumps
- whatever parts of the image transfer that isn’t sticking by now will (should) come off
- we will create a smooth finish
- whatever parts of the image transfer that is sticking will surely stick if it sticks through this step.

As usual, go back with the lint-free cloth for a once over to remove any remaining dust or lingering image glue.

Sealing Painted Furniture
When you are learning how to refinish wood furniture or how to refinish a table with paint we need to seal our painted table for protection. I am using clear satin varnish from Wise Owl. I do love that this varnish is a water-based clear topcoat. It has a clear resin which makes it non-yellowing. You can get some online HERE.

As always, I am applying the varnish with my favorite yellow applicator sponges. You can get these online HERE. They do tend to go in and out of stock, so when they are in stock I grab a few.

Rather than work straight from the container, pour a little bit of sealer onto a paper plate.

Apply a thin layer of your varnish to the table with your sponge. Do not overwork the sealer.

Refinishing a Table with Metallic Glaze
Painting a wood table doesn’t have to end with paint. Next, we are going to add metallic paint glaze to our table. I am using Black Pearl Metallic glaze from Wise Owl. The color is exactly that, like a black pearl. You can find this color and other metallic glazes online HERE.

For the metallic glaze portion of our table refinishing I am using the short handle Cling On brush. Isn’t it cute? You can find these online HERE.

Using the small Cling On brush we will apply the metallic paint to the entire painted table with the exception of the top.

The metallic glaze adds a subtle dark shimmer over the charcoal paint. You can find an abundance of more metallic paint projects here: Metallics.

Applying Sealer Over Metallic Paint
Now you know how to refinish a wood table with paint and pretty images. But, we still need to apply a sealer over the metallic glaze portions of our painted table. I almost always like to tint my sealer, so we will be using a combination of the clear satin varnish and the metallic black pearl glaze.

Pour some of your clear varnish onto a paper plate and then add just a drop of your metallic glaze.

Stir your sealer together. Make sure that you really only add a dab of the metallic. You want the sealer to be primarily sealer with just a tint of the metallic.

We already added the clear sealer to the painted tabletop, but we are going to give it an additional light coat of the metallic tinted sealer just so it ties together nicely with the rest of the table. Before doing so make sure to wipe the tabletop with a lint-free cloth just to be safe.

Dab your handy yellow sponge into the tinted varnish. Wipe off any excess back onto the plate. You don’t want the sponge to be soaked.

Apply a thin coat of the metallic tinted varnish over the entire painted table with your sponge.

Don’t overwork the sealer. Just apply a thin coat and do not go back over it over and over again.

If you find that you may apply a bit too much or if some sits in any crevices just go back with a clean, dry chip brush to wipe away any excess.

If you ever have questions about sealing your painted furniture project you can find a full tutorial with video on how to apply clear sealer here: Sealing Painted Furniture

Video Tutorial for How to Refinish a Table with Paint, Glaze and a Floral Image Transfer
You can follow the project via video here. If you are unable to see the video you may need to turn off ‘ad-blockers’ on your site. The video may also autoplay within the tutorial post.
Check out all of my furniture projects with over 90 painted furniture makeovers: Stunning painted furniture ideas.
Refinished Wood Table with Paint, Metallics and Fabulous Florals
Your table is all finished. This project, like many of my makeovers, is being donated to a local school, animal rescue or charity to help with their fundraising efforts. Click here to see all of my projects that have been donated to support local fundraisers, schools, and charities: Donation Projects


You can get find all of these Wise Owl products and more online here: Wise Owl.
Furniture Fixer-Uppers
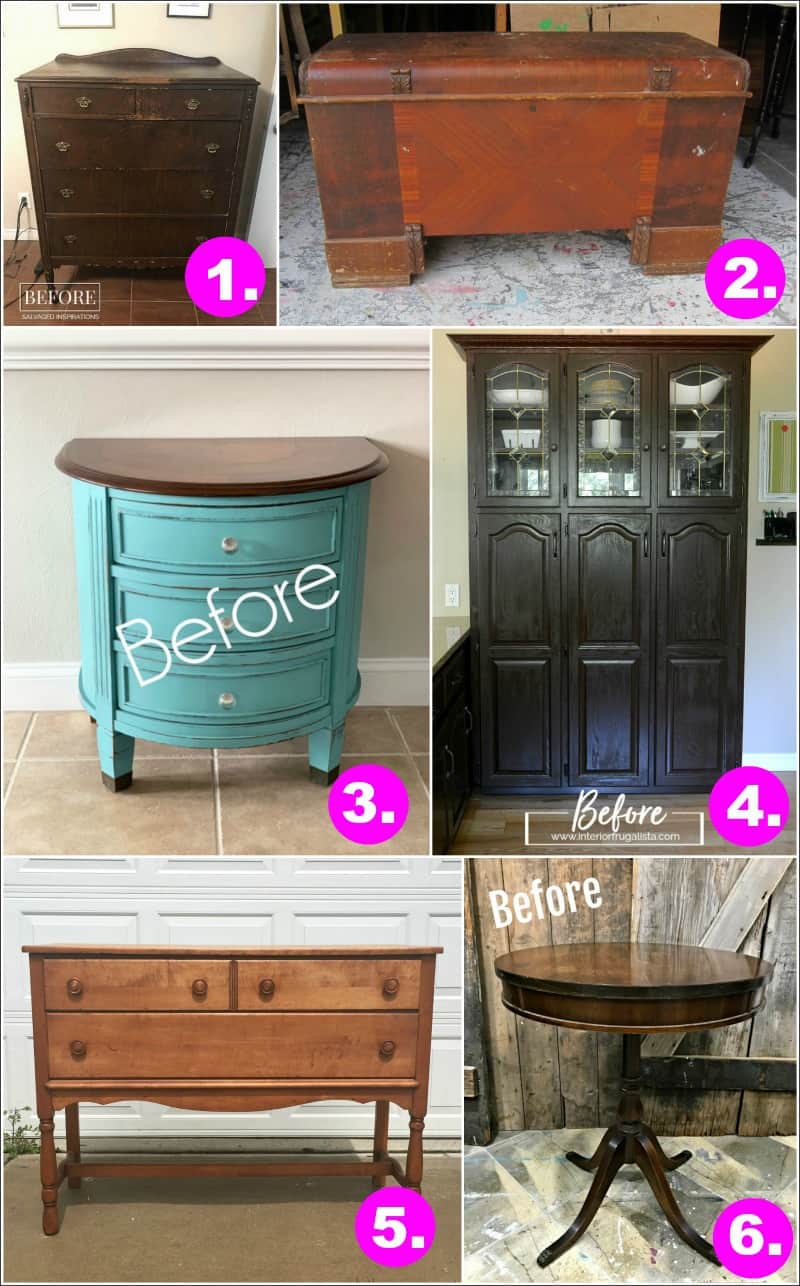
Its that time again where a few of my creative and talented blogger friends and I have joined together in our monthly Furniture Fixer Uppers share. Let’s see what my friends are up to! Make sure to click the links below the image to check out all the amazing projects that my bloggy girls are working on this month.
3. Confessions of a Serial DIYer
6. Just the Woods (you are here)

Don’t Forget – Follow Just the Woods and Share this post to Inspire others:

FACEBOOK * INSTAGRAM * PINTEREST
Stay connected! For more tips and tricks sign up here : [mc4wp_form id=”1340″]


I love that you added a little glizt to the topcoat. Looks gorgeous Kandice! And I didn’t know you are a retired NYPD Detective!!????
This came out gorgeous!!! Glad round two was a smashing success! XO
Very well explained! Turned out just beautifully!
Thanks for this terrific, detailed post. I love the results–the transfer is beautiful on the dark background, and the metallic adds just a subtle touch of shimmer. Lovely. I also read your blog post about your career with the NYPD and found it fascinating. I’m a mystery novelist, so I have a professional interest, but it was also well written and a good read. In between all your other projects, you might think about writing a novel using your experiences as background– 😉
Beautiful makeover, Kandice! Love the transfer over the black paint. I bet the table will bring in some nice cash for the charity.
Kandice I love the striking new look! Who would’ve guessed the floral transfer would be so vibrant over dark gray paint? It’s fabulous <3
It turned out beautiful. My parents had one of these tables, except it had four small lion head rings around the table!
I am just crazy over what you did to that little table!!! I now want to find a piece of furniture to do this myself!! I really wish you had a store near me where you could hold classes while we work on our project! Absolutely BEAUTIFUL!!!
I have never seen a tutorial with so many pictures. This is fabulous. It really helps to see it. It makes me confident I have understood it all the steps, You did a great job both with the table and the tutorial. Thank you.