Repainting Furniture – How to Paint Over Stained Wood Furniture
Repainting furniture isn’t something we often think about. Or at least I don’t think about it. But when your taste and style changes or maybe your loved ones have abused your beautifully painted furniture it may be time to break out the brush and repaint your painted furniture. That is exactly what happened to me, so I’m sharing a few tips for how to repaint furniture, and how to paint over stained wood furniture..

Disclosure: This repainting furniture tutorial post contains affiliate links for your convenience. Click here for my full disclosure policy.

Supplies & Tools Needed to Repaint Painted Furniture
Materials Needed / Source List:
Tools
- Zibra Paint Brushes or Cling On Brushes
- Furniture Tri Wheelies
- Sandpaper
- Foam Roller
- Paint Brush
- FIFO Squeeze Bottles
- Yellow Applicator Sponge
- Shop-Vac
- Lint Free Cloth
- Find all of my favorite tools and products on my Amazon Page here
Paint
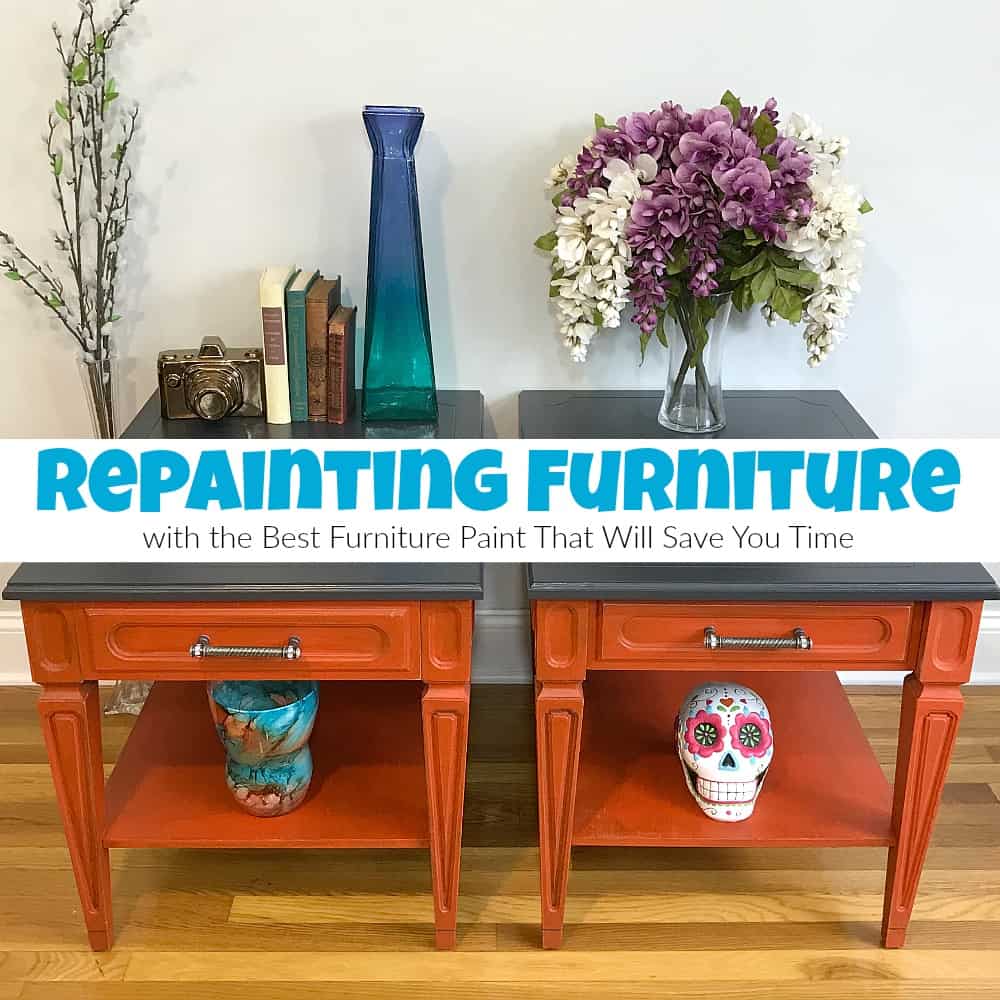
Original Vintage Living Room Tables
Let me show you these living room tables when I first acquired them a few years ago. They are vintage and originally made by Mersman. The end tables both have a dovetail drawer, while the coffee table merely has a faux drawer. The holes on the coffee table are plugged up with wood filler, and the hardware on the end tables replaced. Here are the tables before their first painted furniture makeover.

As you can see the top has a pretty nice wood grain pattern to it. But, with some old furniture, the tops of these tables are actually a faux veneer-type laminate material over wood. With that, I simply am unable to sand the surface down to bare wood since it is in fact, not a solid wood top.

In an attempt to preserve that grain pattern I refinished these table tops with a wood stain product. Yes, I took a chance. I will only take chances when it comes to my own furniture paint projects, but never with a customer’s piece. In fact, I often cut corners with my own painted furniture makeovers just to ‘test’ the products. I know if something goes awry I can always fix it. 😉 Going in, I knew that there was a chance that the stain would or would not hold up.
If you are new to furniture painting and want to learn how to update old furniture with paint you can always start at the beginning with How to Paint Furniture – a Beginners Guide.
How to Paint Over Stain
The tops of the tables are a bit smooth and there isn’t much to grab onto. This is why we prep! It is ALWAYS a good idea to prep the surface of the wood before applying any kind of paint or stain. Sanding the surface will scuff the surface for the product to grab a hold of. The wood stain product itself is a great stain and works great on raw wood, or even over paint. But note to self – it does not hold up well over laminate. Lesson learned. Here is what the table tops look like after the wood stain is applied. Initially, it looks beautiful.

Damaged and Worn Stained Table Tops
Now let’s take a look at these tables after over two years of daily use. At first glance, not too shabby right?

These tables are in my living room, where the kids play and we all hang out regularly. My son plays with his Legos on the coffee table, and my daughter has been known to stand on the coffee table. At least she wore slippers this time. Ugh.

Let’s take a closer look. This is where I do not take my own advice. Before the tables had a chance to fully cure, or even dry, I brought them up to the living room and set them up. Then to add insult to injury a few days later I used a Lysol wipe to clean the table top. What was I thinking? I always make sure to tell people to take care of their painted furniture. A few things that should be followed when you first finish painting your furniture:
- wait for the paint to fully cure
- be gentle with your piece in that time frame
- clean with a lint-free cloth
- no harsh chemicals.

I literally broke every single one of my own rules. The harshness of the Lysol wipe removed the product from the tabletop leaving an ugly mark. Don’t worry, I covered that mark with a lamp. Facepalm.

Next, the coffee table. Please don’t judge. This is the result of using a stain over laminate without prep. Followed by, feet on the table, eating on the table, Legos, and Barbies on the table. Add in not using coasters, which is ridiculous since I have my adorable DIY coasters available in the living room. All in all, we have 100% abused the coffee table.
On the plus side, the orange-painted portion of the tables is holding up beautifully! You can actually check out the first makeover if you’d like here: Bold Orange Painted Tables. Because the orange still looks great I am not repainting that part of these tables. There simply is no need to.
Click HERE to Pin this post for later.
Repainting Furniture Prep
It’s time to fix these tables. The next question may arise asking can you paint over chalk paint or can you paint over stain? In the case of this project, the answer is yes. In general, though, the first thing you would want to make sure you aren’t mixing a water-based stains or products over an oil-based paint or product or vice versa. Of if you do, you want to make sure that the first coat is completely cured. Just check your products first to avoid unnecessary incidents. Let’s start with proper prep. Using a sanding block/sandpaper gives the entire tabletop surface a nice sanding to scuff up the stained surface.

Next, go ahead and clean the table tops making sure to remove any dirt and dust.

Using Primer Before Repainting Furniture
Remember I mentioned that the table tops are rather smooth? Even with a scuff and clean the tops of these tables are still pretty smooth and I don’t want to risk anything this time around. The next step in our painting over stained wood furniture is to apply primer. I am using a stain-blocking primer before repainting the tables. If you are painting furniture that is new, laminate, shiny or slick then make sure to check out my Best & Trusted Method for Painting Laminate Furniture.
For this project, I am using a clear type of primer from Wise Owl. The stain-eliminating primer comes in both clear and white. But since I am painting a dark color (fresh paint) over a dark color (old finish) I am opting for the clear primer. (You can get this product online HERE) If you are painting furniture white then I would opt for a white primer. White paint – white primer. Dark paint – clear primer.

This is my first time using the Wise Owl clear primer. When you first open the can you can see that the primer has sort of separated. For best results, you will want to stir it thoroughly before you begin.

Now, grab your favorite brush and make sure it’s clean. I am using my flat Cling On brush, but I like to swap back and forth between Cling Ons and Zibra brushes. They both have soft bristles, are easy to work with, and clean up well. (I abuse my brushes) To be honest, I like them both and don’t have a true preference. Zibra brushes are a bit more affordable and can be ordered online (HERE). Cling Ons can be ordered online (HERE).

The clear primer may appear a bit on the white side, but don’t worry. It goes in slightly white and dries clear. Using your favorite brush go ahead and brush on your primer.

Cover the entire surface with a coat of your primer before painting over stained wood tables.

You will see that as the primer dries it changes from white to clear, and have a matte finish..

Best Paint for Furniture Redo
If this is the second time around should we call it a furniture redo redo? Hmmmm. Either way, obviously we aren’t using another wood stain this time. I have also come to terms with knowing that I have to cover the wood grain pattern on these tables, even if the pattern is a total fake! So the question is what is the best paint for furniture? Or even, what is the best furniture paint to use when repainting furniture? Well, lucky for me, and you, Wise Owl has just come out with a new one-hour enamel furniture paint. I admit I was a bit skeptical. Furniture paint that completely dries in one hour?! Is this even possible? How can this type of paint be real? I confess I sat back and waited to see how others liked it first, but then decided it’s time to give it a go. It comes in some really pretty neutral colors.

Since the table tops were dark brown before I want to keep them dark again. I also have a super cool dark gray wall in my living room, so I am going with the color Carbon. It’s a very pretty dark gray, somewhat charcoal color.

Like the primer, when you remove the lid the paint looks like it has separated a bit. This is ok!

Give your one-hour enamel furniture paint a good stir.

Once you finish stirring the paint should be all mixed and ready to go. Make sure you don’t skip that stirring step!

Click HERE to Pin this post for later.
How to Paint Stained Wood Furniture with the One Hour Enamel Paint
Now that the paint is thoroughly mixed you may want to transfer some to a paper plate. I find this leads to a little bit less of a mess.

Normally, I almost always paint furniture with a brush and sometimes with a paint sprayer. But today, for some random reason I decide to use a foam roller. I figure since we are only repainting table tops the roller would be perfect. We’ll see about that. This is the foam roller that I normally use when applying stencils to painted furniture, you can find it online here.

Go ahead and add a liberal amount of paint to the foam roller. This is the opposite of what you would do when stenciling by the way.

Carefully, roll a fresh coat of paint onto the tabletops.

Video For Repainting Furniture
Prefer video? Here is a video showing you the application of the one-hour enamel paint on the tabletop.
Click HERE to Pin this post for later.
Repainted Tables
Truth time. Once the first coat of paint is dry I notice a few bumps in the paint. I did notice the bumps while foam rolling the paint but didn’t pay them any mind. But as the paint dried the bumps remained. I think some refer to this as orange peel. All I know is that I don’t like it, and after a little research. I discovered that this is a result of the foam roller. To avoid these bumps it’s best to use a brush or sprayer with the enamel paint. When using a foam roller I should have loaded up more paint to the foam roller and rolled back to remove any air bubbles. Ahhhhh, now I know. In case you were wondering, I’m more the let’s see what happens kind of painter and not so much for reading directions first.

Lucky for us, the good news is – it’s only paint, we don’t have to wait a long time to move forward to fix this, and we can always move on and learn from this. To take care of these bubbles you just have to give a quick once over with sandpaper to knock the bumps down a bit.

Next, make sure to remove any sanding dust by wiping the tables with a lint-free cloth or tack cloth. I keep a bin full of these in my shop. You can get them online here.

Here is a close-up of those pesky bumps. But at least now they are knocked smooth and ready for the second coat of furniture paint. Hopefully, you learn from my mistakes in the painting process and don’t make the same mistake that I do. But even if you do, we learn from it, and we move on.

How to Repaint Furniture – Second Coat
For the second coat of paint, I am using my trusty brush.

Here are a few things I have learned when it comes to applying the one-hour enamel paint:
- do not water down
- use a liberal amount of paint
- do not overwork the paint
- 2 coats of paint are plenty
- it’s an easy process once you get the hang of it
- great results
A few noteworthy things about this paint itself:
- No additional top coat needed
- Ideal for use on Kitchen cabinets, and bath cabinets, outdoor furniture and signs, trim, exterior and interior doors, garage doors, tile, countertops, kitchen tables, and any type of furniture.
- 1 hour CURE time (YES dry enough to transport your painted piece).
- Eggshell sheen type of finish.
- Coverage: It’s 110-125 officially per quart.
- Low VOC – 125 grams per liter, Also, this is a very fast dissipating VOC. So while it’s more than you will find in other Wise Owl products, it’s far less than you will typically find in enamels and what is there will vanish quickly due to the nature of the one-hour cure.
- Self-leveling and can be brushed, sprayed, or rolled with literally no brush/roller marks. It dries with a smooth porcelain-like finish.
- Scrubbable and virtually indestructible.
- That means it’s not distressable unless approached with a non-traditional distress method. Distress immediately before it cures.
As I mentioned the one-hour enamel does not need an additional sealer. It is a self leveling paint, and a self leveling furniture paint is a great thing! But, keep in mind, if you want to add a glaze or something on top of it you will need to follow up with sealer. If you have questions about sealing your painted furniture project you can find a full tutorial with a video on how to apply clear sealer here: Sealing Painted Furniture

Repainted Painted End Tables & Coffee Table
I must say that after the second coat of enamel furniture paint with brush application the bumps are gone, and the tables have a great finish that looks beautiful.

Using the one-hour enamel is the best way to repaint your piece of furniture and paint over just about any type of stain. This works equally well over both veneer and a solid wood surface.

Check out all of my furniture projects with over 90 painted furniture makeovers: Stunning painted furniture ideas.

Click HERE to Pin this post for later.

Back to my living room they go. I have also waited a few weeks to share this tutorial to see how the new paint job is holding up. As I sit here writing, I am watching my son build more Legos on the table while leaving zero scratches or evidence. I can honestly say that the paint is holding up as it claims and is a much better option for my rough family. 🙂

The gray tops look great with the dark gray wall.

If you have a project in mind where you need a super durable furniture paint, I definitely recommend the one-hour enamel for your painting job. You can find it along with all of the other Wise Owl products online here: Wise Owl.
Click HERE to Pin this post for later.

Wait! Don’t Go! It’s that time of the month again for:
The Furniture Flippers
If you have been with me for a while then you know that I participate in a monthly Furniture Fixer Uppers share. That is where a few of my creative and talented blogger friends and I have joined together to share what we are working on. This is another fun group of Furniture Flippers that I hang out with every now and then. We will be sharing our furniture makeovers too. DIY projects and furniture makeovers are more fun with friends anyway, so the more the merrier, right? Let’s see what my friends are up to! Make sure to click the link above the image to see each makeover.
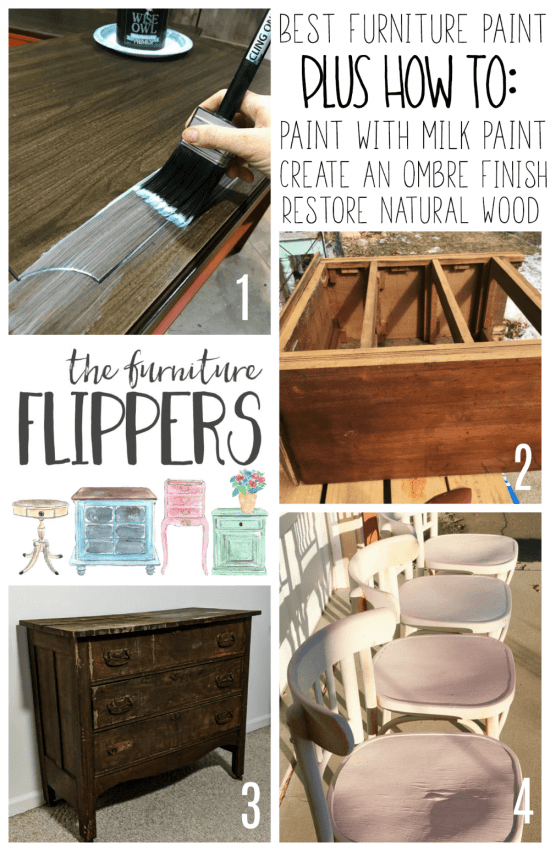
- Repainting Furniture with the Best Furniture Paint That Will Save You Time from Just the Woods (you are here)
- How to Bring Old Furniture Back to a Natural Wood Finish by Refresh Living
- Farmhouse Dresser with Old Fashioned Milk Paint from Lovely Etc.
- How to Mix Ombre Paint from a Fresh Squeeze of Life
I’d love for you to join me for more painted furniture makeovers, and DIY projects! and Share this post to Inspire others:

FACEBOOK * INSTAGRAM * PINTEREST
Stay connected! For more tips and tricks sign up here : [mc4wp_form id=”1340″]

Click HERE to Pin this post for later.


I really like how the tops of the tables look painted. Generally, I try to keep the wood on the top, but now I will have to try paint. It creates a more modern look. Good work!
Your grey hutch in the background of the photo with the little girl was my inspiration for my dining room redo. Beautiful work!
thats awesome! I love my hutch 🙂
Love the color combo on your tables and you l/r looks great. LOVE that couch btw!
I love the look of the gray tops now! And I totally am the same way – experiment and cut corners on my own pieces and then figure out how to fix them when/if I need to! I’ve actually learned a ton in the process, but hav probably wasted quite a bit of time fixing my mistakes, too!
I love seeing all the different paints and finishes you use and your tutorials are great. You do amazing and beautiful work! A question: I can’t tell from the photos, but does using a paint brush with this Wise Owl furniture paint leave visible brush strokes? Or is the paint self-leveling? Is that why you chose a roller first…in hopes to minimize brush marks?
thanks so much! the paint is self-leveling. and yep – i used the roller at first to minimize brush strokes but hated that. The brush marks are pretty minimal with the brush. If you want zero marks at all Id say use a sprayer. But I havent tried this paint in the sprayer yey myself. 🙂
Great post, I have a ton of furniture to paint. So I pay close attention to type of paint, brushes etc, thanks for sharing what you do, I will copy you!!! Thanks again!!