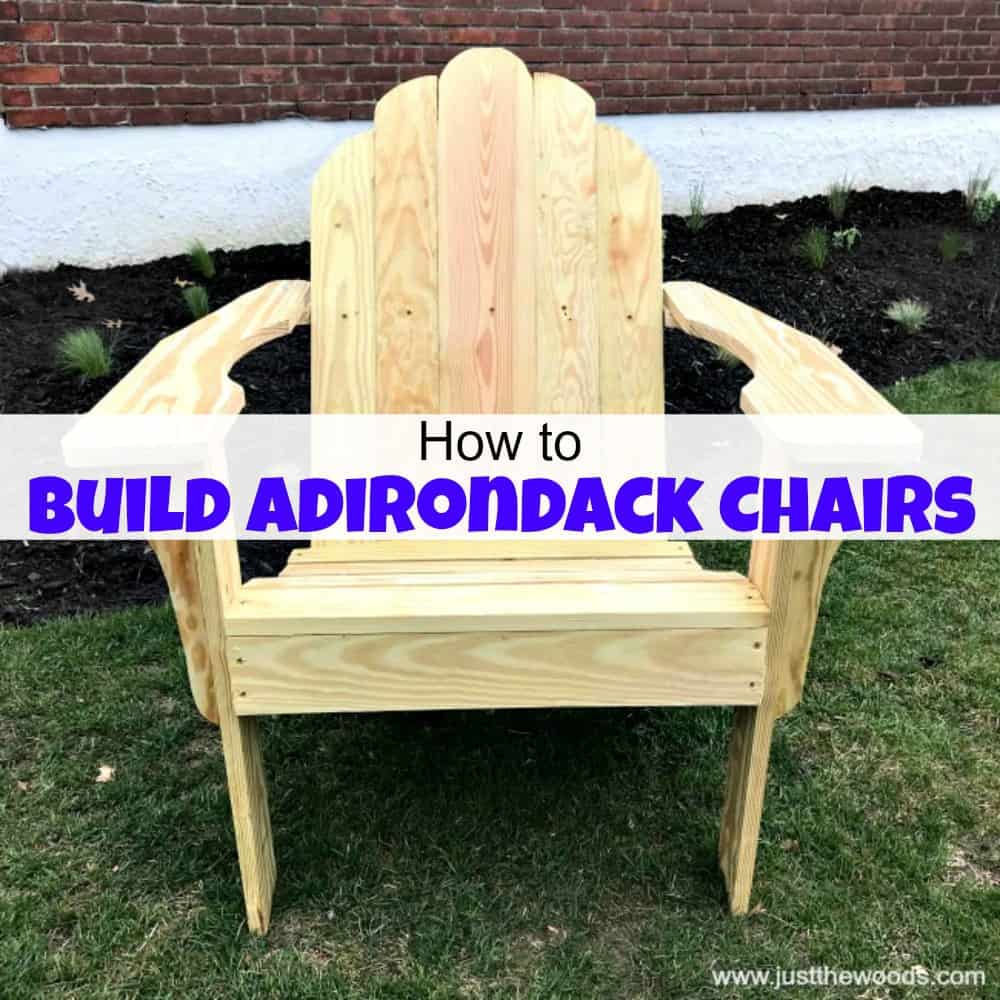
How to Build Adirondack Chairs from Scratch
See how to build Adirondack chairs from scratch. This DIY Adirondack chair is both sturdy and comfortable. Use these easy Adirondack chair plans and learn how to build an Adirondack chair.
As the weather starts to warm up we start to think about spending more time outside. We decided that this year we want to build Adirondack chairs from scratch. Building your own Adirondack chairs has to be better than spending a small fortune on them, right? We tease a friend of ours for spending over $500 on new Adirondack chairs. Lucky for us, we found free plans to build Adirondack chairs online which makes this project so much easier.
This DIY Adirondack chair project is also part of the monthly Power Tool Challenge. Make sure to stick around through to the end to find all of my Power Tool Challenge team friends’ creative spring related projects. 
Disclosure: This how to build Adirondack chairs post contains affiliate links for your convenience. Click here for my full disclosure policy.

Supplies & Tools Needed to Build Adirondack Chairs
Materials Needed / Source List:
- Wood
- Saw Horse
- Spray Adhesive
- Jig Saw (we used 2)
- Ryobi
- Porter Cable
- Scroll Saw (I may switch to the scroll saw for the rest of the chairs – this is the one that I have: Scroll saw
- Spindle Sander
- Orbital Sander
- Electric Drill
- Trigger Clamps
- Free Printable Plans to Build Your Own Adirondack Chairs – HERE
- Find all of my favorite tools and products on my Amazon Page here
Our Current Adirondack Chairs
For the past few years, we have had a pair of Adirondack chairs in the yard. They are made of teak I believe and have become very wobbly and rickety over time. Last Spring they looked like this: 
So bad, right?! To get just a bit more use out of them I decided to paint them last Spring. Painting these wobbly old chairs gave them another season. This is what they looked like after paint: (you can find that project here: Painting Adirondack Chairs)
Much nicer, right? But it was like putting lipstick on a pig. Paint made them look pretty, but they were still wobbly and rickety. I think we got our money’s worth out of those crappy old Adirondack chairs and now its time for something a bit sturdier and better.
Adirondack Chair Building Plans
The first thing you need to do when you want to know how to build an Adirondack chair is to find Adirondack chair plans. We (hubby and I) searched online at the abundance of Adirondack chair designs until we found these Adirondack chair plans for free over at Skip to my Lou blog. She provides easy Adirondack chair plans that you can download and print to make your own Adirondack chairs. Make sure to hop on over and get the plans from her and show her some love here: Skip to My Lou.

Gathering Supplies
In addition to the power tools listed above, you will need to gather these to build Adirondack chairs. This list is per Adirondack chair, so if you plan to make multiple chairs make sure to multiply your screws, bolts, and wood by the amount of Adirondack chairs you intend to build. Our plan is to build 4 chairs so we multiplied each by 4.
- 60 -1 1/2″ deck screws
- 10 – 2″ X 1/4″ carriage bolts along with flat nuts and washers
- 2 – 12 ft 1 X 6 treated lumber
- 1 board is for cuts for the middle back of the chair, upper back support, one seat, and two arms
- 2nd board is for cuts for two legs, the first seat piece/bottom support for back, and two seat pieces
- 1 – 8 ft 1 x 4 treated lumber
- for cuts for both support for arms, the front cross piece of chair, and two legs
- 1 – 10 ft 1 x 4 treated lumber
- for cuts for all four of the remaining back of the chair
Off to Lowes we go and return with a truck full of wood. Make sure to get treated wood for this project since your DIY Adirondack chairs will be used outdoors. 
Getting Started Making Adirondack Chairs
Place your wood on your sawhorse so you can work without having to constantly bend over. If you don’t have a sawhorse, you can get one HERE. 
Make sure you have printed out those Adirondack chair building plans in the appropriate size. 
Using a scissor, carefully cut out your template pieces. Then grab adhesive spray. 
Lightly spray the wood with your spray adhesive. 
Carefully place your Adirondack chair template on the wood and press into place. 
Cutting Out Adirondack Chair Template Pieces
Once your template is placed on the wood grab your jigsaw. I use the cordless Porter Cable jigsaw until the battery died 😛 
Then I switch to the Ryobi plug in jigsaw 😉 Using your jigsaw go ahead and cut the Adirondack chair pattern. 
When you need multiple cuts of the same template, take your first cutout and trace it onto the wood with a pencil. Then cut the next piece along the pencil line. (I hope that makes sense)
Do this entire process until you have ALL of your pieces of wood cut out to make your Adirondack chairs. Then you will have to sand each piece.

Sanding Your Adirondack Chair Wood
You want all of your pieces to match as closely to the template as possible. And you may have cut a few pieces a little rough, or not exactly on the template so you will want to sand the edges smooth. To do this you can use a spindle sander. I admit that I started out clamping matching pieces together to attempt to sand them together. But I eventually gave up on that and sanded each piece one at a time, stopping periodically to compare them to one another. This is the oscillating spindle sander that I have HERE. 
This part is time-consuming and messy considering how many pieces there really are for making Adirondack chairs. I ended up covered in sawdust, or as my 5-year-old calls is “wood fuzz”. 
Assembling a DIY Adirondack Chair
Before assembling your DIY Adirondack chair you may want to lay out all of the pieces for a sort of visual and to make sure that you have all of the pieces. Once you are certain that you have all of your pieces go ahead and remove the paper template pieces from your wood. 
Starting with the legs you can begin assembling your DIY Adirondack chair. 
Continue assembling the base and work upwards. 
Next, add the arms, then the back. Make sure to use a level and space your boards evenly. (The weather took a turn and we had to continue on the porch) 
Add all of the boards until your entire Adirondack chair is fully assembled. Then grab your orbital sander and give your newly built Adirondack chair a once-over to smooth any remaining rough edges. 
Enjoy Your DIY Build Adirondack Chair
Now that you can build Adirondack chairs you can fully enjoy them. These are super sturdy and much better built than those rickety old chairs that we had. They are surprisingly comfortable too.


We will be making more since the kids like them too! 
For now, the first set actually looks great outside of our cabin in the Catskills. It’s still pretty chilly up there. 
The second set looks great in the backyard by the fire pit/chiminea! 
Power Tool Challenge Team
This is a power tool challenge project where a few of my fellow bloggers and myself get together and create a project based on one theme. This months theme is Spring. We are building Adirondack chairs to welcome the warm weather of Spring. Each project must be created using at least one power tool. Make sure to check out these other projects. Links to each project are below the image.

Just the Woods –DIY Build Adirondack Chairs
Domestically Speaking – Solar Address Post
The DIY Village – DIY Barnwood Lantern
H2oBungalow – DIY Mid Century Modern Plant Stand
The Kim Six Fix – Kitchen Herb Garden
Create and Babble – How to Make Easy Wooden Flowers
My Repurposed Life – Reclaimed Stair Stringer Tiered Plant Stand
Also, check out these great DIY Outdoor Furniture projects for more inspiration! 
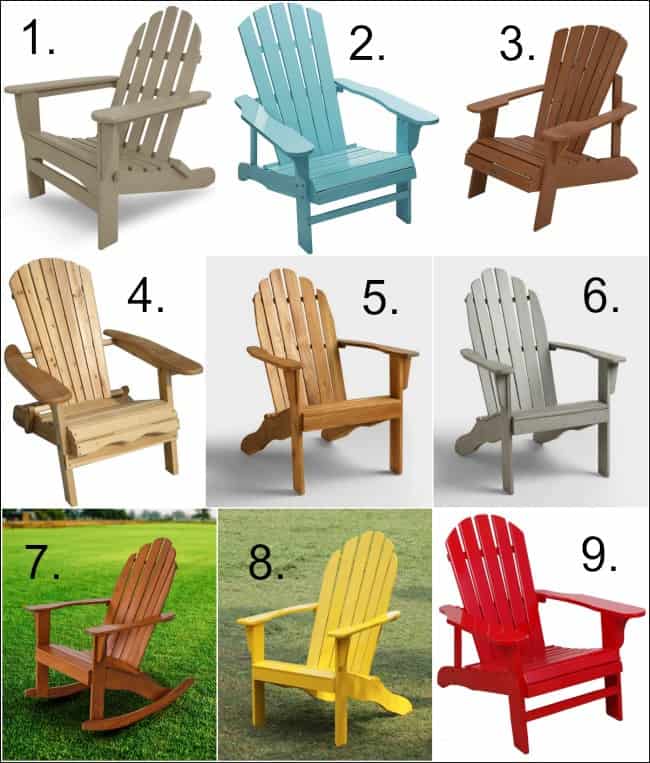
Prefer not to DIY?
If you love the idea of adding Adirondack chairs to your yard but not up for the task of building them yourself then here are a few that you can get online. Each Adirondack chair is numbered and the corresponding number is under the photo with the link to the chair. Or find a wide variety of gorgeous wooden Adirondack chairs for sale HERE.
Don’t Forget – Follow Just the Woods and Share this post to Inspire others:
FACEBOOK * INSTAGRAM * PINTEREST
Stay connected! For more tips and tricks sign up here : [mc4wp_form id=”1340″]


These are awesome! I love that you used a pattern for the pieces. I have no doubt your entire family will enjoy the nice weather…when it finally arrives, in your new chairs! Pinned!
I need some Adirondack chairs!!! I think I need to add them to my project list. They turned out great!
thank you so much!
Kandice,
What an awesome project! Great tips for making these chairs. I love how they turned out.
gail
thanks Gail! These should last much longer than the last ones lol
You are really going to enjoy using these this summer. We made templates of our Adirondack chair pattern pieces out of luan. Now when we make new ones, it’s easy to trace where to cut on the wood. Our first set, made years and years ago, finally rotted to the point that we had to throw them out, so making a new set is on our spring “to-do” list.
Your chairs turned out great. Building them are a lot of work but it’s so worth it. They look great by your workshop!