How to Build a Shed From Scratch
How to build a shed from scratch. Not only how to build a shed but how to do it with your spouse and your kids. Not an easy task.
To be honest, I almost named this project “How to Build a Shed from Scratch with your Spouse and Not Bury them Under the Concrete.” Working together as a team in life is one thing, but working together on a home DIY project is another. It’s like being on a drunken see-saw with “stay out here and work with me, but don’t get in my way.” Or, “keep me company, but don’t talk to me” How about, “just play with the kids while I work but keep them away from what I’m working on” Or even “Get me this tool, get me that tool, where are my tools? Don’t touch the tools” As it turns out that title is just a bit too wordy anyway, so I had to shorten it up a bit.
Then I considered “How to Build a Shed with Kids.” But I wouldn’t suggest building a shed with kids. This project is hard enough without them demanding to be involved or asking for juice and snacks. They track dirt in and out of the house because they can’t decide if they really want to help outside or if they want to hang out inside and watch TV.
In the end, I went with the simplest and most direct title for the project. That may be the only thing that is short and simple on this project. We mainly worked on this over the course of the weekends and it took about 5 weekends to complete.
A DIY Secret
Can I tell you a secret? I don’t think I would ever do this again because I have another secret. Shhh, don’t tell, but DIY projects that are a joint effort between my hubby and myself really aren’t fun. They are stressful, and hard, and take a toll on us. Which may seem strange in a way because we are both handy and we both enjoy these type of projects and we even have a pretty good idea as to what we are doing. Actually, I think we really have it together – separately! Once you throw the two of us together is gets a little intense. Enough about that, let’s get on to the project.

How to Build a Shed From Scratch – Start to Finish
Building a shed from scratch is a multi step process. First, clear an area, build a foundation frame, lay a base, pour concrete foundation, then build the wall frames, build the walls, add a roof, and all of the finishing touches and important steps in between.
We are going to walk you through the entire process for how to build a shed.
Tearing Out the Garden and Bushes to Build a Shed
Step 1 – Clearing the area to build the shed. We decided that the area along the back fence was a bit of wasted space. It had a few bushes that had been there since we bought the house, but any flowers we ever planted there never really took off or did well. This is the perfect spot to build a storage shed.

Clearing out this area was a bit more involved than just pulling a few flowers and weeds. We literally had to cut out the bush by cutting the branches until it was small enough to dig out the root.

You don’t realize how much is there until you start to tear it out.

We enlisted the kids to help as well. They were quite eager to get involved.

The yard started to have bushes, branches, and dirt everywhere.

The branches all had to be bagged up before being placed on the curb for sanitation, so once again the kids got involved. hehe

This portion of the project was tedious and tiresome, but once all cleared out we have a location to build a shed. In addition to removing the bushes and roots, we had to dig down a bit for a bed location.

Digging out this area turned into a worm hunt for the kids.

They made it into a game of how many worms they could find and then relocated the worms to the vegetable garden so they could “do their work” in there.

How to Build a Shed From Scratch
To build a shed it is best to have downloadable shed plans to build a shed from scratch to work off of, and of course you will need multiple tools.
Disclosure: This post contains affiliate links for your convenience. Click here for my full disclosure policy
Materials Needed / Source List:
- Building Plans for Shed
- each of the DIY shed Floor plans will tell you what you will need:
- 2 x 4
- 1x 4
- 1 x 6
- each of the DIY shed Floor plans will tell you what you will need:
- Paint Brush
- Hammer Drill
- 80 lbs bags of 5000 psi concrete (22 bags)
- Sandpaper
- Behr Exterior Paint – Color ‘Anonymous’
- HomeRight Paint Sprayer
- Screwdriver or Electric Drill
- Level
- Shingles
How to Frame a Shed Floor – Building a Frame to Make a Concrete Floor
Step 2 – With the area cleared out we could now build a foundation frame for the concrete DIY shed floor. With Mother Nature NOT on our side, we headed to Home Depot to gather supplies and shed material for building a shed floor.

The first step in how to build the floor of a shed, we need to build the floor frame. To build the frame we started with 2 x 4 pieces of wood. Jackson (6) learned about measuring and cutting wood to size.

Since we don’t have a large yard, the shed will only be 4′ x 8′. The frame pieces were measured and cut.

The simple shed floor frame was nailed together using the nailgun, because who has time for a hammer?

Once squared off and fully assembled the foundation frame is ready.

Unfortunately, as I mentioned, Mother Nature was not on our side for the project and it had been raining non-stop all week. The rain had turned our cleared out area into a bit of a swamp. This will certainly make things difficult.

The frame for the shed slab can now be dropped into place, and we can only hope to make some progress in the mud.

Though not ideal, the soft mud allowed us the maneuver the shed floor frame into place.

A little bang with a hammer will help get that frame where it needs to be. I think Brian took out a little anger about the rain on that wooden frame too.

Once down, make sure that the frame is level.

It’s a good thing Brian has his fishing boots.

At this point, we had to walk away and leave the project for a week to allow some of the water to dry before we could continue.

How to Build the Floor of a Shed – Creating a Base and Laying a Concrete Floor for the Shed
Step 3 – After waiting a week in hopes that some of that water had disappeared and evaporated we are ready to start the foundation work for the floor of the storage shed.
White stones were poured into the wooden foundation frame.

Bags and bags of these white stones were poured in to create a bottom layer base.

After multiple bags were poured in to cover the entire floor we decided to wait on pouring the concrete since the ground was still a bit too soft.

When we returned to the shed build the following weekend, Mother Nature again rained on our parade. Seriously? More rain! Our framed out stone base had been yet again turned into a swampy mess.

We waited, yet again for this to dry up a bit. But out of concerns for future water issues, we decided that a taller frame was in order. A second level frame was also built to raise the floor base.

By this, I mean that another frame was built and placed directly on top of the existing frame to allow more stones and a deeper base for under the slab.

The second level frame was attached to the original frame with a few pieces of wood to make sure they stay together and in place. The frame doesn’t have to be pretty since it will be removed once the concrete is finished.

Once the second tier of the frame is added, make sure it is level and fill with the white stones yet again.


Building a Concrete Shed Floor – Pouring Concrete Floor for Shed
Step 4 – Time to finally pour the concrete floor. This requires another trip to Home Depot. The kids are getting tired of this project and at this point, I don’t think they really care about how to build a shed, but would rather take a nap. Layla did kick butt at her morning JuiJitsu tournament and won third place for her age group. If you are feeling tired like Layla and overwhelmed you can always get some help with you DIY shed project. Click for assistance, and find someone local to do the job for you: HELP

For the concrete slab, we used twenty-two 80 lb bags of 5000 psi concrete and we were able to rent the concrete mixer for the afternoon.

When you want to know how to make concrete from scratch, for your shed floor, make sure to add reinforcing mesh over the white stones for structural support to the slab first.

Then use the concrete mixer and mix the concrete with water. Only mix a few bags at a time.

Jackson was here to supervise because the next time we need a shed, this kid will be the one to build a shed.

As the concrete was mixed it was poured into the frame over the white stones.

This process continued until the frame was filled with concrete.

Bag after bag, mix after mix.

Once all of the concrete was poured into the wooden frame it had to be spread out.

When the traditional way of spreading concrete doesn’t work fast enough, its okay to start a non-traditional way.
Next, the wet concrete is smoothed with a finishing trowel, and all the bumps removed.

Once smoothed out it just needs to dry. Make sure to spray the concrete with water occasionally to prevent it from cracking while drying.

Once dry, the wood frame was removed, pried off with a crowbar. Its job is done.

How to Frame a Shed – Building the Back Wall of the Shed
Step 5 – We bought the plans to build a shed from scratch online for a mere $14.99. You can find the plans to build a shed yourself online HERE.
Due to the fact that the back wall of the shed will be up against the fence, we decided to build that first.
Of course, we took another trip, yep, you guessed it. Layla was quite excited to get the wood because she has convinced herself that this is a playhouse for herself and her dolls. She expects it to be fully equipped with bunk beds and a place for her dresses. She also doesn’t want daddy to put his dirty tools in her playhouse. I think she and Brian need to work that out amongst themselves.

The first part in how to build a shed frame is the wood. The first wall was framed out using 2 x 4 pieces of wood. Our poor patio acted as a work area for building the shed, as did our entire yard really.
The detailed steps for how to frame shed walls will be in your specific DIY shed plans.

Once the frame was built the walls were attached. To build a wooden shed these walls are made of T111 siding panels.

Painting the Shed Walls
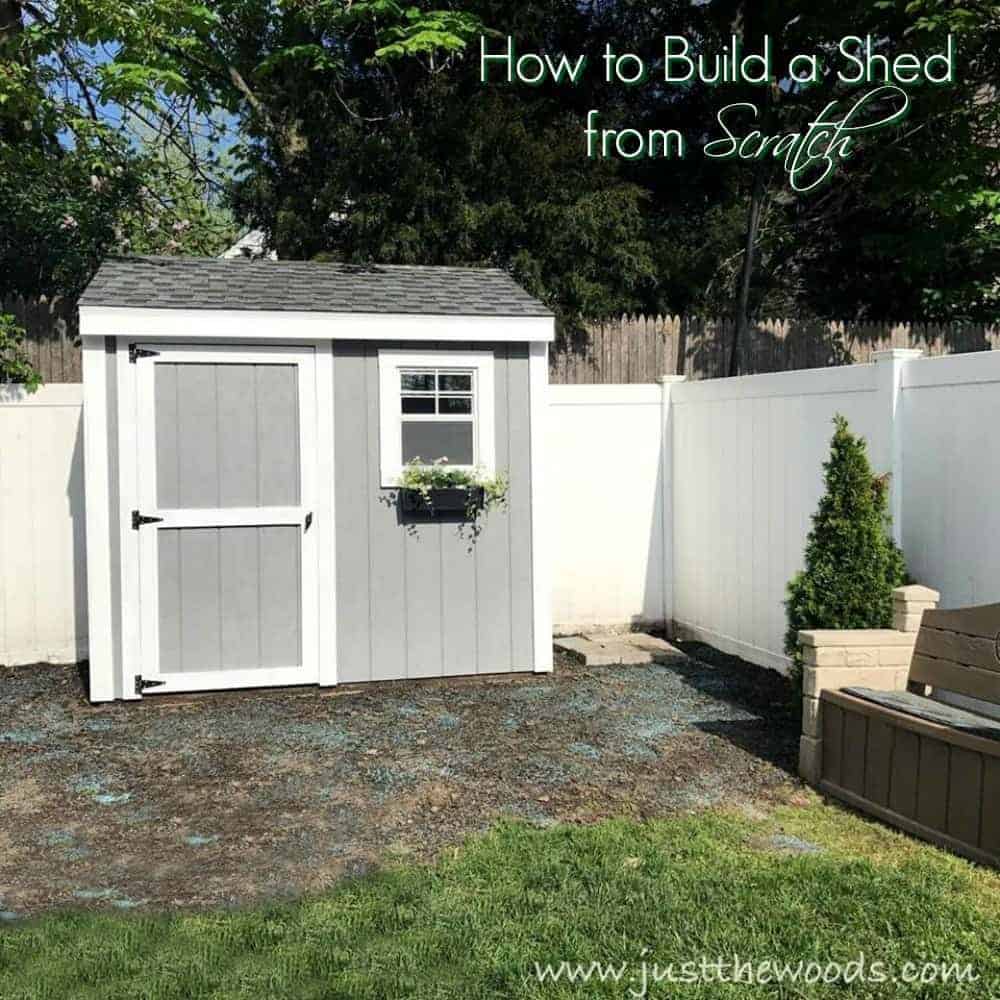
Step 6- Like I mentioned, the back wall won’t be accessible once it’s in place so we have to paint it first. We tried to color match with the vinyl siding on the house as close as possible and choose Behr Exterior Paint in a gray called Anonymous. (Third row down, second from the right).

We started off painting with brushes and rollers.

The kids were ecstatic that they were able to help paint. But if you look up ‘things not to let the kids help with’, I’m sure this image would come up:

There was paint everywhere. They stepped in the paint, fought over brushes, painted the dirt, and quit a few times in between. If you know anything about T111 then you know it’s not the easiest thing to paint either. So I decided to try something different. A paint sprayer!

After getting the majority of the back wall painted we decided to prop it up vertically and use the Home Right Finish Max Paint Sprayer to finish it up and touch up the spots we missed.

The sprayer is very easy to use, the kids even got to use it.

It really is this easy to use, and less messy – no one is stepping in the paint this way. You can get one HERE


With the wall vertical we were able to add the trim as well before installing the wall itself.

How to Anchor a Shed to a Concrete Slab – Anchoring Shed Walls to the Concrete Floor
Step 7 – The back wall is in place, and the front wall framed out. The front wall is framed to accommodate the door as well as a window.

Moving the finished back wall to the rear was a bit of a chore and included a few bad words between hubby and I. Usually, I’m yelling that I don’t have a full grip and he assures me that it’s fine when it’s not fine. But we managed, and we lived to tell about it.

A hammer drill is used to anchor all of the shed walls into the concrete.

This makes sure the entire shed is secure and stays in place.

Framing Shed Walls for the Rest of the Shed
Step 8- All of the walls were framed out using 2 x 4s and then pieced together.

For framing shed wall corners, the corner joints where the frame pieces meet are built to fit within each other for strength and security. Shed corner framing requires a little patience, and measuring to make sure the corners fit together nicely.

They all fit together like a jigsaw puzzle and then are nailed to one another.

Again, the sides are also anchored to the concrete floor using the hammer drill. Anchoring the shed is important and should be done to all four sides.

Adding Shed Walls to the Shed & Building a Shed Door
Step 9 – Once the entire frame is finished it’s time to add the walls. The T111 panels are cut and secured to the frame.

The shed door was framed out and built before being attached. In addition to the door, we also added a small window. The steps for how to make a shed door and window are laid out in the specific shed plans.

How to Build a Shed Roof – Building a Roof for the Shed
Step 10 – You can’t build a shed without a roof. Building shed rafters is the first step. The shed roof was framed with roof rafters to support the top. With the back of the shed being taller than the front, the rafters supplied the needed support for the roof.

The angled pieces were cut first followed by the front support piece.

Once the rafters were in place the DIY roof shed was added.

A fascia was added to the rooftop and sides.

Waterproofing a shed roof is necessary to keep your shed dry. The roof was waterproofed using 30 lb roofing felt.

After waterproofing the shed roof the shingles are added. The kids wanted to help again.

Eventually, the kids were kicked off the roof before any accidents happened.

Adding Trim and Finishing Touches
Nearing the end, FINALLY. Trim was added to the door, window and along the sides.

All of the nails were caulked over before finishing with paint.

The rest of the shed was painted, then painted again, then touched up before we finally said enough. There was actually a big fight debate over the order of things in this portion of the project. We butt heads on whether to build completely then paint, or build – add walls, paint walls, paint trim then add trim.

An adorable flower box was added under the window.

Lastly, we threw down some grass seed around the shed so that it will be surrounded by lush green grass and not soil. With all the rain we’ve been getting lately that should happen in no time.

In Conclusion on How to Build a Shed from Scratch
Is it hard to build a shed? Would we do it again? I won’t sugar coat it, this is real life so yes it was hard, and we would probably not do it again. It is completely Do-able thought if yoy want to take on this type of project.
For me, some things aren’t worth the aggravation or the stress. In the end, we didn’t save that much money by building the shed ourselves. I think the total cost was around $1200. But I can tell you one thing, if we are ever attacked by zombies or if there is an Armageddon I am hiding in the shed because the big bad wolf can huff and puff and nothing is taking this structure down.
If you do choose to build a shed from scratch then I highly recommend using downloadable shed plans, like these here: shed plans. I can’t imagine building a shed without plans.


After a couple of weeks, the grass has started coming in beautifully.

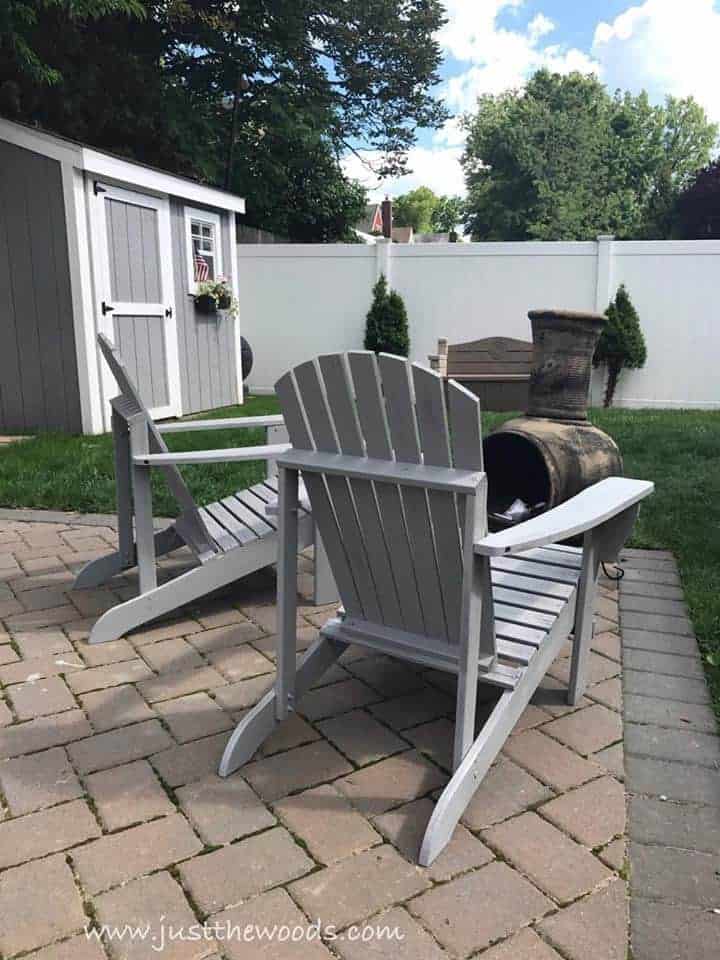
Once the shed was finished I decided to give my Adirondack chairs an update to match the shed. Check out the update here:
Painting Outdoor Adirondack Chairs with HomeRight
To see other joint effort DIY project between hubby and I check out:
Bursting with Color Living Room Makeover

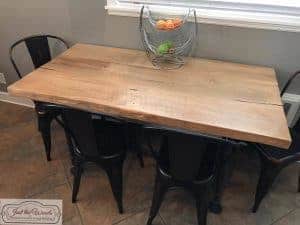
How to Build a Farmhouse Table With Reclaimed Barn Wood
I’ll be sharing this post at these fabulous link parties.
Don’t Forget – Follow Just the Woods and Share this post to Inspire others:
FACEBOOK * INSTAGRAM * PINTEREST


The amount of work you put into this is really admirable. We’ve never built a shed but, have definitely worked on our share of renovations that have tested us in every way. This turned out awesome and I loved seeing the process. Pinned & sharing!
thank you so much! to be honest, Im so glad its over lol
Talk about working around hurdles. It certainly is charming now that its done.
I also have a tiny yard and was attracted to your post as this little shed is just the right size, yet has style.
I love it. Pinning.
Wow! Even though it was a huge ordeal, the final result is amazing! We’ve been thinking about building a shed under our deck since nothing grows under there anyway. This size would be perfect!
thank you! Im so glad its over lol
You did a wonderful job. It looks so much better than the metal sheds you see around. And yes it can be stressful working with your spouse but you made it and the kids looked like they were having fun.
We’ve done a ton of big projects at my house and I have threatened to quit so many times. I agree with everything you said about working with your spouse. I like it when he’s helping me with a project, then he knows I’m the journeyman and he’s my apprentice 🙂
Love your cute shed! We’ve been contemplating getting a small storage shed too but decided it would be easier to buy one that the Amish have built and have them deliver it. And we’re not that mechanically inclined either – LOL!! Have you thought about getting any chickens for it?
Wow! Although I am sure a huge project like this is stressful, it sure turned out to look amazing. Thank you for linking up with us at the #HomeMattersParty this week.
Do you happen to have the blueprint? We would LOVE to do this exact shed at our house.
Diana, I actually have the link in the post where we got the plans for the shed ourselves. I think we only paid around $14 for them 🙂 Let me know if you cant find them and I can send them to you directly
I hope you don’t mind me asking as I am looking to for an outside small office to take calls in. This seems like if would work for a small desk and chair. Can you tell me about how much it will cost to build one. Thanks in advance!
hi. I included a link to the site where we obtained the plans for the shed. You would have to check there to see which one you would want to go with
Hi, I’m strongly considering building a shed myself. I’m fairly handy and looking to save thousands from the prefabs.
I love the look of your shed; it’s a fantastic job! Since it’s been a couple of years, I’m curious to see how it’s been holding up. I’m concerned about paint not being able to hold up from weather. Have you considered siding and other waterproofing options? Thanks again!
hi! The shed is holding up great to be honest! I would do it the same again if I had to. The paint looks great, (a little dirty since its January lol) but otherwise great! Good luck with your project!
Beautiful shed! Well done. We are having an Amish-built shed installed this summer and are looking for color ideas. I was immediately drawn to your colors and appreciate your listing the gray paint info. Can you please tell me the white paint color you used on the trim? Thanks so much.
Thank you so much! Its been a few years since this project. Im going to assume that we used a basic white trim paint, or an outdoor white trim paint. I don’t think there was anything really special about the white. 🙂