How to Blend & Layer Paint for Amazing Results on your painted furniture projects. Learn the furniture painting technique of blending and layering multiple colors while painting furniture to achieve a gorgeous finish. The layered painting technique is truly one of a kind.
Blending and layering paint on furniture can be achieved in a few different ways. The great thing is that there really is no right or wrong way when it comes to painting furniture. Everyone has their own creative style which makes each makeover truly unique. There is the dry brush method, and then there is this method. This method to layer paint is more of a wet layering method and also one of my all-time favorites.

Disclosure: This post contains affiliate links for your convenience and I may be compensated if you make a purchase after clicking on my links. Click here for my full disclosure policy.

How to Layer Paint on Furniture
Materials Needed / Source List
- Cling On Paint Brush
- Wooster Angled Brush
- Flexible Sandpaper
- Shop Vac
- Find all of my favorite tools and products on my Amazon Page here
Unfinished Vintage Buffet
This post will walk you through a general idea of this technique with the option to purchase an hour-long detailed tutorial video at the end of the post.
This vintage buffet is full of ornate details and is the kind of furniture that looks great painted. It will also be a copycat makeover of a popular finish I completed on a smaller ornate cabinet using the blending and layering paint technique.

My customer sent me the photo of the piece I had painted and asked for the same to be done to her buffet. This is the finish that she wants. Painted Layers

I’m giddy at the request. I let my customer know that I can copy the same process as well as colors, but when you paint in layers, especially as many layers that are on this piece there is no guarantee to get the same exact result. Which is a good thing, because who wants the same thing as the next person?
Prepping Furniture to Paint
As usual, the buffet is thoroughly sanded, cleaned and prepped the same as each and every piece that comes in for a makeover. This is how I prep painted furniture. The drawers are removed and labeled with chalk.

The hardware is removed. A little trick to make sure you can still open the doors is to stick a long screw through the hardware hole that you can grab to open the door.

Make sure to tape the screw in place on the inside so that it doesn’t push through and fall out inside the cabinet. That would defeat the purpose. 😉

Sand and clean the entire buffet.

Painting a Base Coat Before you Layer Paint
Now its time to get down to business. I prefer to use a leftover custom mix as a base coat when I’m layering paint. The base coat normally won’t be seen by the end of the layering process, but still provides a nice solid coverage, to begin with. This purple gray base coat is actually the remainder of paint from my living room china cabinet. You can see my gorgeous china cabinet here: Painted China Cabinet

Since we plan to layer paint on this buffet you should be fine with only one coat as a base coat. Of course, that is depending on what color paint you use, and how well it covers. In this case, one coat will do!
Click here to Pin this post for later.
How to Add Multiple Layers of Paint to Furniture
Copying the same process as in the previous layered paint makeover we add a coat of blue.

After the initial blue, add your second layer of paint. In this layered painting technique, the next layer is metallic silver.

On to the third paint layer. The next layer of paint is a bold teal.

Next, we see-saw from dark to light and add a lighter blue.

After the light blue, we revert back to a dark and add a royal/navy blue paint layer.

Blending the Layered Paint Finish
Your piece of painted furniture, now with six layers of paint on it may appear blotchy. We need to create a blended appearance to these painted layers. To do this we will go over the layered paint with a soft wash.

After the wash, you can distress the entire piece of painted furniture with sandpaper. Make sure to only distress the raised edges and where the piece would naturally wear over time. Also, lightly sand the flat surfaces with a fine grit sandpaper for a smooth finish.
Click here to Pin this post for later

Sealing Layered Painted Furniture
Since the protective sealer can also be considered a paint layer I’m adding this here and will come back to the hardware. The blue painted buffet is sealed using a gray tinted sealer rather than clear. The gray protective glaze adds a bit more depth to the final color.

Here is a full tutorial with VIDEO showing how I seal my painted furniture projects: Sealing Painted Furniture

Painting the Vintage Hardware
Since the vintage hardware is perfect for the buffet there is no reason to replace it. We can easily change the color to make it compliment the painted finish. First, make sure to clean the hardware to remove any grime or dirt that may build up over time. This is how I clean, prep & paint hardware.

The hardware is then painted with Slate and sealed with a combination of silver and onyx metallic hardware opulence. The same metallic combo can be seen on this Metallic Painted Table.

Make sure to keep your nice clothes clean and show off what you love at the same time. These DIY shirts are perfect for any furniture painter, and creative DIYer.

Blend & Layer Paint for Amazing Results
Did you count how many layers? There are a total of 8 different layers of paint on this makeover. Technically, 9 if you count the second coat of protective sealer. But EIGHT different shades of paint, wash, glaze, etc.

Check out all of my furniture projects with over 90 painted furniture makeovers: Stunning painted furniture ideas.

Click here to Pin this post for later

The entire process of how to blend and layer paint for this project is also available in a full one-hour long video tutorial. If you feel you need more details or would like to see the layered painting process as it happens, you can purchase the video and watch as I walk you through all the layers and share tips as I go here: Blend & Layering Paint Video Tutorial (after purchase, the video link will be emailed to you)

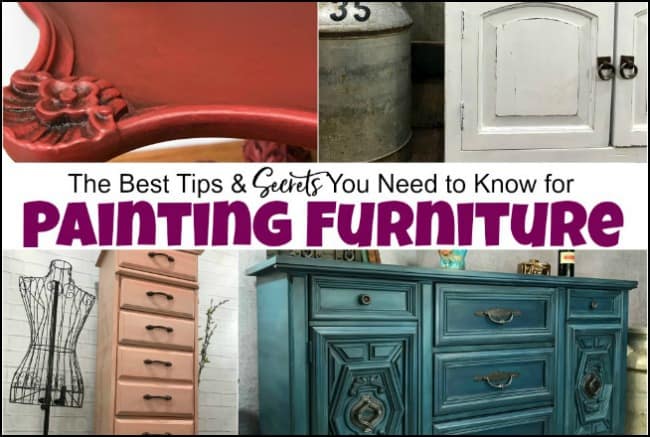
If you like this post make sure to check out all of the tips & secrets that I wish someone told me when I started painting furniture here: Painting Furniture Secrets

Don’t Forget – Follow Just the Woods and Share this post to Inspire others:
FACEBOOK * INSTAGRAM * PINTEREST


Leslie says
Do you let each layer dry slightly before you paint on the next or do you keep each layer wet before applying the next layer? Thanks!
kandice kullmann says
by the time I get to the next coat, the previous coat was already dry 🙂
Katie says
What do you mean by soft wash? I assume a form of color wash. This piece is gorgeous, very inspirational. Thank u for sharing!
kandice kullmann says
yes, basically just a wash. 🙂 I have another tutorial on applying a wash in case you may want to check it out: https://www.justthewoods.com/whitewash-wood-furniture/
Lorie says
I think I let my blended paint color get a little to dry while blending and it peeled!! Is there anyway to salvage it without starting over?
kandice kullmann says
mAybe try adding paint And blend back in where it got messed up