How to Whitewash Wood Furniture for Breathtaking Results
White wash paint on furniture is amazing. I don’t know why I waited so long to whitewash wood furniture. For some odd reason, it’s just not something that has come up. Until now.
To be honest, I use the whitewashing technique over painted furniture all the time. But this is the first time that I will show you how to whitewash furniture that has not been painted.
And let me tell you that now I want to white wash wood whether painted or now. Whitewash all the things!

This step by step tutorial will show you how to white wash furniture using whitewash paint, then sealing your whitewashed furniture makeover to preserve and protect your project.
Supplies & Tools Needed to Whitewash Furniture
To whitewash furniture you will need a handful of supplies. This makeover using a whitewash paint technique will make it appear like we use a white wash stain. That’s the incredible thing about whitewashing furniture. There I often more than one method to create a whitewashed furniture look.
Disclosure: This post contains affiliate links for your convenience. Click here for my full disclosure policy
- Tools
- Zibra Paint Brushes or Cling On Brushes
- Furniture Tri Wheelies
- Sandpaper
- Rolgear screwdriver
- Cutting Mat
- Spray Adhesive
- Wall Paper Liner
- Shop-Vac
- Lint Free Cloth
- Find all of my favorite tools and products on my Amazon Page here
- Paint
Before we begin, this how to whitewash wood furniture project is part of our monthly Furniture Fixer Uppers share. You know what that means! Make sure to stick around all the way to the end for more great painted furniture before and after projects.
Check out all of my furniture projects with over 90 painted furniture makeovers: Stunning painted furniture ideas.
Unfinished Wooden Chest
This cute little wooden chest is more of a nightstand I suppose. It looks like it has 3 drawers, but in fact, only has two. This little chest is in very nice shape, it is made of wood but is rather plain in my opinion.

As usual, the first thing to do is pop this little chest up onto my furniture wheelies. These make it easy to move the piece around while you work. You can get them online HERE. Next, we will need to pull out the drawers and remove the hardware. I am using my ratchet screwdriver with exchangeable bits.

Since we are not replacing the hardware (there is no need to) make sure to place all of the pieces and screws somewhere safe. You don’t want to lose any important parts. 😉

Now that the hardware is taken off we can remove the drawers and start to prep this piece for its whitewash makeover. At this point, you will also want to check inside and wipe out any dust that may be hiding behind and under the drawers.

How to Prep Wood for Whitewash
You may or may not be surprised to know that when you want to know how to whitewash over stained wood, whether the stain is new or old you still need to prep. Keep in mind when you whitewash over bare wood the wash will easily absorb into the wood much easier. Since this piece has an existing finish on it I want to give it a little bit to grab on to, just like when we paint. I hope that makes sense.
Just like when we prep for painting furniture we will grab our sandpaper. The 150 grit tends to be a nice ‘go-to’. It’s rough enough to scuff the surface but not so rough as to scratch it up.

Working in the same direction as the grain go ahead and lightly sand the entire surface of your piece of furniture.

By the time you finish, you should have a bit of a dusty piece of furniture. Personally, I feel like if I don’t have a bunch of dust then I didn’t do a good enough job.

Now we need to clean up the dust and finish cleaning the wood furniture. Just like when we prep furniture for paint, we need to thoroughly clean the surface.

Lastly, give your piece of wood furniture a once over with a clean, damp cloth to remove any remaining residue.

What is Whitewashing? What Does it Mean to Whitewash Furniture?
Basically, when you whitewash furniture you are creating an appearance of weathered wood. Another way to think of it is that it looks somewhat like whitewash wood stain is applied over your piece of furniture. The great thing about this furniture painting technique is that you can change the look of your whitewashed furniture each and every time you create a new project.
How to Whitewash Furniture with Paint
Even though this finish gives off the look of white stain I’m going to share how to whitewash furniture with paint. For this project, we are using Fluff by Dixie Belle. It is a pretty soft white chalk mineral paint. You can get some online HERE.
This paint is so versatile, this same color is the base color on a table makeover project with wood stain tops and white painted bottoms (you can see that project here: How to Apply Wood Stain).

How to Make White Wash Paint
To make our whitewash paint we will need to get a clean container or cup. I like to keep a package of plastic cups in my shop (and plastic spoons, and paper plates). First, give your paint a good stir.

Next, you will need to scoop some of your paint into a container or cup. We don’t want to work from the original container for this.

Now slowly add water into your white wood paint. Stir your water and paint as you go. (Don’t judge my messy workshop paint sink. LOL.)

I aim for roughly a 1:1 ratio of water to paint. But you can play around with whatever consistency you are comfortable with. The more paint the darker the whitewash, the more water the lighter the whitewash. That is only one factor in our whitewashing furniture. If you feel the whitewash paint is too watery you can add a bit more paint. But don’t overthink this 😉

Click HERE to pin this post for later.
How to Whitewash Furniture
Now, grab your favorite brush and make sure it’s clean. I am using my flat Cling On brush, but like to swap back and forth between Cling Ons and Zibra brushes. They both have soft bristles, are easy to work with and clean up well. (I abuse my brushes) To be honest, I like them both. Zibra brushes are a bit more affordable and can be ordered online (HERE). Cling Ons can be ordered online (HERE).

With your brush, apply your whitewash paint to your piece. Make sure to work in sections. For example, do one drawer at a time. Do not cover the entire piece at once. You will regret it.
Also, since the diluted paint is quite watery don’t worry when your paint doesn’t look so great with this first application. You may very well end up with things like:
- watery drips
- uneven brush strokes
- missed spots

Believe it or not, this is ok. This is not ok when painting furniture in the traditional way that we normally do, but it is ok when whitewashing furniture.
To remedy this, and make it all better you want to grab a clean dry cloth. I am using an old T-shirt this time. Before the watered down white wood paint gets a chance to dry you will need to wipe the paint off of the piece. It sits just long enough to creep into the wood grain but not long enough for full coverage.

Video Tutorial for How to Whitewash Wood Furniture
You know I always like to give you a bit of a video tutorial when I can. This one is short and sweet, but I show you how to whitewash furniture by applying the whitewash on a drawer so you can see how easy it is. But you do need to work quickly (or at least I feel like I do).
Results After the First Whitewash Paint Application
The beauty of this weathered wood finish is that you can truly embrace any imperfections that your piece of furniture may or may not have. The first coat of whitewash creates a soft rustic white wash wood stain look. It has a bit of farmhouse and a bit of beachy. But I think we are going to do it again!

The first go around left more of a gray wood stain appearance, which is beautiful, but I want a bit more white. I also feel that there are a few spots where I am not completely happy with the way the whitewash is sitting on the grain.
Just like with paint, I want to give this little white wash dresser chest a second coat. So, grab your sanding block and finer grit sandpaper. I am using 220 grit and giving a quick once over light sanding before we apply again.

As always, when we sand at all, go back and give a quick wipe down with a lint-free cloth to remove any dust that we create. I keep a stash of these cloths in my shop and toss them in the wash after each project. You can get them online HERE.

Even before we apply a second coat of whitewash to the wooden chest you can already see where the white paint sits in the wood grain and the creases of the piece creating a weathered wood appearance.

Click HERE to pin this post for later.
How to White Wash Wood Furniture – Second Coat
Remember, I mentioned work in sections? Well, the same still applies for the second coat. For larger areas, you can do a little at a time, like here: I don’t even cover the whole top at once. Take a small area at a time, but make sure to cover the full length (side to side).

Next, grab your *clean* old T-shirt (or rag) and carefully wipe away your whitewash paint again. Make sure to work in the direction as the grain and mind the edges. There’s nothing more annoying than the shirt getting caught on the edge of the table when you are trying to wipe it away and make it look pretty.

You can see a clear difference between the first and second layer of whitewash.

Moving along, still quickly, because you want to continue to work to make sure the sections all blend together nicely.

Be mindful of the edge/sides. Because we are working with very wet paint you can bring your paint near the edge but not all the way to it. When you wipe with your cloth you will easily be able to drag the whitewash all the way to the edge. I try to avoid having to deal with a pool of white paint on the edges.

Once you finish applying the second coat your piece will be a bit more white than before but still have that weathered wood look.

Sealing Your Weathered Wood Whitewashed Furniture Finish
Yes, we do need to seal out whitewashed furniture. Similarly to when we are painting furniture white, I am breaking out the white wash glaze to add to my clear sealer. With white painted furniture I like to add a little white paint to the sealer, so naturally, with white wash I am adding white was glaze to the sealer.
This white was glaze works beautifully to add a soft white wash over painted furniture as well. You can see where I use it and how to whitewash painted furniture where a similar wash is applied over a painted lingerie chest to soften the finish. See that project here: Painted Lingerie Chest. You can find this white wash glaze online HERE.

I am adding this white wash glaze in with my clear sealer.

So go ahead and spoon a little of each on a paper plate and give it a stir. In case you are wondering “what is this crazy chick doing? why is she adding white wash glaze to her sealer?” Well, to be honest, I feel like any areas left that where the whitewash may be a bit uneven – this will tie it all together. Put it this way, it won’t hurt.

Now go ahead and grab your yellow sponge. I love these things for sealer, glazes, stain, etc. You can grab some online HERE.

Apply your sealer to your piece of whitewashed furniture the same way you would seal your painted furniture.

Click HERE to pin this post for later.
If you ever have questions about sealing your furniture makeover project you can find a full tutorial with video on how to apply clear sealer here: Sealing Painted Furniture

Whitewashing Hardware
Now that we have this great whitewash weathered finish on the chest we have to do something about that hardware, right? There really is no reason to replace it but its a bit too dark for the new lighter finish. Let’s whitewash it!
Make sure to clean the hardware of dirt and grime. If it’s really gross, this is my method for cleaning hardware here: How to Clean Hardware.

Now that the hardware is clean I am following a very similar method on the hardware as on the furniture. Paint the hardware with slightly diluted white fluff paint. I know it looks pretty messy and bad here.

But, don’t worry, we aren’t leaving it like that. Now, while the paint is still rather wet, use a clean dry brush (like a chip brush) to brush away most of the paint.

Complete this for all of the hardware and follow up with the same sealer as on the chest.

This process tones down the darkness of the hardware and pairs perfectly with the weathered wood finish.

Adding Liner in the Drawers
We aren’t finished yet. We may have a beautiful weathered wood look on the outside with our whitewash finish but inside the drawers are less than. I’m not sure what they are less than, but they just don’t meet the same level of pretty that is on the outside.

Often, I will freshen up the inside of the drawers with a furniture salve. But these drawers aren’t a good candidate. There are a few pencil drawings and markings inside that I would much rather cover than preserve.
With that in mind, I also don’t want the inside of the drawers to distract from the pretty whitewashed wood on the outside. I’m using this very neutral and simple wallpaper that I have in my shop. This paper has literally been in my shop, untouched, for a few years. But you can find great wallpaper options for lining drawers online HERE.

Aside from your liner of choice, you will need just a few things to make the drawers pretty:
- measuring tape
- cutting mat
- Exacto blade
- spray adhesive
Cutting Liner to Fit the Drawers
First, you will need to measure the inside of the drawer to see the size of the liner that you need to cut. You want it to fit as perfectly as possible. Then grab your supplies and make sure you have a sharp blade in your Exacto knife. I have these that I got online, it comes with a bunch of extra blades which is nice.

Trim your wallpaper to size using the cutting mat and ruler.

Place your liner in the drawer to make sure it fits nicely. Trim as needed. Once you are satisfied with the fit we can move on. Before you grab your spray adhesive make sure to clean the inside of the drawers. This step is often done with the original cleaning and prepping of the piece. But I am mentioning it again, just in case.
Now, go ahead and grab your spray adhesive. This extra strong spray adhesive is SUPER sticky- wear gloves if you don’t want sticky fingers for hours after you finish! You can get it online HERE.

Carefully, lightly spray the back of the wallpaper liner. This step may take a little patience to spray the adhesive while preventing the paper from curling up (since it’s been in a roll for the past however long).

Next, gently place the wallpaper liner into the inside of the drawer. Do not fully press down until you are certain that the paper is in place and not crooked or creeping up too much on one side.

Repeat for all drawers.

I really love the simple and neutral look of the paper. Some projects call for the inside of the drawers to pop and stand out, while others really call for simplicity.

FAQs
Do you have any of these questions:
- can you whitewash over stain
- how to whitewash stained wood
- how to whitewash furniture that is already stained
- how to whitewash dark stained wood furniture
- can you stain over whitewash
- any other questions relating to combining furniture stain with whitewashing
If you have any of the above questions then I direct you to a Lane cedar chest makeover project where the body is painted white, but the top is both stained and whitewashed. Find the tutorial here: Lane chest makeover.
How to Whitewash Furniture for a Weathered Wood Finish
We are finally finished with our how to whitewash tutorial. I don’t know about you but now I want to whitewash everything!

This project, like many of my makeovers, has been donated to a local school to help with their fundraising efforts. Click here to see all of my projects that have been donated to support local fundraisers, schools, and charities: Donation Projects.

Check out all of my furniture projects with over 90 painted furniture makeovers: Stunning painted furniture ideas.

Click HERE to pin this post for later.


Prefer a white wash wood stain combo? You need to see the farmhouse finish on this Lane Cedar Chest Makeover.


Grab any of the products used for this project as well as many others online HERE.

Furniture Fixer-Uppers
Its that time again where a few of my creative and talented blogger friends and I have joined together in our monthly Furniture Fixer Uppers share. Let’s see what my friends are up to! Make sure to click the links below the image to check out all the amazing projects that my bloggy girls are working on this month.
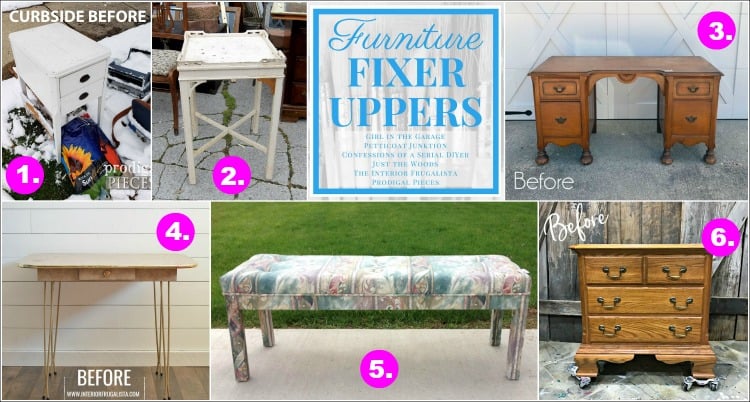
- 1. Prodigal Pieces
- 2. Petticoat Junktion
- 3. Confessions of a Serial DIYer
- 4. Interior Frugalista
- 5. Girl in the Garage
- 6. Just the Woods (you are here)

Don’t Forget – Follow Just the Woods and Share this post to Inspire others:

FACEBOOK * INSTAGRAM * PINTEREST

Click HERE to pin this post for later.


Beautiful, Kandice. I adore how whitewash allows wood grain to peek through.
This is one of my favorite looks for furniture and you did a beautiful job on this piece! I had to chuckle at the first photo and the thought of you on your belly on the floor getting that shot ha ha! It’s a good one though! 🙂 XOXO
Love the whitewash look on wood furniture and what a difference it made to this nightstand! Excellent tutorial too 🙂
The whitewash REALLY updated this nightstand…beautiful! Pinned! And btw… you should see MY work sink… 😉
It turned out beautiful Kandice and your tutorial is so detailed even a bumpkin like me can follow it.
Such a pretty new look, Kandice! (I was also imagining you laying on the floor taking a few of those photos! LOL) I really like the drawer liners too. xo
I have that exact same chest. It’s going to get a whitewash. It needs one!
Thanks for the inspiration!
What a beautiful soft new look! I am sure it will be a huge hit for the fund raiser!!!
Kandice, you write and photograph a mean tutorial! Over and above the success of your project your directions are very clear and complete and extremely well illustrated with your photo images. Very easy to follow each step in the process. I appreciate the significant amount of time you take to do such clear and complete instructions. They are some of the best I encounter in the blogs I read. Which are quite a few. Thanks so much!
thank you so much! (I try) xoxo
Have you ever done a white wash with white paint and mineral spirits? I did one years ago and I love how it turned out.
sounds cool. I haven’t tried that one
Hello
Thank you for the instructive and clear tutorial 🙂
In the picture, you show the paint material and I saw that you use “chalk mineral paint”.
Do I need this typo of paint or I can use another paint for woods?
Thank you, in advance.
hi! I can only suggest what I know from my experience. This is the paint that I used in the project. Im not sure how another paint would work or how it would come out. You can always give it a try and see what happens. 🙂
I have been looking for a tutorial that covers this exact topic! I just stripped and restained a cherry end table (used English Chestnut stain) and want to give it a whitewash finish. I bought DB pickling stain, but wasn’t happy with the results when I tried it on the underside. I’m a little afraid of using paint (it’s an expensive piece I inherited from my parents) and was going to try the DB whitewash glaze. You’ve given me confidence to try your approach — your result it stunning!