Custom Painted Cranberry Credenza
Painted Cranberry Credenza
 Materials Needed
Staging / Home Decor
Unfinished MCM vintage buffet
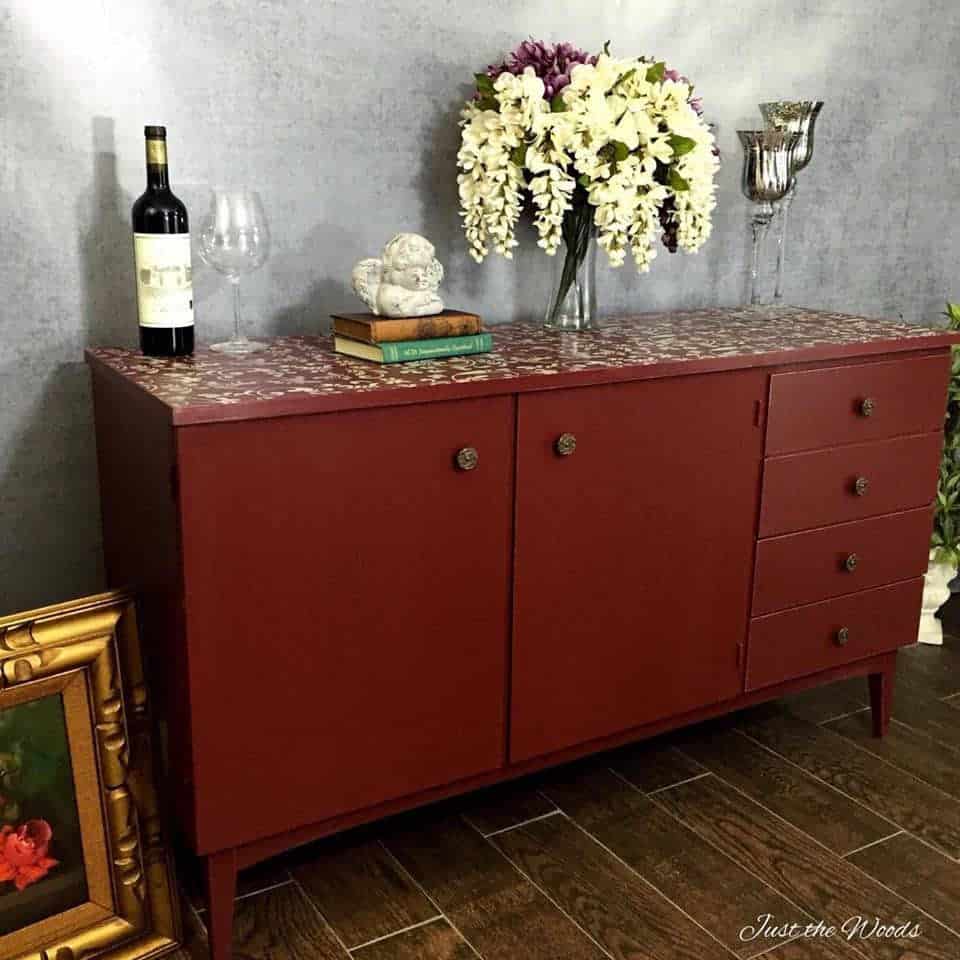
Whether you call this a credenza, a buffet or a sideboard, it’s vintage, solid wood construction and shiny. It also belonged to my customer’s mother’s mother, otherwise known as grandmother and was brought into my shop with the invitation for me to do whatever I please with it. I love a customer who is willing to give up control and let me have my way with their furniture. With that said, I do still prefer to do a little review and have somewhat of a design plan; even if it is a loose design plan. So, after we chatted about her decor we decided on a deep cranberry red with a neutral taupe stencil on top.

Prepping Shiny Veneer
This vintage credenza is made of solid wood construction, but like many pieces from its time period, it is covered in a very shiny veneer or laminate. Some would question if paint will stick to such a shiny and sleek surface. The answer is “yes, with the proper prep it will”. The entire surface was hand sanded with a rough 80 grit sandpaper to rough up the smooth surface and give some tooth to the piece. Make sure to sand in the direction that you will paint, do not sand all willy nilly in different directions because you risk the sanding marks showing through your paint since essentially you are scratching the surface. After sanding, the piece was thoroughly cleaned as any other piece getting a makeover would be. This is my full process for How to Prep Painted Furniture.
My Own Two Cents
My customer did say that if I have another idea for the piece, to just go ahead and do it. I don’t even need to run it past her, so I made the decision to add an additional, yet very subtle touch. The edges of the piece were painted in a neutral taupe. The reason for this added layer of taupe is to allow bits of taupe to peek through when it’s distressed. Basically, when the edges are distressed you will see a bit of the taupe rather than just the original wood surface underneath.

You can find great quality furniture paint and stain online HERE. An added bonus, when painting furniture, you want to make sure to use a quality non-toxic furniture paint.

If you are just starting out you can always start at the beginning with How to Paint Furniture – a Beginners Guide

Painting a Cranberry Credenza
The entire piece was hand-painted in a deep cranberry red. In between coats I lightly sanded with 220 grit sandpaper. Because of the original shiny surface of this piece I felt the extra step of sanding between coats would help with adhesion. A second coat was applied next followed by a light wet sanding using flexible sandpaper. The light sanding using this method allowed me to distress the edges revealing a subtle taupe underneath.
Adding Stencil to the Top of a Painted Buffet
A beautiful floral stencil design was added to the entire top of the credenza in neutral taupe. Then the top was lightly sanded to get a smooth finish before being sealed for protection.
Love stencils? Looking for fabulous stencils? Click to find an amazing selection of stencils for your DIY projects: Show me Stencils!

Painting the Original Hardware
By simply cleaning and painting the original hardware in metallic bronze, I was able to bring out the very pretty details of the knobs and keep the hardware with the piece. You can see my tutorial on how to clean, prep and paint hardware.
Finally, a mix of both satin and matte protective sealer were used to seal the entire piece for protection. The combo of both clear sealers were used for no reason other than I couldn’t decide if I wanted satin or matte. Therefore, rather than choose one, I mixed them both together.
Painted Cranberry Credenza
This painted cranberry credenza is now ready to head back home where it will become the new media console. I am always grateful for a customer who trusts me enough to let me have a little creative freedom.


If you love stenciled furniture make sure to check out:
Stenciled Painted Furniture Projects 
Don’t Forget – Follow Just the Woods and Share this post to inspire others:
FACEBOOK * INSTAGRAM * PINTEREST
Subscribe to our mailing list here: [mc4wp_form id=”1340″]
PINTEREST PIN READY TO SHARE


Absolutely beautiful. I love the deep cranberry color and the gorgeous stencil. Thank you so much for sharing at Vintage Charm.
thank you so much Sharon
What a transformation!!! I am so envious of people’s stenciling skills (stencils hate me, lol!!) Thank you for sharing at TaDa Thursday!!
thank you! Stencils hate me too.. we have a love/hate thing going on 🙂
I love the buffet but you are not my favorite person right now….getting, “cranberry beret” stuck in my head on a Tuesday morning!!!!!!! Now I will be singing all night!
OMG Jennifer, I almost spit my coffee out as I read your comment! thank you! hehe
Gorgeous renovation. Thank you for step by step instructions.
thank you so much!! xoxo
What a beautiful job you did! I thought the top was granite at first. Love the bits of taupe peeking through too.
thank you Florence!!
My favorite part of this piece is the use of your stencil! It adds such an unexpected touch and just gives a rather dull piece a true significance in a room.
thank you so much! its such a flat piece, it definitely needed something extra 🙂
Kandice, this piece is sooooo beautiful!! Love the deep, rich, cranberry color, and the floral stencil is lovely!! I’m sure your client is very pleased with the new look of her grandmother’s credenza.
thank you so much! I hadnt used cranberry in ages and then got to use it twice back to back. I love the color too
Beautiful job, as always. Love the cranberry. It is rich and unique. And of course the stencil is to die for. Thanks so much for linking to Friday’s Furniture Fix. We love having you share with us. Susie from The Chelsea Project
You did an outstanding job on the credenza. Love the stencil. I will be featuring this at my Sizzle into Summer party that opens tonight at 8pm EST. Please stop by and pick up an I’ve Been Featured button. Thanks. http://diybydesign.blogspot.com
awesome! thank you so much Judy!