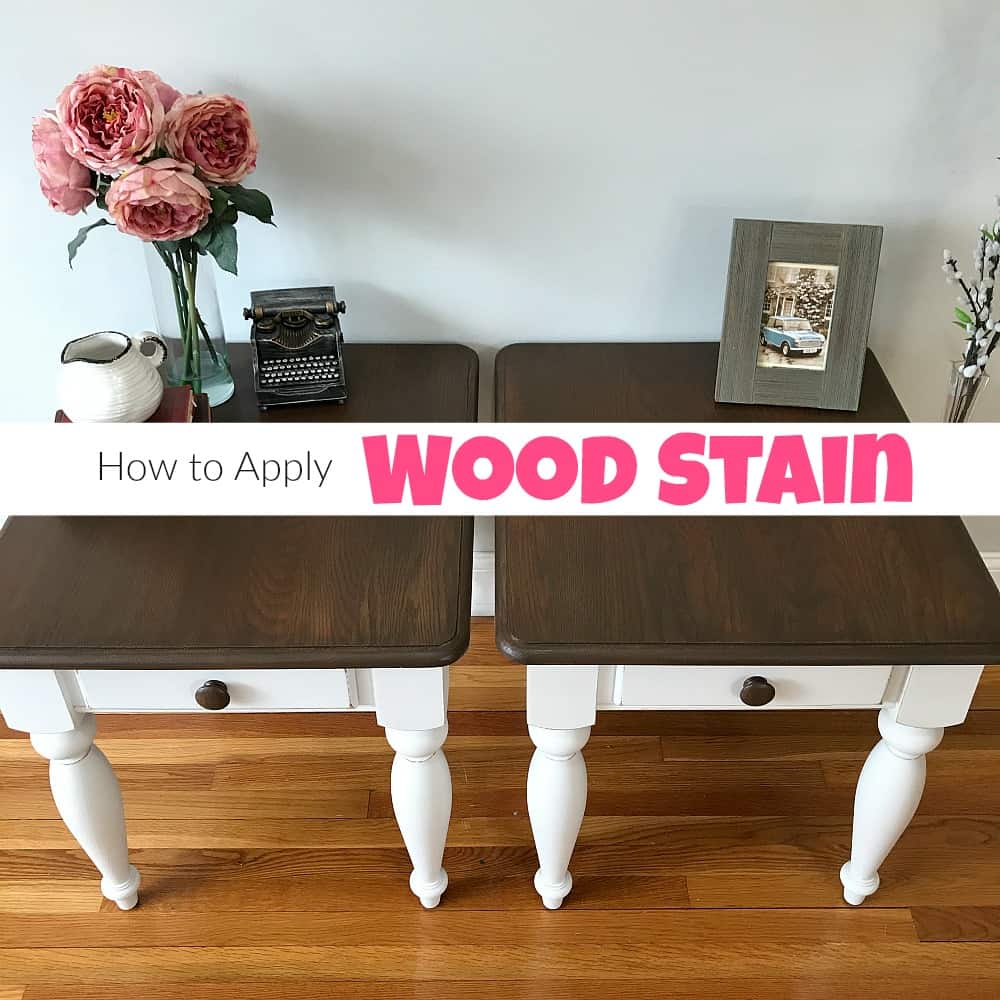
How to Apply Wood Stain for an Amazing Table Refinish
Wood stain can feel intimidating at times. There are so many wood stain colors, which can become overwhelming when you just want to know how to refinish a table with the perfect color combinations. If you are refinishing a table with a wood stain and paint combo then this is the easiest method to get the quality results you are looking for.

Disclosure: This wood stain and painted furniture post contains affiliate links for your convenience. Click here for my full disclosure policy.

Supplies & Tools Needed to Apply Furniture Stain to Painted Furniture
Before we begin, this wooden furniture makeover project is part of our monthly Furniture Fixer Uppers share. You know what that means! Make sure to stick around all the way to the end for more great painted furniture before and after projects.
Materials Needed / Source List:
Tools
- Zibra Paint Brushes
- Furniture Tri Wheelies
- Sandpaper
- Electric Sander
- Shop-Vac
- Lint Free Cloth
- Find all of my favorite tools and products on my Amazon Page here
Paint
Unfinished Wooden Tables
It’s not often that I do custom anymore, but these wooden tables are just so cute. Initially, from the photos, it was a little unclear if the tables are all wood or wood with veneer. But luckily they are in fact all wood. Which is perfect because I simply can’t really show you how to refinish a wood table if it wasn’t actually wood right? I feel like that statement is similar to the “how much wood could a woodchuck chuck if a woodchuck could chuck wood” jingle. Or not. Moving on. 🙂

The first thing we are going to do is pop some furniture wheelies under each table leg. These allow for easy maneuverability of furniture while we work. If you don’t already have furniture wheelies, you can get them online HERE.

As you can see the tables are not in bad shape at all. They do not need any repairs (woohoo) and just have the standard wear from normal use. There is a gorgeous wood grain pattern to the table tops too. The owner let me know right away that she wants a furniture wood stain on the tops with an off white furniture paint on the rest.

Prepping a Table for Wood Stain
We always have to prep. No matter what anyone says, prep is key! When you want to know how to stain wood I will always suggest working with bare wood over anything else. With that being said, we need to remove the existing finish off of the wooden furniture that we are working on. To do this you need to grab a few things:

Since my shop is in my basement and its a bit too cold to sand outside I am sanding indoors. Yep, you read that correctly! I do have a little trick for sanding indoors. You can attach the hose to your orbital and sand indoors without making a huge mess. For a video to see this in action, check out Secrets & Tips for Painting Furniture.

Sanding Wood Furniture
When sanding stained wood to remove the old finish, make sure to work your sander in the same direction as the wood grain. Don’t sand your wood furniture all willy nilly.

If you have an edge or lip to your tabletop make sure to carefully sand around the edge as well. This may take a little patience, but it is do-able.

You can see such a difference between the original and the sanded table tops.

Also, if you are not replacing the hardware go ahead and give the wooden knobs a quick sanding as well to remove the original finish.

Continue on and thoroughly sand both table tops to remove the finish. Your tabletops will be a bit rough to the touch. To create a smoother feel you will need to go back over the tops with the finer grit sandpaper disc to create a smoother finish. (Is ‘smoother’ even a word?) I use a 150 grit for the second go around.

Prepping Wooden Furniture for Paint
Now that the tops of the tables are sanded we also need to prep the rest of the tables for paint. Grab your sandpaper again and give the rest of the tables a scuff. I am using both 150 grit and 80 grit for this step.

Make sure to scuff the rounded legs as well.

Once your table has a decent scuff, go ahead and make sure to clean the surface to remove any dirt and dust. You can also find a full tutorial on prepping furniture for paint here: How to Prep Painted Furniture.

Don’t forget to get the sanding dust from the table tops too. For the tops, I just wipe with a clean damp cloth to remove any excess sanding dust before we begin applying wood stain.

Click HERE to Pin this post for later.
Priming Painted Furniture Before Paint
Now that our tables are all prepped and ready for wood stain and paint we can get going with this table refinishing project. Remember, I mentioned that the customer asked for a wood stain to be applied on top with furniture paint on the rest? Well, she wants off white furniture paint. When painting furniture white there are a few steps I always like to take. For starters, I like to use a type of primer to block any possible stains or bleed through. To do this, I am using BOSS from Dixie Belle. You can get this product online HERE.

Here is an example of why I am using this first. There are at least one or more dark marks in the wood. Here is one on the leg, and it normally wouldn’t be an issue. If we were painting these tables black it wouldn’t be an issue at all. But, since we are painting these table legs white we don’t want to take a chance of the dark spot showing through the white paint. BOSS will block the stain and prevent bleed through of the dark color in the wood.

Grab a brush and apply your stain blocker. I am using my flat Cling On brush, but like to swap back and forth between Cling Ons and Zibra brushes. They both have soft bristles, are easy to work with and clean up well. (I abuse my brushes) To be honest, I like them both. Zibra brushes are a bit more affordable and can be ordered online (HERE). Cling Ons can be ordered online (HERE).

Brush the stain blocker on the same way you would brush on paint.

The cool thing about BOSS is that it comes in clear, so even though it goes on white when it dries – it dries clear. To play it safe I apply two coats of BOSS to the tables, allowing each coat to thoroughly dry in between. Keep in mind you DO NOT apply this to the tops of the tables. The tops are where I will show you how to apply wood stain.

Painting Wooden Tables Before Applying Wood Stain
For the bodies of the tables, we are using Fluff by Dixie Belle. This is a soft off white furniture paint that you can get online HERE.

Give your paint a good stir and apply with your favorite brush. Make sure that your BOSS primer is fully dry before applying your paint.

Because of the thorough prep and BOSS primer, the first coat of Fluff paint looks amazing so far.

Even though just one coat looks great we are still going to go ahead and apply a second coat of paint. But the difference between one and two coats is actually minimal. The second coat is good for fuller coverage and to catch any spots you may miss the first time around.

Distressing Paint When Refinishing Furniture
Now that we have our tables painted we need to give them a little character. By character I mean distressing. Grab your sandpaper and/or sanding block or both. Im using 220 grit for the distressing.

Using your sandpaper distress the edges where the paint would normally wear away over time. There is a more detailed tutorial for distressing painted furniture on the blog for you to check out here: How to Distress Painted Wood Furniture.

Make sure to go back with a lint-free cloth and remove any dust created from the distressing. I keep a bunch of these microfiber cloths in my shop and toss them in the laundry after each project. You can get some online HERE.

Sealing Painted Furniture on Your Table Refinish
Before we move on to applying wood stain to our table refinishing project we need to seal the painted portion of the painted table. When painting furniture white I always like to seal my painted furniture this way. First, grab your clear sealer. I am using clear flat sealer from Dixie Belle. (You can grab some HERE).

But wait, since the flat sealer is really flat/matte I am also grabbing my Gator Hide sealer. You don’t NEED the Gator Hide for this part but I personally love it. It’s a pretty hardcore sealer and I like to add it in with the flat.

Lastly, since our paint is white I am also adding a dab of the white paint (Fluff) to the sealer. I add all three to a plate and mix it up aka stir with a plastic spoon. 😉

Applying Sealer to Painted Furniture
Now that you have your sealer, grab your yellow sponge. These are my absolute favorite for applying sealer, stain, glaze, etc. You can grab some online HERE.

Dab your sponge into the sealer and wipe any excess off back onto the plate.

Apply your sealer over your painted surface. To prevent build up in corners you may need to get in there with a clean brush. After the first coat of sealer is dry go back and apply a second coat.

If you ever have questions about sealing your painted furniture project you can find a full tutorial with video on how to apply clear sealer here: Sealing Painted Furniture

Choosing Your Furniture Wood Stain
Finally, we can move on to the furniture wood stain portion of our table refinishing project. Ready to see how to stain a tabletop the easy way? We will be using a combination of brown wood stain called Tobacco Road from Dixie Belle and a black glaze just to darken it up a bit. You normally wouldn’t need the black glaze, but this is custom and the customer wants a dark brown gel stain look. The black glaze will help deepen the brown of the furniture stain for this makeover. You can grab both of these products online HERE.

Squeeze some of the gel stain onto a paper plate.

If you aren’t as concerned with wood stain colors and just want light wood stain then you are all set. But if you need or want a deeper dark stain color then go ahead and spoon some black glaze onto the plate as well. Make sure to mix well. I suppose its better that we are doing it this way so you can see how easily you can adjust your stain colors based on preference.

Click HERE to Pin this post for later.
How to Stain a Table
Now grab the same yellow sponge that we used to seal the painted portion of the tables. Make sure that you thoroughly clean them between uses with water to ensure that the previous finish isn’t still on the sponge. Sometimes I keep one sponge for clear and light colors, and another for dark finishes just to be safe.

Just like the sealer, dab your sponge into the wood stain and wipe away any excess. You don’t want the sponge to be soaked or dripping with stain.

When refinishing wood furniture you can see how much just one coat of wood stain makes a difference. The wood grain is enhanced and not covered up.

Video Tutorial for How to Apply Wood Stain to Tabletops
Need a video? Here is a video tutorial showing you how to apply furniture stain to the tabletops.
Recapping
As mentioned in the video I like to lightly sand in between each coat of wood stain. By sanding between coats you are creating a nice smooth finish.

Anytime we sand, we have to wipe with a lint-free cloth to remove the dust.

With each coat of stain applied the color gets richer and darker (which is exactly what we are going for).

Here is a little progression of the staining wood table from unfinished through the second coat of wood stain. After the second coat, two more coats of stain are applied to achieve a rich dark chocolate brown stain finish. When staining a table it’s always easier to slowly stain wood furniture darker then it is to lighten. If you stain too dark and then realize that you want a light wood stain you pretty much need to sand the stain products off and start again. ‘Ain’t nobody got time for that!’ 🙂

Prefer Black?
Looking for an alternative to brown wood stain? Click here to see How to Paint a Table with Black Furniture Paint and Black Wood Stain.
Protecting Your Furniture Wood Stain
Now that we have achieved the wood finish color that we want we can protect the gorgeous finish. Because these are tables that will most likely be in a high traffic room (my assumption) I am using Gator Hide to add extra protection. Gator Hide is water repellant and as I mentioned earlier, I just really love how durable it is. You can grab some online HERE. Also, if you want to see how to stain unfinished wood you can also see where I use this same combo on a table that I built for my son to display his Legos here: DIY Wood Table. That table is holding up beautifully.

Again, grab your yellow sponge. See how great these things are? We can use them for everything, well, almost everything.

Click HERE to Pin this post for later
Sealing Wood Stained Table Tops
Just like before, dab your sponge into the top coat/sealer and wipe the excess back off onto the plate.

Go ahead and apply your top coat over the wood stained tabletops.

Mind the edge and run a clean brush along the crease to remove any excess sealer in that area.

Don’t forget those wooden knobs. Everything that we do to the wooden tabletops – we also do to the knobs. The knobs get the same coats of stain as well as the wood furniture sealer applied.

Refinishing a Table with Wood Stain and Paint
Just like that you are all set! These wooden tables are transformed from original orange to painted and stained for a fabulous finish.

Check out all of my furniture projects with over 90 painted furniture makeovers: Stunning painted furniture ideas.

Click HERE to Pin this post for later


To be honest, as it turns out, the distressing on these tables are a bit more than the customer likes. So if you find that your project is a bit more distressed than you prefer you can always go back and touch up a few spots to lessen the distressed look – which is exactly what I do on these. If this happens to you then check out How to Touch Up Paint on Painted Furniture.

Grab any of the products used for this project as well as many others online HERE.

Furniture Fixer-Uppers
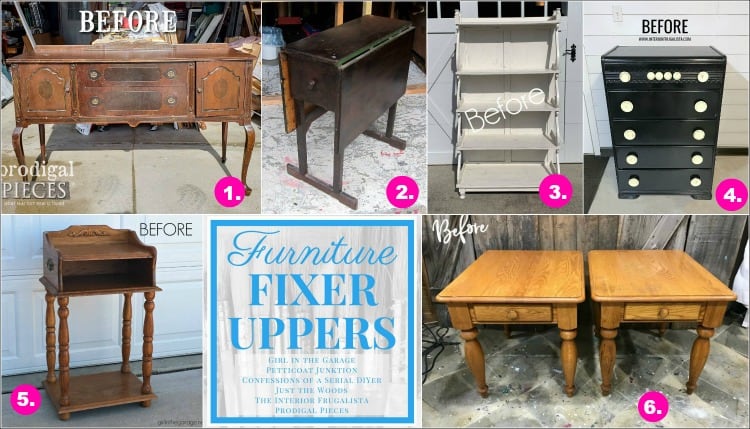
Its that time again where a few of my creative and talented blogger friends and I have joined together in our monthly Furniture Fixer Uppers share. Let’s see what my friends are up to! Make sure to click the links below the image to check out all the amazing projects that my bloggy girls are working on this month.
3. Confessions of a Serial DIYer
6. Just the Woods (you are here)

Don’t Forget – Follow Just the Woods and Share this post to Inspire others:

FACEBOOK * INSTAGRAM * PINTEREST

Click HERE to Pin this post for later


Buh-bye dated and hello gorgeous! So beautifully done, Kandice. ♡♡
Hi Kandace,
What a great tutorial. I have problems with applying top coats and the Gator hide. I know practice makes perfect but i can tell you that i will be adding a little paint to my top coat next time. Lets see how that works for me. By the way, i love your new hair color. You are so adorable. Thank you for your tutorials. It is easier to do something when you SEE how it is done. Great job girlfriend!
Cheryl
Awesome tutorial!!! Beautiful!!!
So much better!! I LOVE Dixie Belle Fluff…never need more than two coats! I tried a sponge applicator that I got with some paint I was sent to apply sealer several projects back, and it is a total game changer! I might need to try yours and see if I like those even better! Great tips as always! XO
Christy, I almost fell out of the chair when I was these tables! They are just like the 2 I did and had and my brother made a drawer for one. Mine had such a deep water stain on the top in several places that I had to do a grey wash but it was ok. I really wanted to keep the pretty wood but just didn’t work out that way. I did sell them thought and was so proud of me! Your video about staining is excellent and will be a tremendous help for me (& probably thousands of others)! XOXO
I meant Kandice! Sorry, I came over from Christy’s page with the Furniture Fixer Upper feature! Love your blog!
thank you 🙂 . xoxox
My favorite combination for oak tables is a white base and dark stained top – gorgeous! Your client must have been thrilled with her tables, Kandice.
I must take the time to tell you what a fantastic job you did on this tutorial! Detailed, clear, concise and a beautiful product. I have pinned for future use and so others can gain the incredible knowledge you shared. Thank you!
thank you so much Linda!!
Beautiful little tables!
Kandice I know you usually do more colorful, exciting makeovers but these simple tables turned out so gorgeous! You can rock any type of makeover. xo
Great job! I’m wondering where the little typewriter is from. It’s adorable!
thank you Michelle. I thought amazon, but I checked my past orders and it seems it wasn’t. Maybe either Michaels, or Home Goods. I have a slight addiction to buying decor items that I don’t really need. 🙂
Very good information, I work on repairing and renovation company, I got some further tips in this article. Thanks.!!