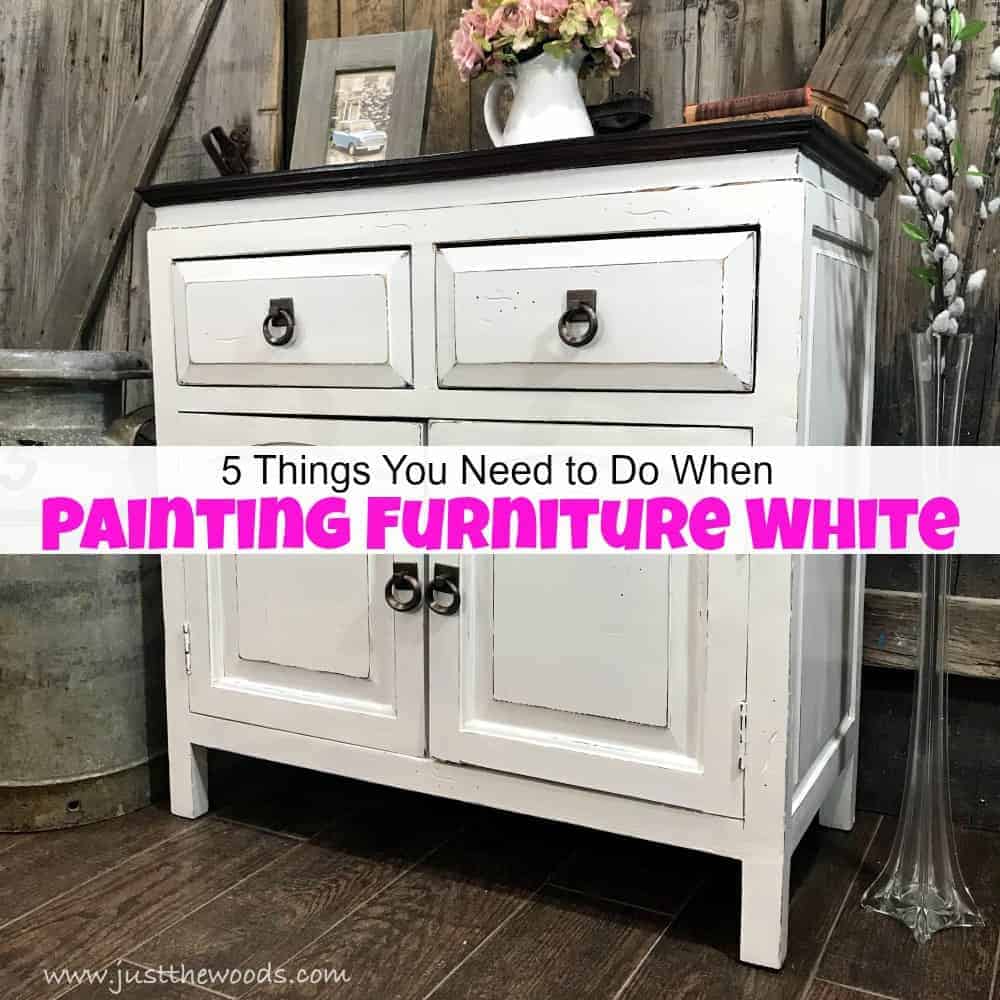
5 Things You Need to Do When Painting Furniture White
Painting furniture white is a great way to update your old furniture. Do you ever wonder how to paint furniture white? Is there a secret to painting white furniture? Maybe there is a secret white furniture paint that is like the holy grail to furniture painting? Nope, there isn’t. I wish there were.
The truth is- I don’t think there is one best paint for painting furniture whether white or any other color. Of course, there is furniture paint and then there is wall paint. There is quality paint for furniture and lower quality paint.
At the end of the day, most people find what they are comfortable with using and stick with it. But let’s stay focused on the end game here, which is painting furniture white. So, when you plan to paint wood furniture white you really need to make sure that you take a few necessary steps to ensure a quality end result that you will be happy with.

Tools & Supplies to Paint Furniture White
Once you have the piece of furniture that you intend to paint you will need a few essential tools and supplies in addition to white wood paint for your project. This is a list of everything used in this tutorial:
Disclosure: This post contains affiliate links for your convenience. Click here for my full disclosure policy
- Materials Needed / Source List
- Orbital Sander
- Primer
- Yellow Detailer Sponge
- Dense Foam Roller
- Cling On Paint Brushes
- Painters Tape
- Shop-Vac (clean up your mess)
- Find all of my favorite tools and products on my Amazon Page here
Unfinished Wooden Cabinet
This plain wooden cabinet is up for a makeover. The owner scooped it up for only $20 at a thrift store! She asked that it be given a makeover just like the one I did for her over 3 years ago. She loves color but likes to keep her painted furniture neutral so it will remain timeless as her decor may change. Smart lady!
This is the piece that was made over 3 years ago: Timeless White Painted buffet This is the piece that we are about to give a furniture makeover.

Make sure to stick around all the way to the end. It’s Furniture Fixer Upper time when my fellow furniture painting friends join in and share their projects as well.
Check out all of my furniture projects with over 90 painted furniture makeovers: Stunning painted furniture ideas.
First Step to Painting Furniture White
Following this step-by-step guide will surely give you the best results for your furniture painting project. The first step when painting furniture white, or painting furniture any color for that matter is the prep work. Prep is probably the most important step in furniture painting.
This is my go-to process for How to Prep Painted Furniture. In addition to the standard prep process, this cabinet is getting a new stain top, so the wood must be sanded down to a smooth finish using my favorite orbital sander.

Step Two – How to Paint Furniture White
Now that your furniture piece is cleaned, sanded, and prepped, I always like to use a primer before painting furniture white. You can find other painted furniture projects that required primer here: primer. I admit that I didn’t use to use primer at all since most chalk paint claims that it isn’t necessary. But over time, I’ve realized that I prefer to err on the side of caution, especially when using white furniture paint.
No matter what type of paint you are using, chalk paint or latex paint I would always suggest priming your piece first. I prefer to seal in any possible bleed-through as well as create a nice foundation before painting wood furniture white. You will need to prime the entire piece that you intend to paint. (Do not apply primer where you plan to apply stain). The primer that I use and trust is a shellac-based primer and you can find it HERE.

When applying primer to furniture I tend to find that a simple foam roller works best for the flat areas, and a chip brush works great for getting into the details, or crevices. Here is the cabinet with two coats of white primer.

Step Three- Painting Wood Furniture White
You may be unsure as to which white furniture paint to use for your painted furniture project. There are so many different brands and types of white wood paint out there. Is there really a best white wood paint for furniture? For this project, I’m creating a custom mixed white paint color using both an off-white, and a stark pure white. You can get great furniture paint online HERE.

When you paint furniture white, even with a primer you will still need a minimum of two coats of white paint. There is less pigment in white furniture paint making it sometimes seem as if it’s see through. Don’t get discouraged, with primer and two coats of paint your piece will start to look beautiful.
If after the second coat of paint, you feel that you absolutely need a third it’s okay to add another coat of white furniture paint. Make sure to use a good quality paint brush when applying your paint. This is with two coats of the custom mixed white furniture paint on the cabinet.

Step Four – Creating a Smooth White Painted Furniture Finish
Step four is actually a step that you should do throughout the entire process. In between each coat of primer, and paint you should lightly sand your piece of furniture. By giving the piece a light sanding between coats, you are maintaining a smooth soft finish, minimizing brush strokes, and you also get the opportunity to see if you missed a spot anywhere along the way. You don’t have to go crazy, a quick once over with a 320 grit is fine.

After you give a quick sanding, always make sure to go back and remove the dust that you just created. A clean lint-free cloth or tack cloth to wipe away the dust works perfectly. You can find them online HERE. This applies to every time you sand your piece of furniture, both sanding between coats and distressing.

Lastly, before sealing your piece go ahead and use an old hairdryer to blow away any sanding dust that may fall into the corners or crevices. You don’t want to seal your dust onto the piece.

Step Five – Sealing White Painted Furniture
Now you should have your piece of painted furniture all cleaned, prepped, primed, painted, sanded, and ready for sealer. One major issue that many furniture painters seem to have is that when they are painting furniture white is that they worry about their clear sealer turning yellow. No one wants a yellow tinge over their white painted furniture. This is my little secret that I like to do when sealing a white painted piece of furniture.
Click here to Pin this post for later.
Painting Furniture White and Applying A Top Coat Sealer
First, I grab the clear sealer. Then squirt the clear sealer onto a plate, and then dab a little bit of the white furniture paint in with the clear sealer. Just enough to give the sealer a white tint. You don’t want to add a lot of white paint, just a little.

Apply your white tinted sealer to your white painted furniture using your favorite sponge applicator. I absolutely love my yellow sponges, but as I went to find my last one I realized that it was missing. Apparently, my husband used it and destroyed it by accident! To right his wrong, he ordered me three new ones to replace my one damaged one. Yay me! You can find my favorite yellow sponges HERE. Today I have to resort to using a blue sponge until my new yellow sponges arrive. 🙂

To make sure that your sealer doesn’t pool up in the corners or crevices, go back with a chip brush and remove any excess sealer.

Recap for Painting Furniture White
Don’t forget these basic tips when painting furniture white:
- Clean / Sand / Prep
- Prime
- Minimum 2 coats of white furniture paint
- Sand between coats
- Add white paint to tint your sealer
Here is a full tutorial with VIDEO showing how I seal my painted furniture projects: Sealing Painted Furniture

Click here to Pin this post for later
White Painted Cabinet Makeover
When you are finished you should have a white painted makeover that you love! Whether this is your first time or your hundredth time by now you know that the best way to give new life to an old piece of furniture is with paint. I hope these tips help you achieve the paint finish that you love.

Check out all of my furniture projects with over 90 painted furniture makeovers: Stunning painted furniture ideas.

Click here to Pin this post for later

The top of this cabinet is finished using a dark protective wood stain. Click here for a detailed tutorial on How to Apply Wood Stain. The hardware is finished using metallic bronze. You can find more painted hardware projects here:

Wait! Don’t Go! It’s that time of the month again for:
Furniture Fixer-Uppers
A few of my creative and talented blogger friends and I have joined together in our monthly Furniture Fixer Uppers share. Let’s see what my friends are up to! Make sure to click the links below the image to check out all the amazing furniture makeovers that my bloggy girls are working on this month.
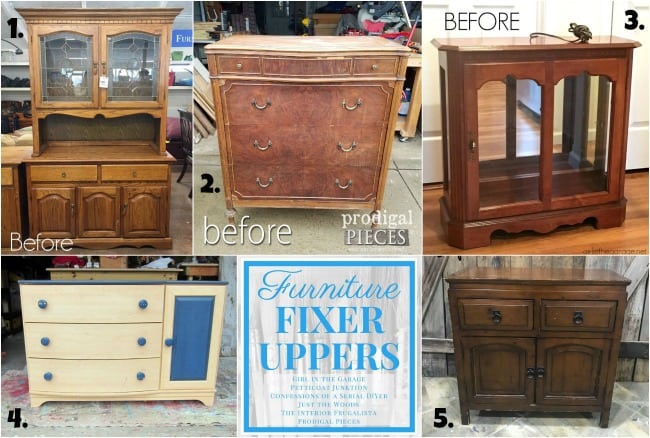
- Confessions of a Serial DIYer
- Prodigal Pieces
- Girl in the Garage
- Petticoat Junktion
- Just the Woods (you are here)
- Interior Frugalista (couldn’t make it this month, she’s on a beach in Mexico sipping drinks with fancy umbrellas)

Don’t Forget – Follow Just the Woods and Share this post to Inspire others:
FACEBOOK * INSTAGRAM * PINTEREST


Nothing more refreshing that a beautiful coat of paint to bring new life back to a piece. This is beautiful, Kandice!
Very nice and I appreciate your instructions being so informative, You did not mention how you refinished the top. If you’ve presented this method before, would you please reference it? It looks so good I’d like to know what stain you used. Thanks.
hi Pam, thank you. I used Teak wood stain for the top. I actually use teak a lot! its one of my favorites. you can find a load of posts with teak here: https://www.justthewoods.com/?s=teak . Let me know if you have any other questions 🙂
Wow this looks SO much better! love the classic white with wood top combo for this piece! XO
Gorgeous!
Oh this piece looks a million times better in white! Great tips Kandice!
What type of sealer is that, so I can look for something equivalent available in Canada?
Love it!! It has that nice country charm now!
I love how you kept the top a darker tone, it gives it more character that way! Great job! It turned into a beautiful useful piece.
Maria
thank you Maria 😉
Excellent detailed tutorial, Kandice – pinned! I’ve never applied a protective coat with sponges and you have me intrigued. The cabinet looks lovely and I bet your client was thrilled with the results.
I custom make my own furnutire as a hobby and literally I would make this same list
Hi, I hope you can help. I sanded and old desk down, sealed with one coat of the BIN sealer, applied 2 coats of chalk paint (rustoleum) in white, applied one coat of polycrylic and it is bleeding through in spots an orangish color and has some bleed through on top, what can I do?
Kristina
I’ve never used Rustoleum chalk type paint before. But you may have to apply another coat of primer. Make sure that there is no bleed through before you start applying paint. I often do 2 coats of primer before painting when Im using white paint. Sorry, this is happening, I know its frustrating. Good luck
Really helpful article for a beginner, special thanks for the video!
Hi there! I am a hobby furniture refinisher/repurposer, but I’m now being hired to do a few pieces for an actual client, and want to be sure I do it right. So, I really appreciate this information, but I also have a few questions (my apologies in advance if you’ve already answered these somewhere and I missed or glazed over it): What grit of sandpaper (discs) do you use with the orbital sander? What is the best way to tape off mirrors? I see you recommended the Dixie Bell paint, but it is really expensive – is there any alternative, more affordable brand you can recommend? I will be working with light wooden pieces that might need to go black…paint, stain, other? Btw, the orbital sander link on that list goes to primer ????. Anyway, thanks so much!
hi! ok to answer your questions.. Normally I use 150 grit with the orbital unless the surface is in really bad shape, then Ill use a 60 grit. I have a post on taping mirrors here: https://www.justthewoods.com/paint-mirror-frame/
As far as paint, I feel, especially when painting for clients that I dont want to cut corners with quality paint and most of the quality paints out there are in the same price range.
Thanks for the heads up on the link – I will go edit that 🙂
Hi i was just wondering what sealer did you use? Im planing to paint a dining table white but im still debating on the sealer , can you please help me . Thank you in advance
hi, Paula. I often use Gator Hide by Dixie Belle for my table tops. But to be 100% honest my own kitchen table is sealed with triple thick Varathane. We scrub the table and are really rough, so Im not sure how hardcore you want to go with your top coat. This is my kitchen table: https://www.justthewoods.com/reclaimed-barn-wood-farm-table/
and this is how I seal most of my other furniture projects: https://www.justthewoods.com/sealing-painted-furniture/
Hi there!
First of all thanks for the tips for painting furniture white. I do a lot of that.
Secondly you are the one who introduced me to using the yellow detail sponges. Unfortunately I can’t get that size any longer. I did order a smaller size but don’t like them near as well. Could you please share with me where you’re getting yours currently or what you are using in place of them.
Thanks so much
Helina – My Beautiful Disaster
h! I get them on amazon. They do go in and out of stock. I normally just wait for them to become available again. I have called the company direct to ask and they thought I was insane haha
I am working on painting two nightstands white. I scuffed all the surfaces. I sprayed two coats of BIN primer and now two coats in on the white acrylic white paint. I am getting some yellowing in the white paint. Any ideas of what is happening and how to fix it? Thanks!
unfortunately you are still experiencing bleed thru and you most likely need more primer to block it. Sometimes you get the rare occasion where its pretty tough and you need more than 2 coats of primer. Im so sorry this is happening – I know how frustrating it can be
Thank you so much for the info. I painted an old dresser with two coats of primer and 3 coats of satin white latex. Will this sealer work on top of that type of paint?
hi! I actually don’t use latex paint, and if I remember correctly (from friends who do) I don’t think you need to add a sealer over latex.
These are excellent tips. I learned the hard way about bleed-thru AND how some top coats can yellow. Follow these steps, people!