How to Paint Layers the Easy Way on a Tall Lingerie Chest
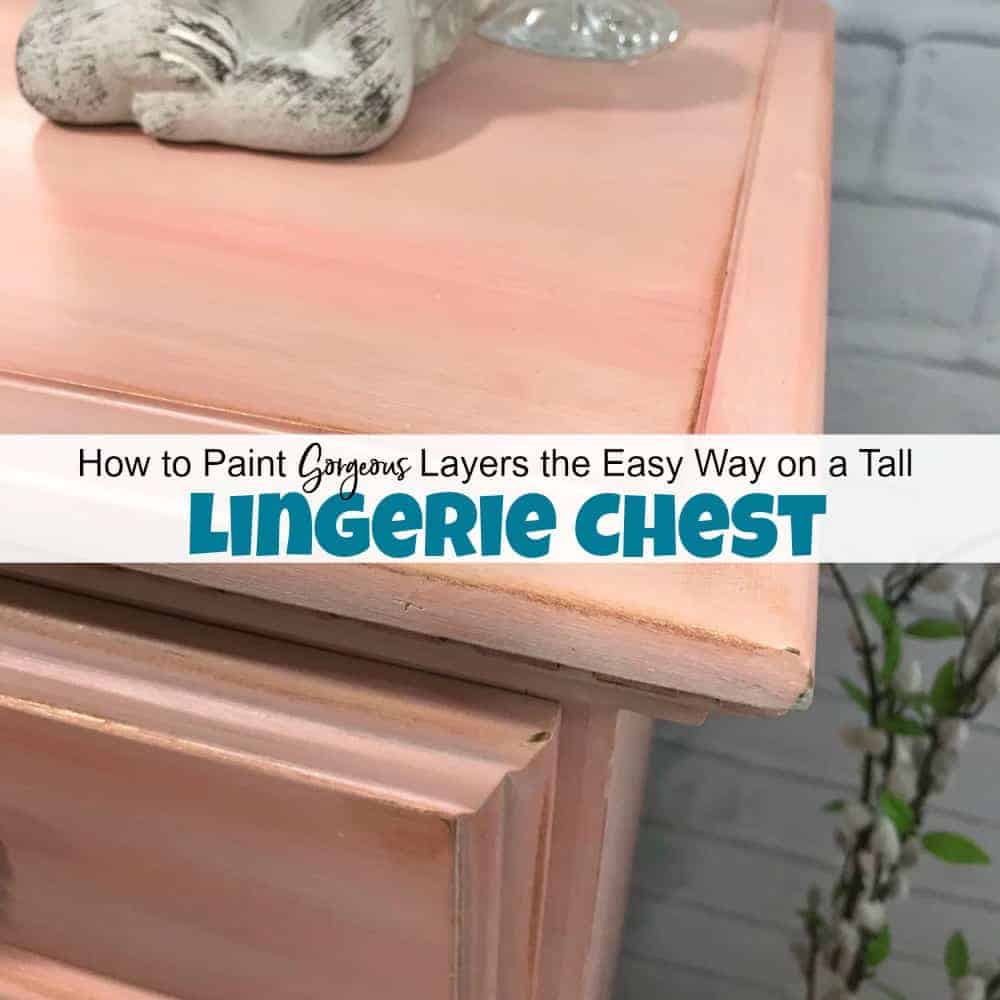
A tall lingerie chest gets a painted furniture makeover with gorgeous painted layers, whitewash and gilding wax. See how this lingerie chest of drawers is transformed with soft layers of coral and apricot by Dixie Belle Paint. Details are accented with bronze gilding wax to compliment the new bronze hardware pulls.
It seems everyone loves a tall lingerie chest. They are often the perfect choice for a painted furniture makeover. Whether you choose to paint a lingerie chest in all one color, ombre or layers they just about always look great. A tall lingerie chest is also an ideal piece of furniture due to its tall narrow design and many drawers. When I discovered this vintage lingerie chest online I knew I had to scoop it up.

Make sure to stick around all the way to the end, its Furniture Fixer Upper time where my fellow furniture painting friends join in and share their projects as well. Disclosure: This tall lingerie chest post contains affiliate links for your convenience. I may be compensated if you make a purchase after clicking on my links. Click here for my full disclosure policy.

Tools & Supplies to Paint Layers on your Tall Lingerie Chest
Materials Needed / Source List
- Dixie Belle Paint Company
- Chalk
- Bondo
- Furniture Tri-Dollies
- Yellow Detailer Sponge
- Hardware Pulls
- Cling On Paint Brushes
- Painters Tape
- Shop-Vac (clean up your mess)
- Find all of my favorite tools and products on my Amazon Page here
Unfinished Vintage Lingerie Chest
This vintage lingerie chest has a few scratches and is in need of a few repairs, but it isn’t anything that I cant handle. The bottom right area appears to have been chewed on at some point.

Aside from the minor damage, I can tell you two things from the start:
- that hardware needs to go!
- I think I have worked on almost the same exact lingerie chest once before. What are the odds? The other lingerie chest makeover had different results. You can check that one out here: Vintage Lingerie Chest
Repairing a Tall Lingerie Chest
Before we can move on with painting layers on the lingerie chest we need to address the damage. First, remove the hardware and the drawers and set them aside. You can label each drawer with a piece of chalk so you know which drawers goes where when your makeover is complete. This is one of many tips that I share in my Best Tips & Secrets for Painting Furniture post.

Moving on to the damage. Here is a close up of the lower damaged area.

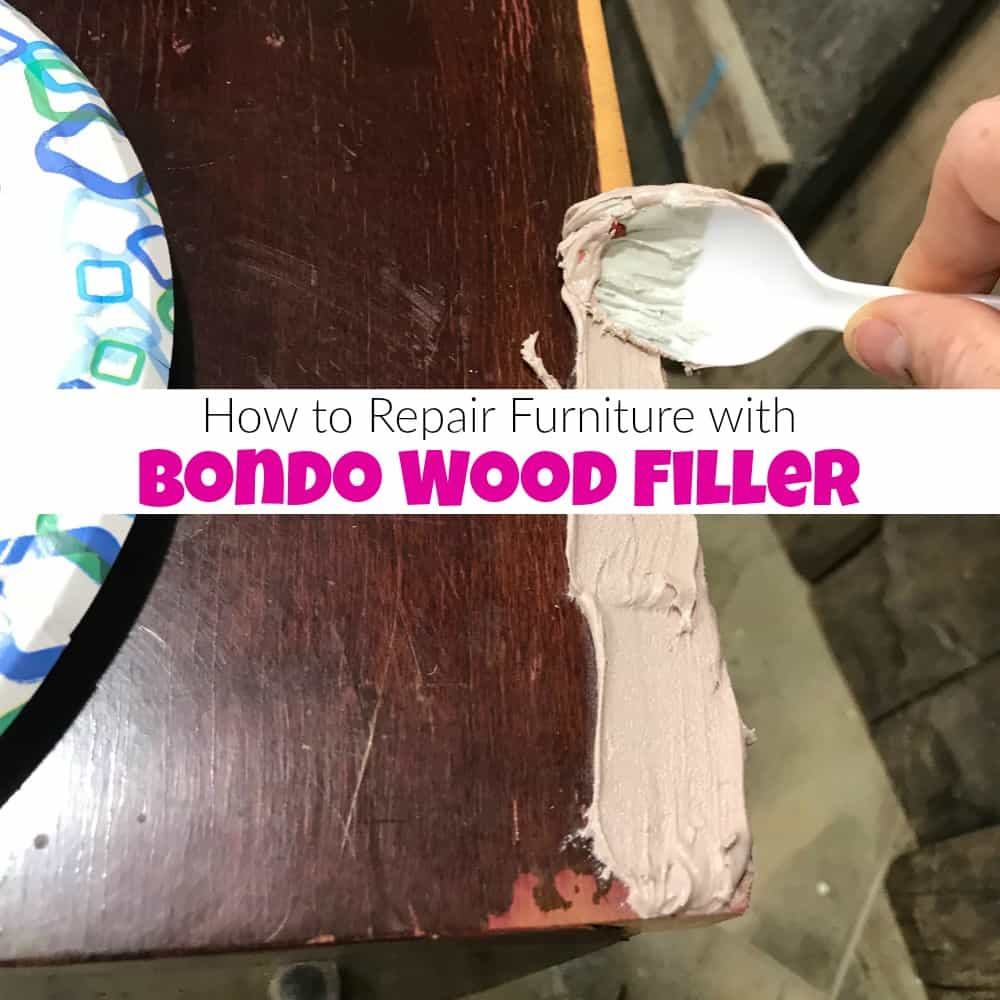
Because this is on an edge and I want to make sure that this is repaired in a mega way I am using Bondo. I try to limit how often I use Bondo since the fumes can be a little strong if you aren’t in a well-ventilated area. I shouldn’t admit this, but personally, the smell doesn’t bother me but I know that it’s not exactly non-toxic (not at all) so you should use safety precautions. Once the Bondo is completely dry you can sand it smooth. It’s like it never happened 😉 You can get Bondo HERE. (I do tend to use the hardcore stuff made for cars)

The same is done for one of the drawers that required repair. This part I hadn’t even noticed right away. It wasn’t until I started to work on the tall lingerie chest that I discovered a piece of the drawer completely missing.

For more projects and ways to use Bondo to repair furniture, make sure to check out How to Repair Furniture with Bondo Wood Filler.
Preparing a Vintage Lingerie Chest for Paint
Now that the repairs are complete we can move on to cleaning and prepping the tall lingerie chest for paint. This is my standard process for How to Prep Painted Furniture. After ping-ponging around a few ideas, I am going in the direction of feminine soft layers for this lingerie chest. I even put together a small inspiration board to see how the paint colors and new hardware will look together.

These colors are perfect for this lingerie chest. You can get these gorgeous colors HERE.

Click here to Pin this post for later.
Painting a Base Coat on the Tall Lingerie Chest
Since I am going for soft and feminine I am applying a base coat of Tea Rose, which is the prettiest soft pink I have ever seen. I confess that I almost kept the lingerie chest in just tea rose because it is just that pretty.

If you are new to furniture painting and want to learn how to update old furniture with paint you can always start at the beginning with How to Paint Furniture – a Beginners Guide.
Painting Layers on a Vintage Lingerie Chest
But I move on. After the initial base coat of tea rose I am adding soft layers. This method of painting layers has to be one of the easiest furniture painting techniques there is. You can use this painted furniture technique with the same colors yet still get a different outcome each and every time. Gather your paint colors and literally spoon a little of each color on to a paper plate. Even though are paint colors will blend together, make sure to use a clean spoon for each color, you don’t want to mix paint colors in their original container.

Here is a video showing how to paint layers on this tall lingerie chest.
Once you finish painting layers your paper plate will look something like this.

The painted layers on the lingerie chest will be subtle.

Click here to Pin this post for later
Distressing the Painted Lingerie Chest
Next, you can go ahead and lightly distress the edges of the painted lingerie chest.

While distressing I also like to adjust my pressure and lightly sand the entire piece. This gives your surface a soft, smooth finish.

Adding White Wash to Painted Layers
To lighten or soften the painted tall lingerie chest I am adding a whitewash to the entire piece.

As shown in the video above you can see that you wipe the whitewash onto the furniture and then wipe it off. This allows the white to sit in the grooves and slightly soften the surface color of the lingerie chest. Here is the same drawer- before and after whitewash.

You can find a more detailed tutorial on whitewashing here: How to Whitewash Wood Furniture
Sealing Your Painted Lingerie Chest
Once you are satisfied with your layered paint finish its time to seal and protect your painted tall lingerie chest. I grab my favorite yellow sponge, the same sponge that I use for applying the whitewash is also used for applying the clear sealer.

The entire tall lingerie chest is sealed using clear coat sealer in satin.

Here is a full tutorial with VIDEO showing how I seal my painted furniture projects: Sealing Painted Furniture

Replacing the Vintage Hardware
Remember that old brassy hardware that we removed? We need to replace those. These new pulls from D. Lawless Hardware are perfect for this painted lingerie chest. You can find these pulls HERE.

The dark rustic copper pairs so nicely with the painted layers of the chest.

Adding a Touch of Gilding Wax
Now to enhance the dark copper of the hardware we will add just a bit of gilding wax. Since I can’t decide between hammered copper or bronze I am using both.

If you are unsure about how to apply gilding wax, simple rub some onto your fingers, then rub it onto the area where you would like an added metallic.

With my finger, I rub a bit of the gilding wax on the edges of the lingerie chest.

I also apply gilding wax along the drawers.

I love the balance between the soft pink paint layers, the whitewash in the creases and the gilding wax on the edges.

Click here to Pin this post for later
Painted Tall Lingerie Chest in Soft Blended Layers
This tall lingerie chest has been donated to a local nonprofit organization for their annual fundraising event. Click here to see all of my projects that have been donated to support local fundraisers, schools, and charities: Donation Projects.

Check out all of my furniture projects with over 90 painted furniture makeovers: Stunning painted furniture ideas.

Click here to Pin this post for later


Wait! Don’t Go! It’s that time of the month again for:
Furniture Fixer-Uppers
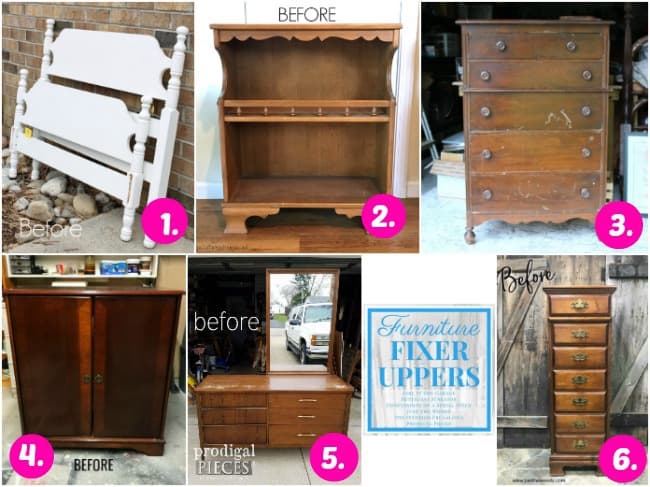
A few of my creative and talented blogger friends and I have joined together in our monthly Furniture Fixer Uppers share. Let’s see what my friends are up to! Make sure to click the links below the image to check out all the amazing projects that my bloggy girls are working on this month.
- Confessions of a Serial DIYer
- Girl in the Garage
- Petticoat Junktion
- Interior Frugalista
- Prodigal Pieces
- Just the Woods (you are here)
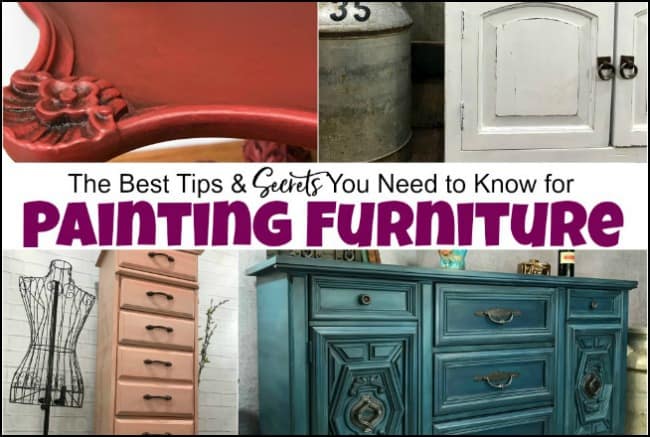
If you like this post make sure to check out all of the tips & secrets that I wish someone told me when I started painting furniture here: Painting Furniture Secrets

Don’t Forget – Follow Just the Woods and Share this post to Inspire others:
FACEBOOK * INSTAGRAM * PINTEREST
Subscribe to our mailing list here: [mc4wp_form id=”1340″]


Oooh…how pretty and fun, Kandice! I love the blend you used and gilded accents. And you know I love me some DIxie Belle! 😀
The layers of gorgeous color combined with white wash and gilding make this piece FABULOUS!
This turned out so beautiful, Kandice! Love that you donated it for a good cause too! XO
Love your new profile picture! Looking good!
thank you 🙂
Such pretty paint color combinations, Kandice! Love the gilding highlights too. I’ve never come across these lingerie chests in my travels but I keep looking after seeing the first one you did. Pinned
thanks marie 🙂
Super talented and love seeing all you do with Dixie Belle Paint!!! Always, brings a smile to my face! 🙂
What a beautiful transformation, Kandice. I’m sure it will bring top dollar! Thanks for all the details on how you got this effect, seeing the finished piece, it looks like it would be much more complicated.
Too cute! It’s amazing what a little paint, glaze and gilding wax can do!! Along with new hardware 🙂
thank you Suzanne! Loving Dixie Belle <3
WOW!! I can not believe that is the same piece!! Loving the Dixie Belle Paint colors you chose!!
thanks so much, I love the colors too 😉
Wow, really beautiful!
Wow! Really beautiful!
thank you Debra 🙂
Such a soft, romantic pink finish! I love that several of us had feminine makeovers this month. Beautiful job Kandice!
The color is perfect for a lingerie chest.
Maria
Have tried numerous times/days to view how to paint furniture beginner but keep getting directed somewhere else, any suggestions?
You are probably getting directed to give your email and then the beginners guide will be emailed to you so you can save it. Is that where you are being sent?
Fun mix of colors Kandice! I love the hardware too. Great makeover.
Wow!!!!!! This is beautiful.
What a lovely project. I really like the old Chippendale pulls but the new ones you chose are so perfect for the chest. I hope whoever gets it appreciates all the effort you put into it!