How to Create a Beautiful Beachy Look with Furniture Paint
When it comes to painting furniture I’m often asked which furniture paint do I use. One thing I can tell you is that everyone has their own opinion and their own preferences. Which is fine, life would be boring if we all did everything the same anyway. But, personally, I find that wall paint works best for walls and furniture paint works best for furniture. My preference is always to paint furniture using a chalk or mineral style furniture paint. I also feel that no matter which furniture paint you choose to use is that you should always prep and seal your painted furniture project, every single time. So let’s get into this latest beachy furniture makeover!

Disclosure: This beachy look furniture paint post contains affiliate links for your convenience. I may be compensated if you make a purchase after clicking on my links. Click here for my full disclosure policy.

Make sure to stick around all the way to the end of this project because it’s our monthly Furniture Fixer Uppers day. You know what that means? You get a whole bunch of furniture painting projects to enjoy. 🙂
Supply List for Painting Furniture in a Beachy Finish
What You Will Need
Tools
- Zibra Paint Brushes
- Cling On Paint Brushes
- Primer
- Chip Brushes
- Sandpaper
- Yellow Applicator Sponge
- Shop-Vac
- Lint Free Cloth
- Flexible Sandpaper
- Find all of my favorite tools and products on my Amazon Page here
Paint
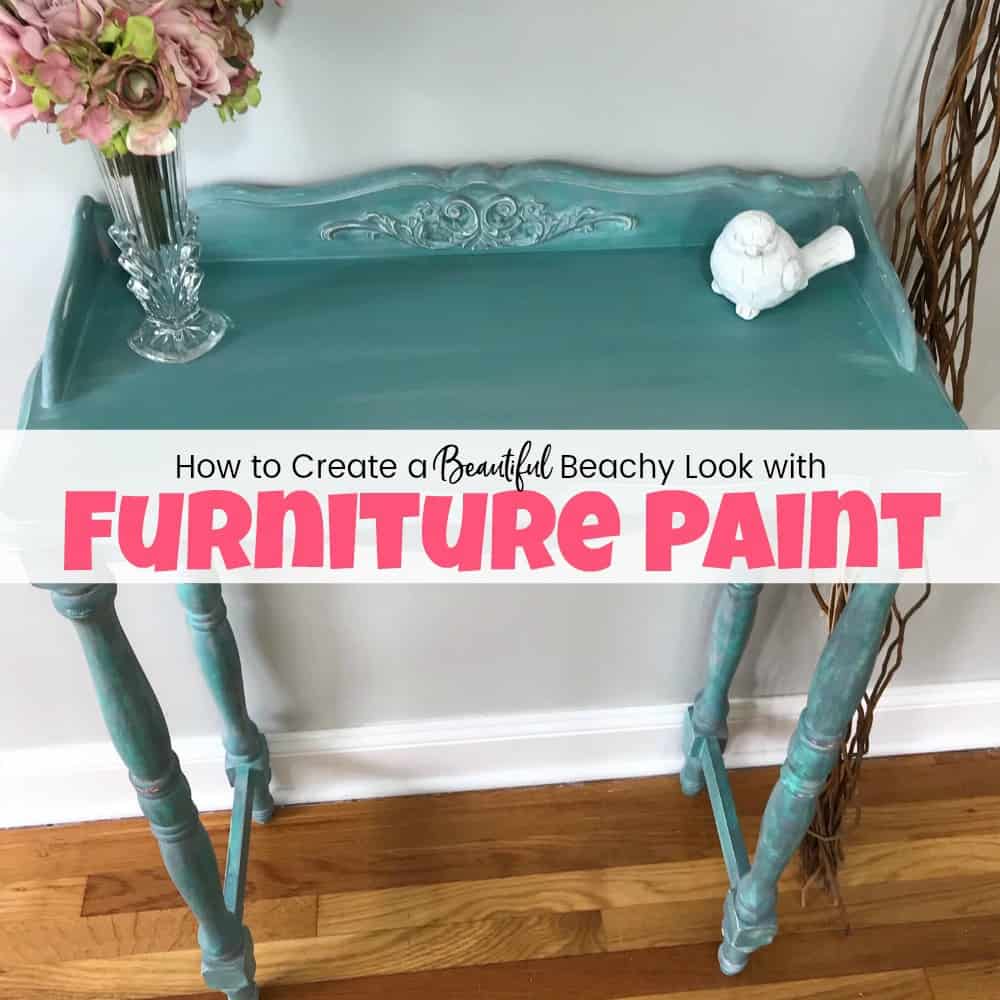
Original Accent Table
This little table is another one of my parents’ roadside finds. My stepdad has a great eye for save-able curb finds. He found this cute little girls vanity too! But now my husband is threatening to bring random items to my parents’ house since they keep bringing things to me that they find on the curb. lol. This little table may look like it doesn’t need any work from the photo, but trust me – it does!

Prepping a Table for Furniture Paint
This little table gets the same thorough cleaning and prepping as every other painted furniture project that I do. Here is how I prep painted furniture for each makeover. First, you want to sand the entire table. You don’t have to go too crazy, but enough to scuff the surface. I know many furniture paint brands boast that you don’t need to prep, and maybe you don’t. But I look at it like going to the gym or going to church. You most likely will never regret going but you certainly may regret not going. The same applies. You will never regret a thorough cleaning and prepping, but you may regret not doing it. Does that make sense?

Along with a bit of sanding, I make sure to clean the entire surface of the table including the details. Feel free to break out an old toothbrush or scrub brush to get into the detail areas.

Also, wipe the table clean to remove any dust and residue. I like to use a simple mixture of water, white vinegar and a drop of blue dawn soap. Then follow up with a clean rinse wipe down.

Priming Before Furniture Paint
Again, you may not need to use a primer before applying your furniture paint. But I prefer to err on the side of caution. I have never regretted the decision to prime first, and I’m pretty sure you won’t either. This is the shellac based primer that I prefer when painting furniture. You can get it online HERE. You can find other painted furniture makeovers where I choose to use primer in the process here: primer.

Make sure to stir the primer well before applying. Apply at least one coat of primer to the entire piece. If you are painting furniture white, you may opt for two coats of primer.

A chip brush works great for applying primer. It also lets you get into those detail areas. Since chip brushes are so cheap you won’t feel so bad throwing it out after using it.

Make sure to get those feet too. In an attempt to not get primer on my shop floor I use my rustic wood coffee table to lay down my table for easy access to the feet. 😉

Beachy Table Makeover Using Furniture Paint
Now that our table is cleaned, prepped and primed we can get started with our makeover. To give a little backstory, my friend Sonia from Junk Monkey Paint had reached out to me and offered to send me some of her furniture paint to try out. You may have caught her on Facebook, she does a lot more live videos than I ever do! So of course, I tell her I’d love to give her chalk paint, or chalky style paint a try. Did you know there are so many different ways to say furniture paint? Who knew? After checking out her paint color options I narrow it down to a handful of beachy blues and grays with a pop of coral. How pretty are these? They remind me of the colors of the homes in Key West!

If you are new to furniture painting and want to learn how to update old furniture with paint you can always start at the beginning with How to Paint Furniture – a Beginners Guide.
Layering Furniture Paint without a Plan
Without a true plan, I start off with that pretty coral color called Sweet Sunset.

You know how much I love to paint in layers right? So I randomly paint in a few areas on the table with fingers crossed that the end result looks nice. Sometimes it’s fun to not have a plan and just see what happens. Im going to show you how to paint furniture to look coastal.

Hmm, I’m not so sure about this just yet. Let’s keep going. For the second layer, I am going with Bahama Jade.

What’s the worst that could happen? It’s only paint right? I randomly paint the second layer on the table in an uneven manner. Woah, this is a bit too bright for my taste.

Time to tone this down a little with a color called Teal River.

This third layer of furniture paint is applied with a bit more coverage than the previous two colors. But, eeek, still not pretty yet!

The next two layers are a bit more in the gray family. I’m using Mouse in the House (the lighter gray) and Stormy Forest (the darker gray-green color). I decide to work with these two colors at the same time. Darker first, then lighter.

Here is a quick video to get an idea of how I am applying the furniture paint to get that beachy furniture look, trust me there is no specific method. That’s what makes it so fun!
Click here to Pin this post for later!
After the latest two painted layers here is how we look so far. Getting better right?

It’s starting to feel very beach boho with the mixture of colors.

There are many layers of furniture paint on the table at this point. All colors are visible at some point, but no one color completely overtakes the others. At least, that’s the way I see it. But we still need to tie it all together.

Applying a White Wash with Furniture Paint
To tie all of the layered paint colors together I almost always opt for a wash. A wash will also tone down any areas that may be too dark, loud or bright. I love that you can see all of the colors but I do think we need to soften the finish to get a more coastal beachy look.

For the whitewash, I am using a white furniture paint called Vintage white.

Scoop some of your white paint into a separate cup. We will be diluting this paint so you want to take what you need out of the original container. Slowly add a little water to your paint at a time.

Stir your water and paint thoroughly. Your furniture paint should now be very watery.


Next, apply your diluted white paint over the entire piece. Work in sections and paint, then wipe the diluted paint off with a clean dry cloth. This will allow for just a small amount of the white paint to stay on the piece softening the overall appearance.

You will also allow some of the white paint to remain in the creases. Keep in mind you can apply a wash using any color. In a previous makeover, I apply a wash using a soft yellow. You can find that project here: How to Create Breathtaking Results Painting Wood Furniture.
Click here to Pin this post for later!
I need to give a big thank you to Sonia for sharing her pretty furniture paint with me. If you want to try any of these paint colors or check out the other colors by Junk Monkey you can find them all HERE.

Distressing Your Painted Furniture Project
We are also going to go ahead and give this beach themed painted furniture a light distressing along the edges. Using a fine grit piece of sandpaper go ahead and lightly distress the edges and raised details.

Remember the original table was white? This allows that little bit of original white to peek through the paint. The original white peeking through works really nicely together with the whitewash.

Sealing Your Furniture Paint
Always make sure to seal your painted furniture projects for protection. I am sealing this project with a clear sealer from Dixie Belle. You can get this sealer online HERE.
As usual, I am using my favorite yellow sponge to apply the sealer. You can find these sponge applicators online HERE.

To make sure there is no pooling or build up of sealer in the details and crevices you can use a dry chip brush.

If you have questions about sealing your painted furniture project you can find a full tutorial with video on how to apply clear sealer here: Sealing Painted Furniture

As an added precaution I also add a water repellant clear sealer on the table top after the standard clear sealer. Gator hide is water repellant and is applied in the same manner as the clear sealer with the yellow applicator sponge. You can find Gator Hide online HERE.
Check out all of my furniture projects with over 90 painted furniture makeovers: Stunning painted furniture ideas.
Creating a Beachy Look with Furniture Paint
Next time you see a piece of furniture sitting on the side of the road waiting to head to the landfill, just think of the possibilities that can be achieved with furniture paint. Scoop that table or dresser up and give it a makeover!

This little table has been saved and given a beachy style look with furniture paint and has since been donated to a local school fundraiser. Click here to see all of my projects that have been donated to support local fundraisers, schools, and charities: Donation Projects.

I love that the bits of coral beachy furniture paint shows through but remains subtle.

This cute little table would make the perfect accent table for a coastal style home.
Click here to Pin this post for later!


Wait! Don’t Go! It’s that time of the month again for:
Furniture Fixer-Uppers
Its that time again where a few of my creative and talented blogger friends and I have joined together in our monthly Furniture Fixer Uppers share. Let’s see what my friends are up to! Make sure to click the links below the image to check out all the amazing projects that my bloggy girls are working on this month.
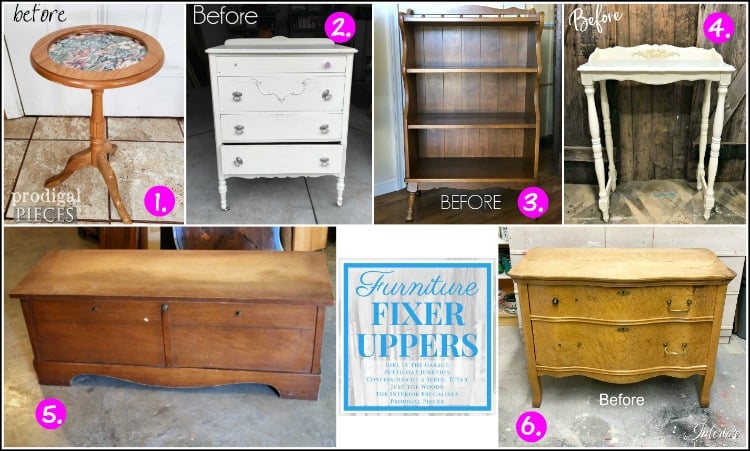
2. Confessions of a Serial DIYer
4. Just the Woods (you are here)

Don’t Forget – Follow Just the Woods and Share this post to Inspire others:
FACEBOOK * INSTAGRAM * PINTEREST
Stay connected! For more tips and tricks sign up here : [mc4wp_form id=”1340″]


Click here to Pin this post for later!

Ooh…I just love layers, Kandice, and your table is gorgeous!
I love the layered color combos! The Sweet Sunset peeking through looks amazing. 🙂
thanks so much Denise!
We had similar ideas this month ha ha! Love the end result! XO
Love all those pretty layers, Kandice! Your table is stunning and how sweet that you donated it to a school charity love that you donated it to a school fundraiser. I bet it brings in some nice coin!
Such a pretty finish- love the colors you chose together Kandice!
Beautiful, layered vanity. Such a versatile piece. I was a little worried about all the colors but it looks great. Im starting to gain the courage to try something.
Love the layers Kandice! Great makeover!
Oh, super beautiful! I love chalk painted furniture. I tried it by myself, but to be honest, it didn’t look as good as I wanted to be. And also never heard about products like Gator Hide. Thank you so much for sharing your work its an art for me and will do my best to learn everything shared here.