Learn how to paint and decoupage furniture with fabric on this gorgeous painted vanity project. Painted furniture with peacock fabric decoupaged to the drawers. A step-by-step guide for how to paint a bold vanity, decoupage furniture, upholster a seat, and add a stencil. Filled with easy steps, tips, tricks, and a video.
How to Paint and Decoupage Furniture
If you love painted furniture then you may want to learn how to decoupage furniture too. This painted vanity sat ignored for almost 2 years in the unfinished inventory before being claimed for a custom makeover. And it was worth the wait! The boldly painted finished and colorful fabric decoupage on the drawers creates a gorgeous and unique result.

Disclosure: This post contains affiliate links for your convenience. Click here for my full disclosure policy.
Inspiration Piece – Painted Peacock Desk
Before getting started I should mention that this painted vanity makeover has an inspiration piece. There is no blog post for the inspiration piece which makes this even more fun. Since the previous makeover wasn’t documented I get to give a thorough walkthrough on how to paint and decoupage furniture with this painted vanity project. Here is the inspiration piece:

Make sure to stick around to the end, it’s Furniture Fixer Upper day!

Materials Needed / Source List:
- Flat Razor
- Artists Brush
- Scotch Blue Platinum Tape
- Yellow Detailer Sponge
- Fiskars Cutting Mat
- Scissors
- Feather stencil (I used this one: stencil)
- Peacock Fabric (or something similar)
- Mod Podge
- Zibra Paintbrushes
- Electric Stapler
Painting a Vanity
Once dragged out of the storage unit the vanity is flipped over for a full cleaning in the shop. By flipping it over you get easy access to the bun feet and can paint the underside areas much easier than if it were standing upright. Make sure to thoroughly clean and prep the piece first. Click here to see how to prep painted furniture.

First, paint the feet, then you can go ahead and paint the rest of the vanity or wait until it’s flipped back over again. The main point is to get to those feet. I am loving the Zibra paintbrushes lately. This gorgeous bold blue color is amazing. You can get this bold blue look with ‘peacock’ from Dixie Belle HERE.

Make sure to seal the feet before flipping it back over. You don’t have to seal the body of the vanity until you know that the entire surface area is painted.

Here is a full tutorial with VIDEO showing how I seal my painted furniture projects with a clear coat: Sealing Painted Furniture

How to Prep Drawers for Decoupage
We already know that adding paint to an old furniture piece is the easiest way to bring it new life. Using one of the many decoupage techniques to an old piece of furniture (or new furniture) is another great way to give it a unique and creative update. When adding decoupage to painted drawers you may choose from different materials. Here are a few options:
- fabric
- decoupage tissue paper
- decorative paper
- paper napkins
- scrapbook paper
- decoupage paper
- wallpaper
- wrapping paper

If your decoupage material is a light color or see-through then you want to paint the surface first. I’m using fabric for this project. The fabric is a light color so I’m painting the drawer area in a light gray. This same rule applies when using thin paper or rice paper on your decoupage DIY projects.

After painting your center area go ahead and tape it off to paint the outer areas. The Scotch blue platinum painters tape is perfect for this because it tears off at perfect 90-degree angles giving you perfect corners. You can see a video of how it tears perfectly each time here on Facebook.

Once you paint your drawers on the outer sides you can set them aside.

Not sure where to find decoupage supplies? Find them here:

Click here to Pin this post for later.
Quick Tip
A quick tip for when you paint furniture with multiple drawers is to mark your drawers when you remove them from the piece. Using a piece of chalk you can mark which drawer goes where so when it’s time to put them back together everything falls back into place easily. I share this along with many other tips in my Secrets and Tips for Painting Furniture.

Cutting Fabric to Decoupage Drawers
First and foremost you want to iron your fabric to get out any wrinkles. For best results, always iron with the pattern face down. You don’t want to risk messing up the pretty side of the fabric.

Next, measure the area of your drawers where you will decoupage the fabric. Then lay out the fabric on a clean flat surface. Using your Fiskars cutting mat, a sharp pair of scissors, and a few rulers measure and pencil out the exact measurements of your area. Mark your measurements on the back of the fabric (not the front). Find more tips and tricks to decoupage furniture in my eBook here: Decoupage eBook

Carefully cut your fabric out. You are better off cutting slightly bigger than your needed size than smaller. You can always trim if needed. The main focus is uniformity and to keep the print vertically in line – one drawer over the other. By doing this, I know that I chopped off a few heads, but some tails were fully visible on some drawers and some heads were fully visible. You can align however you’d like.

Are you a visual person? To see a live video of how to decoupage furniture you can catch the video where I did it live on Facebook here:
A few things to note when adding fabric to your decoupage furniture projects:
- Use clean hands.
- Do not use too much decoupage glue. A thin layer of Mod Podge works well.
- Baby wipes are great for cleanup.
- Make sure to gently smooth the fabric and press out any air bubbles.
- Fabric is easier to manipulate than any type of paper, and the best material for someone new to decoupage.
Click here for more decoupage ideas (both furniture decoupage projects and small projects): Decoupage

Have you wondered how to seal decoupage? Well, the entire painted vanity, as well as the decoupaged drawers, are all sealed using a clear protective sealer top coat.
Click here to Pin this post for later.
Changing the Look of your Hardware
Now that you have pretty decoupaged drawers you may want to change the look of your hardware. These gorgeous pulls are original to the piece and simply need a new color. They are almost perfect, but we want to lighten them up and make them gold.

Make sure to clean and prep your hardware. Click here to see how to clean, prep and paint hardware.

These gorgeous ornate pulls are transformed using metallic gold.

The gold hardware is perfect for these drawers.

Click here to see how the triple mirror was painted to match: How to Paint a Mirror Frame

Adding a Peacock Feather Stencil
A feather stencil is added using the same gold opulence as on the hardware.

For a more detailed tutorial on adding stencils to your painted furniture makeovers make sure to check out How to Stencil Painted Furniture. There’s even a video included in the post.
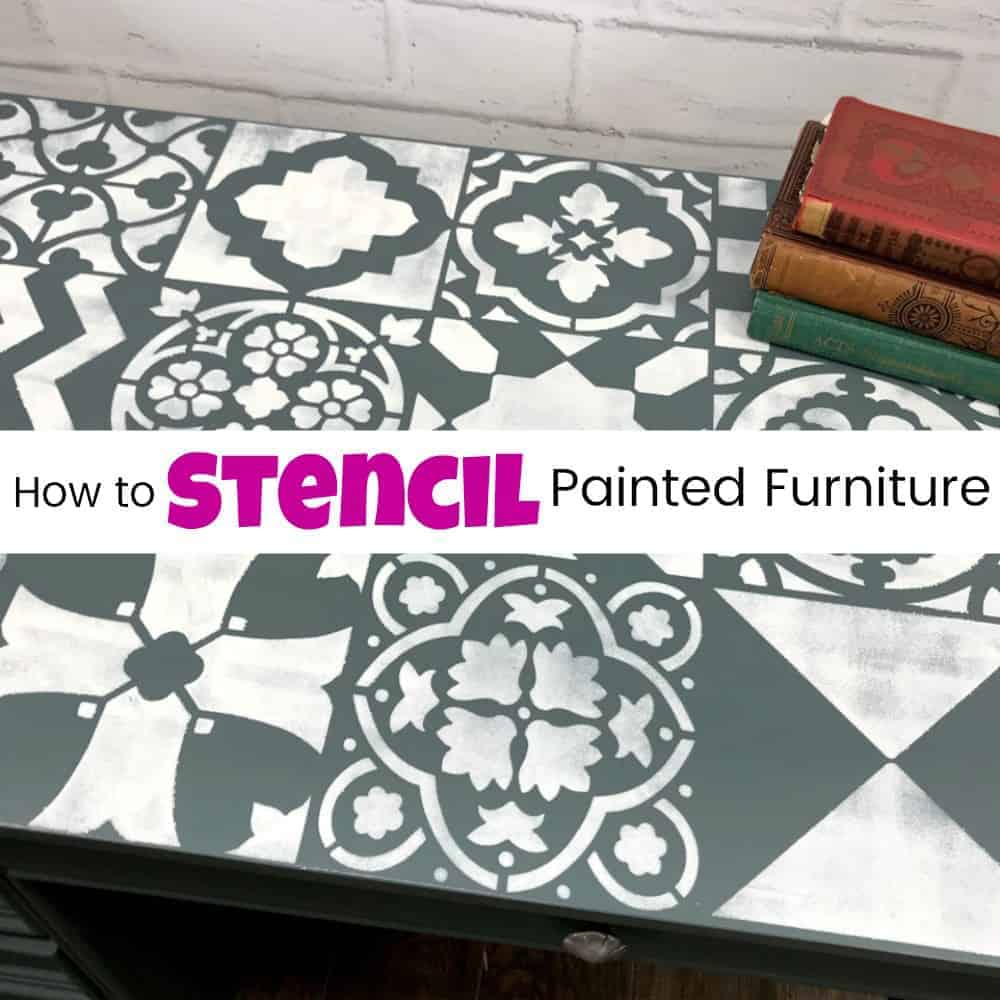
Click here for more DIY stencil projects: Stencil

Reupholstered Vanity Seat
You can’t have a painted vanity without an updated vanity seat. Using an electric staple gun the original vanity seat is reupholstered to match the piece. I am using a complimentary fabric with a peacock feather print. Again, make sure to iron the fabric first and work on a clean flat surface.

When you don’t have enough of the peacock fabric left to cover the seat it’s perfectly fine to use another fabric that compliments rather than an exact match.

Paint and Decoupage Furniture with Bold Peacock Blue
Now that you know how to paint and decoupage furniture – go be creative while this piece heads home.

If you love the glamorous touch of metallic furniture then you will adore the Best of Hollywood Glam Furniture for your Home!


Click here to Pin this post for later.

Check out all of my furniture projects with over 90 painted furniture makeovers: Stunning painted furniture ideas.

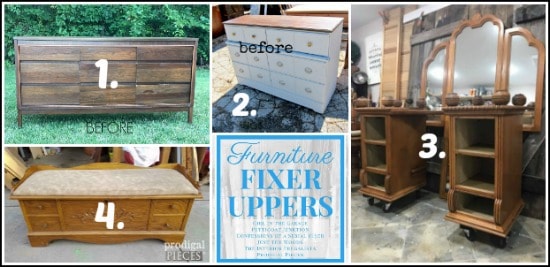
Wait! Don’t Go! It’s that time of the month again for:
Furniture Fixer-Uppers
A few of my creative and talented blogger friends and I have joined together in our monthly Furniture Fixer Uppers share. Let’s see what my friends are up to! Make sure to click the links below the image to check out all the amazing projects that my bloggy girls are working on this month.

Don’t Forget – Follow Just the Woods and Share this post to Inspire others:
FACEBOOK * INSTAGRAM * PINTEREST


Larissa ~ Prodigal Pieces says
This is fantastic, Kandice! Love your tutorial.
Karin says
Wonderful tutorial. Thanks so much for sharing!!! Excellent how you went through every detail.
kandice kullmann says
thank you Karin! Im always on the fence as to whether I write too much or not
Marie says
Kandice, I honestly gasped out loud when I saw this. What a gorgeous makeover!!! Fantastic tutorial too btw. Pinned
Christy@Confessions of a Serial Do-it-Yourselfer says
Such a great piece…sure to be enjoyed for years to come! There should have been a rotary cutter with that cutting mat…makes cutting your pieces a breeze when you run it along side your straight edge. Love that fabric! :):)
Jen @ Girl in the Garage says
I love that turquoise blue, Kandice! Great detailed steps for how to decoupage furniture.
Kathleen Rupp says
I love this makeover!! Fantastic! Every detail looks great; decoupage, painting the hardware, upholstery! It is obvious a lot of work went into this piece. Great job, great makeover! pinned:)
kandice kullmann says
thanks so much Kathleen! yes, a lot of work but it was so much fun 🙂 thanks for the pin xoxo
Linda at Mixed Kreations says
What a stunning piece! Love the color, and fabric. Great job, and tutorial!
Brenda Young says
Loving everything about this project Kandice, simply gorgeous and this weeks featured piece at #fridaysfurniturefix! Thanks for sharing it with us always a pleasure!
kandice kullmann says
thank you so much!! xoxo
Crystal says
What did you use to seal after your decoupage glue dried on fabric?
kandice kullmann says
The drawers as well as the whole piece were sealed with clear sealer. ( https://www.justthewoods.com/product-category/pure-home-paint/protective-finishes/ )
Maria says
Love everything about this blue piece, the more i see your decoupage the more i am in love with this process.
Maria
beth says
I love this piece. If decoupage gets on painted part of drawer do you touch up with paint? Thank you for sharing
kandice kullmann says
hi! If I get glue on the paint I try to wipe it away right away as long as I catch it. With a damp paper towel or a baby wipe. 🙂
Julie Ryan says
What is the name of the blue you used? I want it!