How to Paint the Perfect Powder Blue Painted Dresser
A painted dresser can be simple or artistic. It can be bold or neutral. Whichever way you look at it a painted dresser allows you to keep an old piece of furniture that may have sentimental value while giving it a whole new look. This also lets you hold onto that solid wood quality found in old furniture while adding a bit of your own personal style. Once you decide to update your existing dresser you may need a few painted dresser ideas. Im sharing a pretty little powdery blue painted dresser project today.

Disclosure: This blue painted dresser post contains affiliate links for your convenience. Click here for my full disclosure policy.

Supplies & Tools Needed for How to Paint a Dresser
Materials Needed / Source List:
Tools
- Zibra Paint Brushes
- Furniture Tri Wheelies
- Sandpaper
- Rolgear Ratchet Screwdriver
- Magnetic Tray
- Paint Brush
- Shop-Vac
- Lint Free Cloth
- Find all of my favorite tools and products on my Amazon Page here
Paint
Vintage Solid Wood Dresser
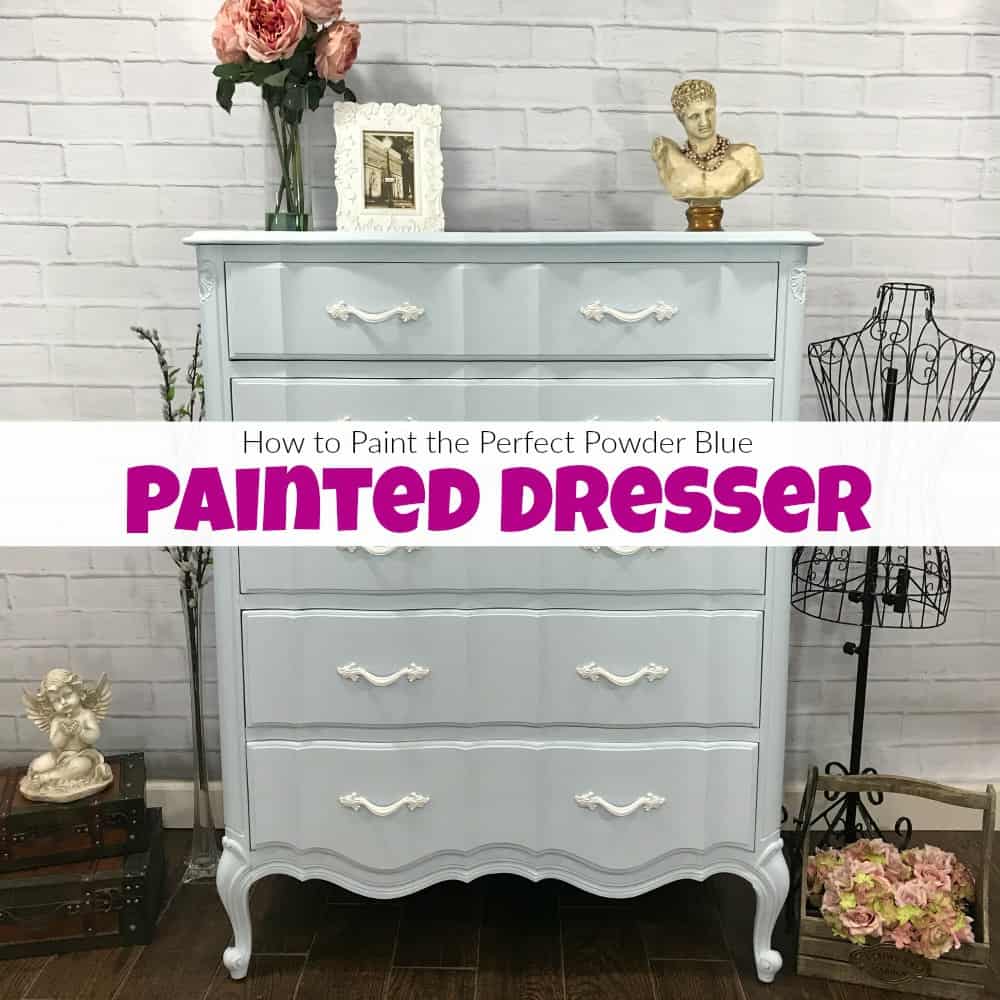
I can honestly say that this dresser is in great shape. It is custom and the owner loves it but wants a little bit of a fresher look for her old furniture. I actually haven’t been doing much custom work lately either since I’ve been doing mostly donations. But when I received her email, she was so thorough in what she wanted for her dresser makeover that I simply couldn’t say no. (big puffy heart) How pretty are the subtle curves on this vintage French Provincial dresser?

This old dresser even has all of the pretty hardware, which is always a plus! I always prefer to keep the original hardware with a DIY dresser project over replacing with new, especially when the hardware really ‘fits’ the piece.

Before Starting Our Painted Dresser Makeover
When you want to know how to paint a dresser you first need to know how to prep your piece for paint. Actually, if this is your first painted furniture project then you may have a few questions. You want to know:
- how to paint a dresser
- how to paint wood furniture
- what is the best paint for furniture
- what furniture painting techniques should I use and how to do them
Well, if you are new to painting old furniture I plan to get through most of these questions as we go. Or you can always start at the beginning with How to Paint Furniture – a Beginners Guide.
Click here to Pin this post for later.
Prepping a Dresser for Paint
Let’s get back to the prep work. First, you will need to remove all of the drawers from your dresser.

When you remove the drawers I like to mark each one on the underside with chalk so I know which drawer goes back where. There’s nothing more annoying than trying to fit the drawers back in and they just don’t feel right. Avoid the Jenga drawer game and make things easier for yourself. I share this along with many other tips in my Tips and Secrets for Painting Furniture.

Next, go ahead and remove that pretty hardware. I’m using my favorite Rolgear ratchet screwdriver. You can find them online HERE if you’d like.

But make sure to keep that hardware and the screws somewhere safe so you don’t lose any. These metal hardware trays come in handy all the time, especially for screws. You can find one online HERE.

To prevent any dust or furniture paint from falling through the hardware holes just cover each hole on the inside with a bit of painters tape.

Cleaning Your Vintage Dresser Before Furniture Paint
Now that our vintage dresser is somewhat taken apart we can start to clean it. Prepping and cleaning are important for all painted furniture projects because you want your furniture paint to stick to the wood and not to the dirt.
Removing Dust
The insides of these wooden drawers are in really nice shape so Im using my shop vac to remove the dust, mostly from the corners. If you don’t have a shop vac, you can find a reasonably priced one online HERE.

Also, go ahead and vacuum out any dust from inside the dresser frame as well. After you vacuum the dust you can also give a quick wipe with a damp cloth inside.

Sanding
You may notice that the surface of the dresser and the drawers are rather smooth and shiny. Grab a piece of sandpaper and give the surface a light sanding. I am using 150 grit for this step.

You should have a little dust but not an overwhelming amount. This is where you will be glad that you covered the holes with tape earlier.

Cleaning
After you lightly sand the entire dresser you will need to clean the surface of dust and dirt. This is my full process for How to Prep Painted Furniture. Make sure to thoroughly wipe down the whole dresser.

You may be surprised at just how dirty old dressers can be. Yikes.

When you have an area with crevices or ornate details, an old toothbrush works great to get those areas clean.

Preventative Measures aka Priming
When it comes to painting old furniture, whether it’s a painted dresser project or any other type of painted furniture makeover the question will often come up as to whether or not to prime. I admit that I used to only use primer when painting furniture white. Using a primer is also a personal choice but I can tell you that I have never regretted choosing to use a primer. I get into more details about types of primers in How to Block Stains & Stop Bleed Through. For this painted dresser makeover I am using BOSS from Dixie Belle.


The one main thing that I love about using this product is that it goes on white, but dries clear. You can get BOSS, as well as other furniture paint products from Dixie Belle online HERE. Go ahead and apply one to two coats of BOSS primer on your old dresser. Im using my flat Zibra brush for this. You can get Zibra brushes online HERE.

This is how the BOSS primer looks when still wet.

Here it is as it dries.

Once fully dry the primer dries to a clear matte like finish.

You can find other projects where a primer is used here: Primer.
Click here to Pin this post for later.
DIY Dresser Makeover
Now that our dresser is cleaned, sanded and prepped we can finally get on to painting a dresser. This pretty French Provincial dresser is being painted in a soft powdery light blue chalk paint called Haint Blue from Dixie Belle.

Using the same flat Zibra brush as before (after cleaning it of course) go ahead and paint the dresser in this pretty blue furniture paint.

This blue paint is so light that it almost looks white.

For a super smooth finish make sure to lightly sand in between coats to knock off any possible bumps, or imperfections. Use a fine grit sandpaper for this part, 220 grit or higher.

After you lightly sand always make sure to go back and wipe with a lint-free cloth to remove the sanding dust. I keep a bunch of these lint-free clothes in my shop, you can get some here.

This particular painted dresser has a few grooves in the curvy details where you may miss the first time around.

Grab a smaller brush, like this Zibra triangle brush to get into those harder to reach areas. Find the triangle brush HERE.

Two coats of furniture paint is looking so much better.

Adding a Top Coat Sealer to Your Painted Dresser
Did you notice that we are not distressing this painted dresser? Nope, no distressing on this one. When you are painting furniture and not adding the distressed look, you do still want to lightly sand in between coats for a smooth finish but just be careful to only add light pressure. Like all painted furniture makeovers we do still need to seal our refurbished dresser for protection. I am using the clear flat sealer from Dixie Belle.

Since this painted dresser is not distressed I am going to tint the sealer as an added ‘why not?” You can tint your sealer anytime you’d like. To do this simply add your clear sealer to a paper plate and then add a very small amount of your furniture paint to the sealer. If you would prefer a distressed blue dresser then you just need to lightly sand the edges, you can see how in this How to Distress Painted Wood post.

Next, mix them together well on the plate. Make sure that the mixture is mostly sealer with just a dab of paint.

To seal your painted dresser grab your applicator sponge. The sponge is the easiest way to apply sealer without streaks or brushstrokes. You can get these handy dandy applicator sponges online HERE. I always grab a few at a time since they go in and out of stock.

Dab your damp sponge into your sealer and wipe off excess into the plate.

Your sponge should not be soaked or have too much sealer on it. A little goes a long way.

Apply your sealer to the entire painted dresser including the drawers.

Use a clean, dry chip brush to remove any excess sealer from grooves and corners.

Click here to Pin this post for later.
Additional Sealer for Painted Chest of Drawers
Keep in mind that the clear flat sealer is exactly that. It is very flat/matte with zero sheen at all. After 2 coats of clear flat sealer, I am adding an additional coat of sealer as an added precaution and extra protection. This time I am using a mixture of the clear flat, haint blue, and Gator Hide. Gator Hide is a waterproof clear sealer with a slight sheen. You can get Gator Hide online HERE. By combining all three the finish will fall a bit more in between flat and sheen.

Again, just like before you will want to lightly sand in between coats. This not only creates a smooth soft finish but it also helps to reduce signs of brushstrokes on your painted dresser.

Remember to wipe the dust away with your lint-free cloth again.

Apply your sealer the same as before. If you have questions about sealing your painted furniture project you can find a full tutorial with video on how to apply clear sealer here: Sealing Painted Furniture

Cleaning Vintage Hardware
Don’t forget the hardware! We still have to give those an update as well.

First, we need to get the old hardware clean before we can paint it. Yes, we are painting this hardware! Here is how I Clean, Prep and Paint Hardware. If your old hardware has already been painted and you need to remove that old paint you may want to try this post: Remove Paint & Clean Brass Hardware.

These orange oven mitts and a scrub brush are my go-to’s for getting old hardware clean.

Once the old dirt and grime are removed we can paint.

Painting Vintage Hardware
We will be painting the hardware in a pure white furniture paint called Cotton. So, since we are going from dark metal to white I am using primer on the hardware to make my life easier. You should do it too. My favorite shellac based primer is this one HERE.

Use an old chip brush to apply your primer to your hardware. You most likely won’t get 100% coverage with one coat of primer, but don’t worry too much about that.

We will be painting the hardware in Cotton by Dixie Belle. It is a pure white as the snow kind of white. You can get some online HERE.

Two coats of white chalk paint on these vintage hardware pulls looks so pretty, don’t you think?

Make sure to seal your painted hardware as well. You can tint your clear sealer with Cotton for the hardware the same way we did earlier for the painted dresser. The white really pops and looks nice with the soft blue.


Freshening Up Inside the Drawers
Remember when we first started this dresser redo project, the inside of the drawers were in really nice shape? Well, there is no need to paint or line them since they are rather clean already. But we do want to spruce them up just a bit. I’ll be freshening these wooden drawers up with a new scent from Wise Owl called Tobacco Flower. The furniture salve conditions, seals and protects your wood. But unlike wax, it does not harden. Instead, it leaves a softer and heavenly smelling result. This furniture salve is made with hemp seed oil, natural waxes, plus other awesome natural goodness that adds to the strength and superpowers of the salve. You can watch this video where I use the Tobacco Flower for the drawers on this painted dresser.

You can order the salve online HERE. Here is another full tutorial on How to Save Wooden Drawers with Lemon Verbena. See how nice the wooden drawers look after a quick application.

Click here to Pin this post for later.
Soft and Sweet Painted Dresser Makeover
This pretty painted dresser is heading home.

Check out all of my furniture projects with over 90 painted furniture makeovers: Stunning painted furniture ideas.

Click here to Pin this post for later.


I had a little helper when photographing this painted dresser 😉
Wait! Don’t Go! It’s that time of the month again for:
Furniture Fixer-Uppers
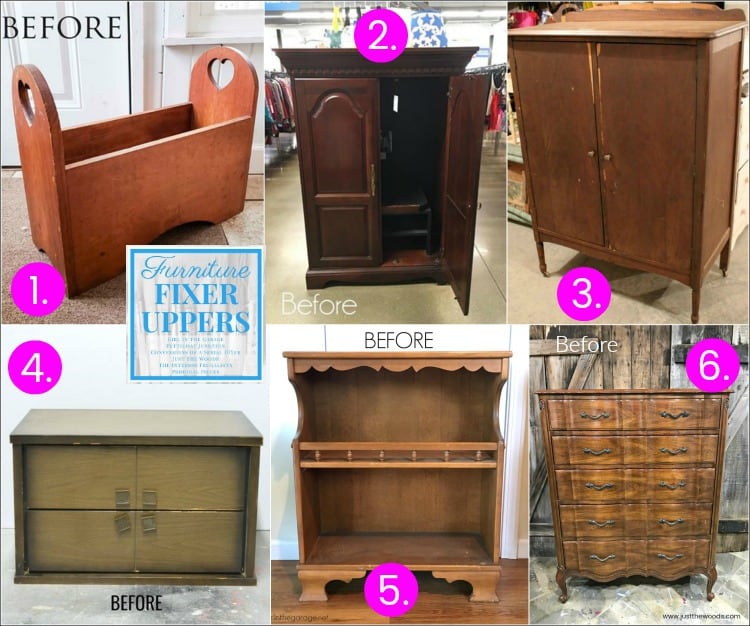
Its that time again where a few of my creative and talented blogger friends and I have joined together in our monthly Furniture Fixer Uppers share. Let’s see what my friends are up to! Make sure to click the links below the image to check out all the amazing projects that my bloggy girls are working on this month.
2. Confessions of a Serial DIYer
6. Just the Woods (you are here)

Don’t Forget – Follow Just the Woods and Share this post to Inspire others:

FACEBOOK * INSTAGRAM * PINTEREST
Stay connected! For more tips and tricks sign up here : [mc4wp_form id=”1340″]

Click here to Pin this post for later.


Exceptional tutorial. Thank you so much for taking the inhibitions out of painting furniture! I appreciate the time ond effort put into this post. Great job!
i really love your tutorials and referenced them when I painted a large dresser! I do have one question though; won’t the furniture salve inside the drawers stain clothing or scent them??
Wow Kandice, this is a wonderful tutorial on how to paint furniture from A-Z! I haven’t tried the furniture salve yet but it’s on my Must Try list. I bet your client was thrilled with her dresser transformation. Such a pretty subtle blue color!
I had that exact dresser growing up! In fact, I think it is still being used at my parents’ house. I love the blue and the white pops perfectly! I wish mine had looked like this growing up.
Gorgeous makeover, Kandice! I know your client must have been thrilled with the beautiful job you did on it! Merry Christmas! XOXO
The dresser is beautiful now! The Haint Blue is perfect. I love all your tutorials. I do have a question. What are all the benefits of tinting your sealer with paint? Does it help prevent the flashing and streaking that especially occurs when top-coating black paints?
This turned out to be such a pretty soft blue dresser makeover, Kandice! xo
Would the process be any different of the dresser I’m painting has already been painted once and I just want to change the color?
It depends on what kind of paint is already on the dresser, if its peeling or not and then what kind of paint you will be using. I have a post for repainting painted furniture. I hope it can be of some help — https://www.justthewoods.com/repainting-furniture-paint/