This nesting tables makeover is so fun and colorful. Nesting tables have to be the most adorable pieces of furniture. These painted nesting tables weren’t exactly planned, yet they came out so pretty.
Today I’m sharing a super fun furniture makeover taking these nest of tables from plain dark brown to boho chic with a colorful watercolor look. If you are looking for a unique nesting tables makeover then you are in the right place.

What Are Nesting Tables
Nesting tables are also referred to as a nest of tables or nested tables because of their small size and how one table snuggly fits under the other. Often, these nest of tables come in a set of three are are used as decorative occasional tables.
Supplies and Tools Needed for a Painted Nesting Tables Makeover
For this DIY nesting tables project, like any other painted furniture project you will need a combination of tools, supplies, and paint. This is the supply list for everything needed in this unique nesting tables makeover:
Disclosure: This post contains affiliate links for your convenience. Click here for my full disclosure policy
- Zibra Paint Brushes or Cling On Brushes
- Furniture Tri Wheelies
- Sandpaper
- Stencil
- Salt Wash
- Shop-Vac
- Lint Free Cloth
- Find all of my favorite tools and products on my Amazon Page here
- Wise Owl Paint
Before we begin, this nesting tables makeover project is part of our monthly Furniture Fixer Uppers share. You know what that means! Make sure to stick around all the way to the end for more great painted furniture before and after projects.

Check out all of my furniture projects with over 90 painted furniture makeovers: Stunning painted furniture ideas.
Unfinished Nesting Tables
I found these nesting side tables on an online marketplace. Porch pick up – easy peasy! They are actually made by Bombay Company and were made in the 1990s. So they aren’t even that old. At least not to most of us 😉 They are cute, in decent shape, and super boring. We can change that!

Prepping Nesting Tables for Paint
Like all of our painted furniture makeovers we need to thoroughly clean and prep this nest of tables. Let’s start by grabbing some sandpaper and giving the entire surface a nice scuff.

You can see on the underside of the largest nesting table the original Bombay Company label. I always like to leave any markings alone when possible. When I was in my 20s I remember thinking The Bombay Company was fancy upscale furniture. lol.

Do make sure to scrape off any of those little stickers that you find on ‘not so old’ furniture. A flat razor gets these off with ease.

Make sure to thoroughly clean the nesting tables after you finish scuffing to remove dirt, dust and any other grime.

Applying Primer before Painting Nesting Tables
Next, because these tables are dark and Im still not sure what direction I’m going yet, I am priming these tables with Wise Owl’s stain eliminating primer. This is actually the gray primer. You can find some online here: gray primer.

Now grab your favorite brush and make sure it’s clean. I often like to swap back and forth between Cling Ons and Zibra brushes. They both have soft bristles, are easy to work with and clean up well. (I abuse my brushes) To be honest, I like them both. Zibra brushes are a bit more affordable and can be ordered online (HERE). Cling Ons are always awesome and can be ordered online (HERE).

I am using my mini Cling On for this.

Use your brush to apply the primer the same way that you would apply any paint.

Two coats of primer are applied to these nesting tables.

Nesting Tables Makeover – Base Coat of Paint
Now that we have a nice foundation set for our painted nesting tables makeover we can begin to paint. Let’s start with a nice neutral white gray called Oyster from Wise Owl.
I like to transfer my paint from the can to these nifty Fifo bottles. This way I can squirt out just a little at a time and waste as little paint as possible. You can find these bottles online here: Fifo bottles.

Go ahead and paint the nesting tables with Oyster (white-gray paint). I switch over to my flat cling on brush for this.

We now have a nice neutral base on our nesting tables project.

Adding Color to Your Chalk Painted Nesting Tables
Next, we are going to add some color. I just happen to have these small size paints in Lotus (a bold pink), Mandarina (orange) and Poppy (red). How fun!

In addition to adding color to our makeover we will also add a bit of texture. As a matter of fact, we will be using multiple furniture painting techniques in this project, such as:
- layering paint
- texture with Saltwash
- white wash
- stenciling
Texture
To add texture we will be using Saltwash. You can find Saltwash online here: Salt Wash. To use Saltwash you simply mix the powder with your paint. You can scoop some paint into a plastic cup, then add some Saltwash powder to the paint. Mix until you have the consistency of cake icing – thick but not chunky. There is no magic method or formula to this, I don’t follow a specific ratio. In fact this time I keep my Saltwash in a separate cup and randomly mix it with the paint as I go.

You can see other projects using Saltwash for texture here:
- Dresser Makeover with Saltwash –How to Paint a Dresser
- Textured Table with Saltwash – How to Create a Textured Finish
Apply Paint with Texture
Using a dabbing or stippling motion, randomly apply paint all over the surface of your nest of tables. Sometimes add salt wash to the brush, while other times just use the paint alone. This will create texture in some areas but not all. This will look a bit wild at first. Once might even use the word ‘hideous’. Don’t worry.

Wow, this is a bit wild. You can see that as I continued from the small table, to the medium then the large I get a bit more heavy handed with the paint. Good thing, we are just having fun and it’s just paint!

How to Apply a White Wash
Now that we have some very loud hand painted nesting tables we need to tone the color down a bit. My favorite furniture painting technique to accomplish this is with a whitewash. I will be using Kashmir for the wash. Kashmir is a neutral off white color. You can see Kashmir on this gorgeous makeover here: Decoupage Furniture Tutorial.

To make a wash simply squirt some paint into a cup and dilute with water. Again, I don’t use a specific ration. I just mix and stir until I have a nice consistency. The only downfall with this is that you want to make sure to make enough wash for your entire project, but not so much that any gets wasted. It can be tricky.
To create a whitewash effect you will apply your diluted paint, then wipe it away with a clean cloth (or old T-shirt). When you wipe away some of the paint will remain on the painted surface and in the crevices.

The white wash lightens up and tones down the darker color creating a softer finish. You can find a full tutorial for how to whitewash furniture here: How to Whitewash Wood Furniture.


Reveal Texture
Remember we used Saltwash to create texture? Well, now we need to reveal some of that texture goodness. Grab a piece of sandpaper. I am using 220 grit, and I wrap it around a sang block. Lightly sand the entire surface of your painted nest of tables.

Make sure to wipe down your nesting tables with a lint free cloth when you finish sanding. The sanding will reveal the texture and the cloth will remove the dust that you create in the process.
I keep a bucket of these cloths in my shop and toss them in the wash after each project. They are handy to have and you can get them online here: lint free cloths.

Our painted nesting tables makeover has a somewhat watercolor effect now.

Adding Stencil to Nesting Tables Makeover
Our project is coming along, but why stop now? Let’s add a little more. Next, we are going to add a subtle stencil to our chalk painted nest of tables makeover using Bronze Metallic Gilding paint from Wise Owl. This is my first time using this particular metallic paint and I kinda love it. I will definitely be using it more.
If you love metallic paint then make sure to check out all of my other metallic makeovers here: Metallic.

Working with the bronze metallic paint I am using my flat end stencil brush.

I am using a cute stencil that I found when cleaning up in my shop. To be honest, I bought it online a few years ago here: stencil.

Stenciling with Metallic Paint
Scoop a little bit of metallic paint onto a paper plate. A little goes a long way, I actually scooped more than I need and tried to put some back into the container :).

Dab your brush in the paint, then blot it on a paper towel to remove the paint. You actually want to have very little paint on the brush. Go ahead and gently dab your paint onto your stencil. During this process its always better to have less paint then too much. Too much will bleed and look messy.

When you remove the stencil you can see the soft metallic stencil, with the watercolor effect of the paint and the raised texture in some areas. I think this is pretty cool. So many furniture painting techniques but each with just enough subtlety to not overpower the next.

Go ahead and add the stencil to the other nesting table tops however you like. I am adding them with random placement.

If any of your stencil is darker then the others you can lightly go over it with a fine grit sandpaper. Make sure the metallic paint is dry before you sand. The sandpaper will lighten the stencil and will also help to lighten any imperfections that may have happened during the stencil process. 😉
Sealing your Textured, Stenciled, and Hand Painted Nesting Tables
Now that we are reaching the end of our project we need to seal our painted nesting tables makeover for protection. To seal our tables I am using satin varnish from Wise Owl. You can find it online here: Varnish.
This varnish is great because its a water-based topcoat designed for high traffic areas. It is non-yellowing and industrial-strength. Win win!

As always, I grab my favorite applicator sponge to apply the topcoat. You can get these online here: yellow sponge. They do tend to go in and out of stock, so when they are in stock I grab a few because I have yet to find an alternative that I like as much as these.

Scoop a little varnish onto a paper plate and dab your sponge in. Wipe off any excess varnish and apply in thin coats to your painted nesting tables. You can see how the varnish deepens the finish a bit as you apply.

If you ever have questions about sealing your furniture makeover project you can find a full tutorial with video on my go-to method for how to apply clear sealer here: Sealing Painted Furniture.

Video Tutorial
Prefer video? You can follow the project via video here. If you are unable to see the video you may need to turn off ‘ad-blockers’ on your site. The video may also autoplay within the tutorial post.
Painted Nesting Tables Makeover with Watercolor Effect
This project, like many of my makeovers, is being donated. Most of my makeovers are given to a local school, animal rescue, church or charity to help with their fundraising efforts. Click here to see all of my projects that have been donated to support local fundraisers, schools, and charities: Donation Projects.

This fun project incorporates multiple techniques to create a unique watercolor look on your painted furniture. The best part is that no two will look alike!

Check out the texture and colorful goodness. You can see a little of each color used in the makeover.

Check out all of my furniture projects with over 90 painted furniture makeovers: Stunning painted furniture ideas.

When considering table makeover ideas, and nesting table ideas I hope that these unique nesting tables give you inspiration to take on any new project!


Ready to Get Started?
Not sure where to buy Wise Owl Paint? You can get find all of these Wise Owl products and more online here: Wise Owl.
Furniture Fixer-Uppers
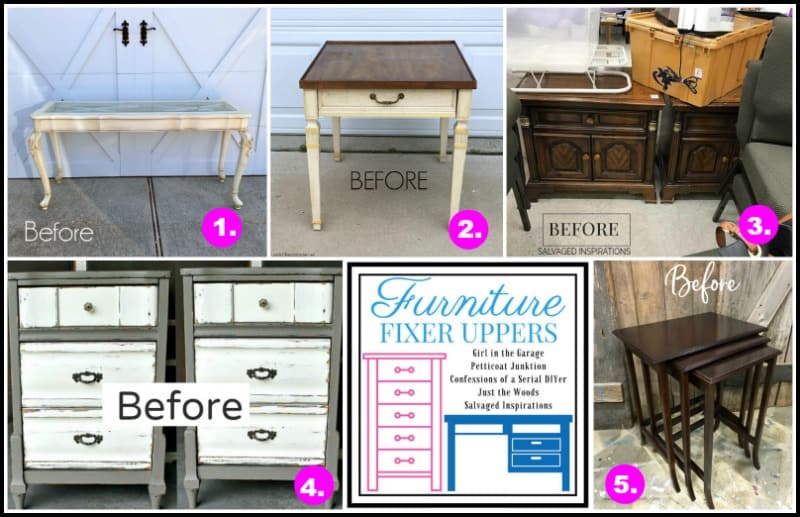
It’s that time again where a few of my creative and talented blogger friends and I have joined together in our monthly Furniture Fixer Uppers share. Let’s see what my friends are up to! Make sure to click the links below the image to check out all the amazing projects that my bloggy girls are working on this month.
- 1. Confessions of a Serial DIYer
- 2. Girl in the Garage
- 3. Salvaged Inspirations
- 4. Petticoat Junktion
- 5. Just the Woods (you are here)
Don’t Forget – Follow Just the Woods and Share this post to Inspire others:

FACEBOOK * INSTAGRAM * PINTEREST


Denise says
Love nesting tables and your water color effect makes these so cheerful Kandice! pinned! 😊💙
kandice kullmann says
thank you so much! xoxo
Linda C Johnston says
Once again, a fantastic job! Clear, concise, direct and thorough. What more could anyone ask. I love your tutorials for these reasons. Thanks for the inspiration and how-to information.
kandice kullmann says
thank you so much!!
Christy James says
I have to say that I wasn’t sure where you were going with these at first (flashbacks to my 90’s sponge-painted bathroom!) but the end result is really pretty! I love how you just go for it! XO
kandice kullmann says
I admit I wasn’t sure where I was going with these for a bit myself lol. Thank you xoxo
Larissa ~ Prodigal Pieces says
Ooh…love that Boho vibe! So beautiful, Kandice.
Jen @ Girl in the Garage says
Wow, this makeover was totally unexpected but it turned out really well, Kandice! It’s fun and very boho chic! xo
Marie says
Wow Kandice, did you ever add some personality to these humdrum nesting tables! Love the boho vibe, the colors, and the textured finish. I’m finally catching up on this month’s furniture fixer upper projects – I miss you gals! So is this one being donated or is it a keeper?
kandice kullmann says
thans Marie! we miss you!! This is still sitting all alone in my shop. I don’t even know what to do with them since there aren’t really any raffles or auctions going on .. They’ll find a home eventually I guess. 🙂
Christie says
These are simply amazing and beautiful! I’m used to the ugly phases in painting projects and I’ve used all the techniques you used here but I do believe I would see how ugly these were for the first 3/4th of the project and I’d yell quit. I’d never hae the oomph to push my way through. You did something really special here.
Drake Frost says
Wow, that looks so vintage. I fell in love with this design, if it were my will, then I would repaint all the furniture in this way. I really liked this idea, thanks for sharing it. Have you done any other projects with this design? I would be interested to see more. I really love vintage things, but unfortunately I do not often see such things. So now I know how to create their look myself. Thanks for sharing this with us, this is useful to me. Have a nice day!
Cheryl Atkinson says
Hi Kandace! It’s so good to see your work again. Did you take some time off? Well anyway, love your work and I love these tables. I am always looking for nesting tables. Haven’t found any yet.