Painting wood furniture can completely transform the appearance of a piece of furniture. As long as you know how to paint wood furniture the possibilities are endless as to what you can create. And if you want your creative painted furniture makeover to last then you should also look into the best paint for wood furniture while you’re at it. No worries, I’ve got you covered. With hundreds of furniture makeovers under my belt, I have multiple tutorials on different finishes for painting wood furniture that you can find all here on the blog. But for the sake of this project, I want to share with you how to paint wood furniture that is super ornate to make it look amazing with layers and patina.

Disclosure: This painting wood furniture post contains affiliate links for your convenience. I may be compensated if you make a purchase after clicking on my links. Click here for my full disclosure policy.

Supply List for Painting Wood Furniture
What You Will Need
Tools
- Electric Sander
- Shop-Vac
- Lint Free Cloth
- Furniture Tri-Dollies
- Zibra Paint Brushes
- Chip Brushes
- Cling On Paint Brushes
- Sandpaper
- Yellow Applicator Sponges
- Find all of my favorite tools and products on my Amazon Page here
Paint
Make sure to stick around all the way to the end, its Furniture Fixer Upper time where my fellow furniture painting friends join in and share their projects as well.
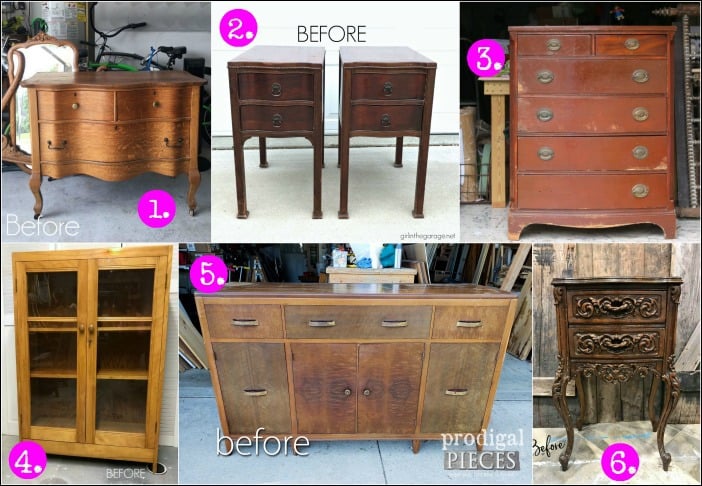
Vintage Ornate Wooden Table
This wooden table is old, dark and covered in old shellac. But, oooh look at those details!

Another cool thing about this old table is that there is no hardware. The ‘handle’ to open the drawers is incorporated into the ornate details on the drawers themselves. I confess that I tried to keep the old textured shellac on the table top. But a last-minute decision brought me to sand it smooth with the electric sander.

The entire table is cleaned, sanded and prepped as I always Prep Painted Furniture. Even inside the drawers is prepped for paint.
Painting an Ornate Wood Table
I think it goes without saying that painting wood furniture can also save your old outdated or ugly things and give them a whole new life. So let’s start by flipping this little guy over for a thorough base coat. Grab your favorite brush and make sure it’s clean. I like to swap back and forth between Cling Ons and Zibra brushes. They both have soft bristles, are easy to work with and clean up well. (I abuse my brushes) To be honest, I like them both and don’t have a true preference. Zibra brushes are a bit more affordable and can be ordered online (HERE). Cling Ons can be ordered online (HERE).

For the base color, I am starting with a deep green base called Collard Greens by Dixie Belle. There are always different methods depending on whether you are painting furniture light or dark. For example, when painting wood furniture white or light colors you would want to use a different base coat. You would be better off starting with a primer or sealer to prevent any bleed through. But since we are painting this wood table in layers and patina we can skip that particular step. (When you do want to paint furniture white make sure to check out my tips: Painting Furniture White)

Collard greens give a nice rich base coat over this ornate wooden table.

Painting Wood Furniture with Layers
But it will not stay this gorgeous rich color. Sorry. As crazy as it sounds, next, I am adding a layer of Colonel Mustard which is a mustard yellow. Please bear with me, I know this doesn’t really look pretty. Yet. But let’s keep going.

Painting Wood Furniture with Patina
When considering painting wood furniture ideas, what about patina? Who knew that adding a little age, texture, and grunge would look so amazing? I am adding patina to this painted wood table by first applying Dixie Belles copper patina paint.

To activate the patina you have to follow the patina paint with the patina spray.

The beginning stages of oxidation are still rather um, less than pretty.

The patina can take up to 24 hours to fully complete ‘doing its thing’ of oxidizing and drying. You can see where the patina green color is starting to show as the patina paint and spray dry.

Click here to Pin this post for later.
When painting a wood table you really can have fun and take chances. This is what the table looks like after 24 hours of adding patina paint. Still a little wild, I know. We definitely need to tone this down.

Applying a Wash with Furniture Paint
To soften the overall appearance of this painted finish we are applying a wash. The majority of the time, when applying a wash I use white furniture paint. But in the case of this painted table, I want to keep the color more on the yellow side. Since I rarely get to paint yellow furniture I don’t want to change my yellow to white if that makes sense. So we will add a diluted wash using soft yellow furniture paint called Rebel yell-ow by Dixie Belle.

To make a wash with furniture paint simply scoop some paint into a cup and dilute with water. Keep a spray bottle handy as well for adding more water if needed.

Working in sections you will want to brush your diluted paint on to the piece.

Spray with more water, as needed.

Grab a clean, dry rag or old T-shirt.

Wipe away the paint that you just applied. Make sure to work rather quickly to wipe away the paint before it dries completely.

The soft yellow wash softens the overall appearance and helps to blend all of the colors together. You can find a more detailed tutorial on whitewashing here: How to Whitewash Wood Furniture.

Prefer video? I bet you do. Here is a video showing the patina application as well as the wash application.
Click here to Pin this post for later
Finishing Up Your Painted Table
As an added touch, a small amount of Fluff is added very lightly to the high points of the details. Fluff is an off-white furniture paint by Dixie Belle and is applied the same way that you would apply gilding wax. I apply the Fluff by dabbing my finger into the paint, wiping it off and rubbing it on with my finger.

Go ahead and lightly distress the edges and as always, when painting wood furniture or any furniture for that matter make sure to seal your project for protection. This table is sealed using Dixie Belles clear satin sealer. If you have questions about sealing your painted furniture project you can find a full tutorial with video on how to apply clear sealer here: Sealing Painted Furniture

Painting Wooden Furniture for Breathtaking Results
Now that you know how to paint wood furniture and how to take chances and paint with patina, go make something beautiful! But before you go make sure to take in all the eye candy that result from taking chances. I admit that I questioned myself many times during this painted furniture makeover, but I am in love with the end result. This table was donated to a local animal rescue and auctioned off to help pay for vet bills for their puppies. Click here to see all of my projects that have been donated to support local fundraisers, schools, and charities: Donation Projects.

Check out all of my furniture projects with over 90 painted furniture makeovers: Stunning painted furniture ideas.

Click here to Pin this post for later


Wait! Don’t Go! It’s that time of the month again for:
Furniture Fixer-Uppers
Its that time again where a few of my creative and talented blogger friends and I have joined together in our monthly Furniture Fixer Uppers share. Let’s see what my friends are up to! Make sure to click the links below the image to check out all the amazing projects that my bloggy girls are working on this month.
You Might Also Like:
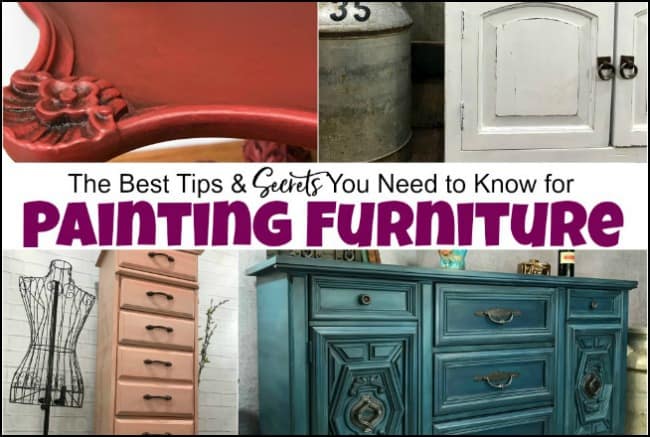
If you like this post make sure to check out all of the tips & secrets that I wish someone told me when I started painting furniture here: Painting Furniture Secrets

If it’s patina you crave, then you will love Perfectly Aged Patina Paint Projects

Don’t Forget – Follow Just the Woods and Share this post to Inspire others:
FACEBOOK * INSTAGRAM * PINTEREST


Larissa ~ Prodigal Pieces says
I love me some layers!! This is just beautiful, Kandice. Sharing!
kandice kullmann says
thank you Larissa! xoxo
Debra says
Beautiful! I love it! The layers are so gorgeous. I’m trying to learn this technique. I tried layering paint on an end table (minus the patina paint) and it just looked like a hot mess. You’ve encouraged me to try again!
kandice kullmann says
Woohoo!! Try again and have fun with it xoxo
Christy says
I’d love to try a layered look…really brought out the details in this pretty piece! XO
Kathy says
Oh my gosh this piece is so pretty Kandice. Love it!
kandice kullmann says
thank you Kathy 🙂
Britt says
It’s gorgeous! I love that you donated it to help animals❤
Britt says
Its gorgeous! I love that you donated it to help animals❤
kandice kullmann says
Thank you Britt! they auctioned it off <3
Teri says
This piece is STUNNING!!!!! I absolutely love it….
kandice kullmann says
Thank you Teri! It was a lot of fun just playing with all the products 🙂
Marie says
I have one word, “WOW” You rocked this challenge girl!
kandice kullmann says
thanks Marie 🙂
Carol S says
That is one crazy amazing piece of furniture to begin with. How you got the vision to refinish it eludes me. It is beautiful!!! You are very courageous. Great job!
kandice kullmann says
thank you, I was a bit worried along the way myself lol
Debra says
WOW WOW WOW…… Love all the layers! What a beautiful piece!!
kandice kullmann says
thank you so much!
Jasmin says
Wow! This looks amazing with Dixie Belle Paint! Great job!
Maya D says
Absolutely love this blog post and your piece came out looking amazing! So great! Keep up the wonderful work!
Alanna says
Love it! Such a cool & unique technique you used! Looks so good!!
Suzanne Fulford says
GORGEOUS!!!!
Jen @ Girl in the Garage says
Kandice – honestly I wasn’t sure how this would end up but it turned out very cool!! 😉
Terri Nobles says
I love ya’lls stuff! I want to be included. Please add me to the audience!