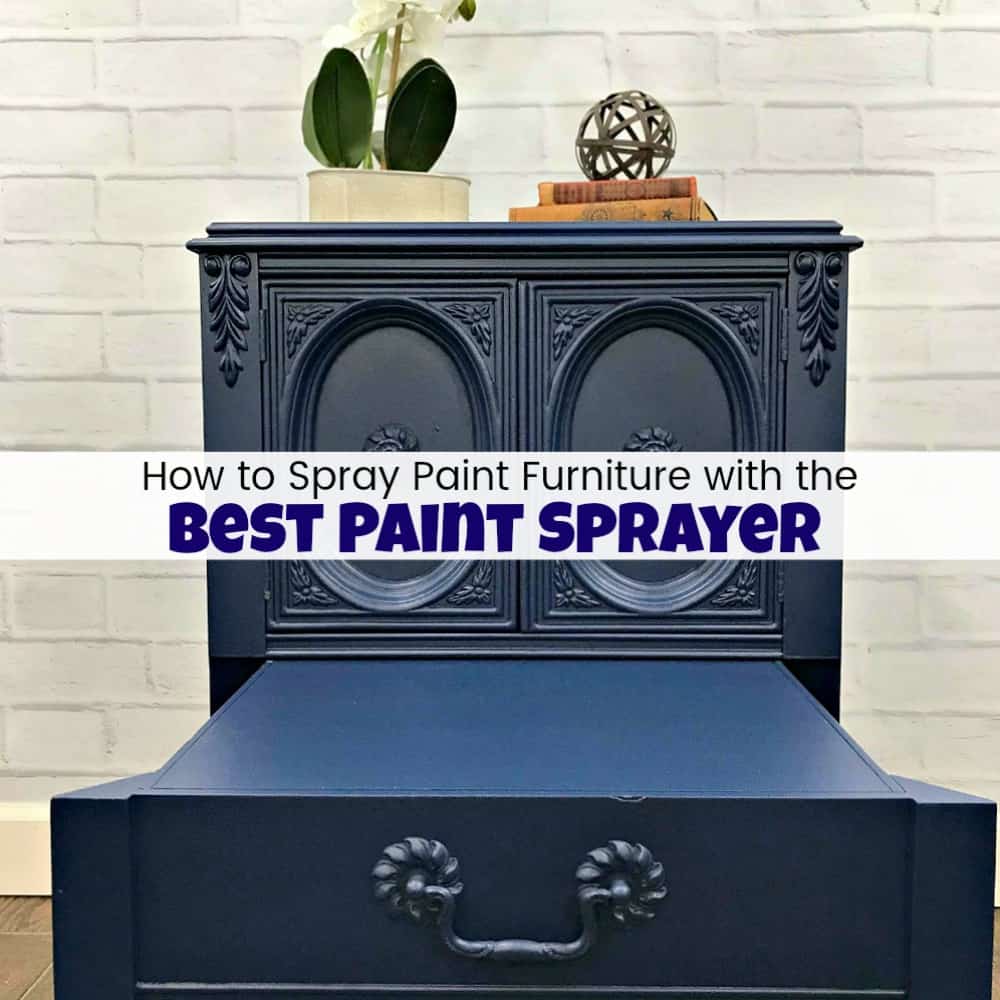
How to Spray Paint Furniture with the Best Paint Sprayer
Does the thought of using a paint sprayer make you excited and nervous at the same time? You want to be able to spray paint furniture for fast results, but you also want to make sure to do it right. I get it. Spray painting furniture can give you a smooth finish with no brush strokes and can be done rather quickly. But you may be wondering what is the best paint sprayer for your project. Or maybe you need to know how to use a paint sprayer. This vintage ornate wooden table is the perfect project to answer all of your paint sprayer questions.

Disclosure: This best paint sprayer post is sponsored by HomeRight. This post contains affiliate links for your convenience. I may be compensated if you make a purchase after clicking on my links. Click here for my full disclosure policy.

Supply List for Spray Painting Furniture
What You Will Need
Tools
- Zibra Paint Brushes
- Rolgear Screwdriver
- Toothbrush
- Sandpaper
- Dewalt Orbital Sander
- Shop-Vac
- Lint Free Cloth
- Flexible Sandpaper
- Wood Glue
- Wood Glue Syringe
- Bondo
- Dremel Rotary Tool
- Wise Owl Lemon Verbena
- HomeRight Spray Shelter
- HomeRight Finish Max Extra
- Find all of my favorite tools and products on my Amazon Page here
Paint
Make sure to stick around all the way to the end of this project because it’s our monthly Furniture Fixer Uppers day. You know what that means? You get a whole bunch of furniture painting projects to enjoy. 🙂
Unfinished Wooden Table
This unique vintage table belongs to a customer. It’s the first I’ve ever seen of a table this style. At first glance, it looks pretty normal, right?

But then check this out! That bottom drawer is actually a pullout! I bet you didn’t see that part coming! Those front legs sort of split in half with the front portions on casters to roll out the shelf. Pretty neat huh?

Don’t worry, there aren’t any surprises behind the center doors. Just a standard opening for storage in there.

But, as you can probably see the table is made of mahogany which usually means bleed through. Bleed through may be the least of my problems at the moment. The top of the table has some damage requiring repairs. The decorative trim is split and broken in multiple spots. We will definitely need more than a little wood glue to fix this up.

If you are new to furniture painting and want to learn how to update old furniture with paint you can always start at the beginning with How to Paint Furniture – a Beginners Guide.
Repairing a Vintage Wooden Table
Let’s start with the repairs to the broken parts of the wooden table. First, and foremost before anything I else I grab my favorite orbital sander and sand the top of the table. If you don’t yet have an orbital I highly recommend this one: HERE. The top has some water marks and rings along with discolorations, dents, and dings. Yes, I sand inside my shop which is inside my house and manage to NOT make a dusty mess. I share tips like this and more in my Best Tips for Painting Furniture.

Next, I grab some wood glue and a fresh wood glue syringe. These are great for getting wood glue into tight spaces or small spaces. You can find them online HERE. I tend to buy them in bulk so I can use a new one each time I need it.

Fill your glue syringe with wood glue.

This may be the closest I ever get to playing doctor. :p

Gently apply your wood glue to the broken area. Try not to go overboard with the glue.

Press the broken piece into place and wipe away any excess wood glue from the table with a damp cloth or paper towel.

You can use clamps to hold your pieces in place while they dry if needed.

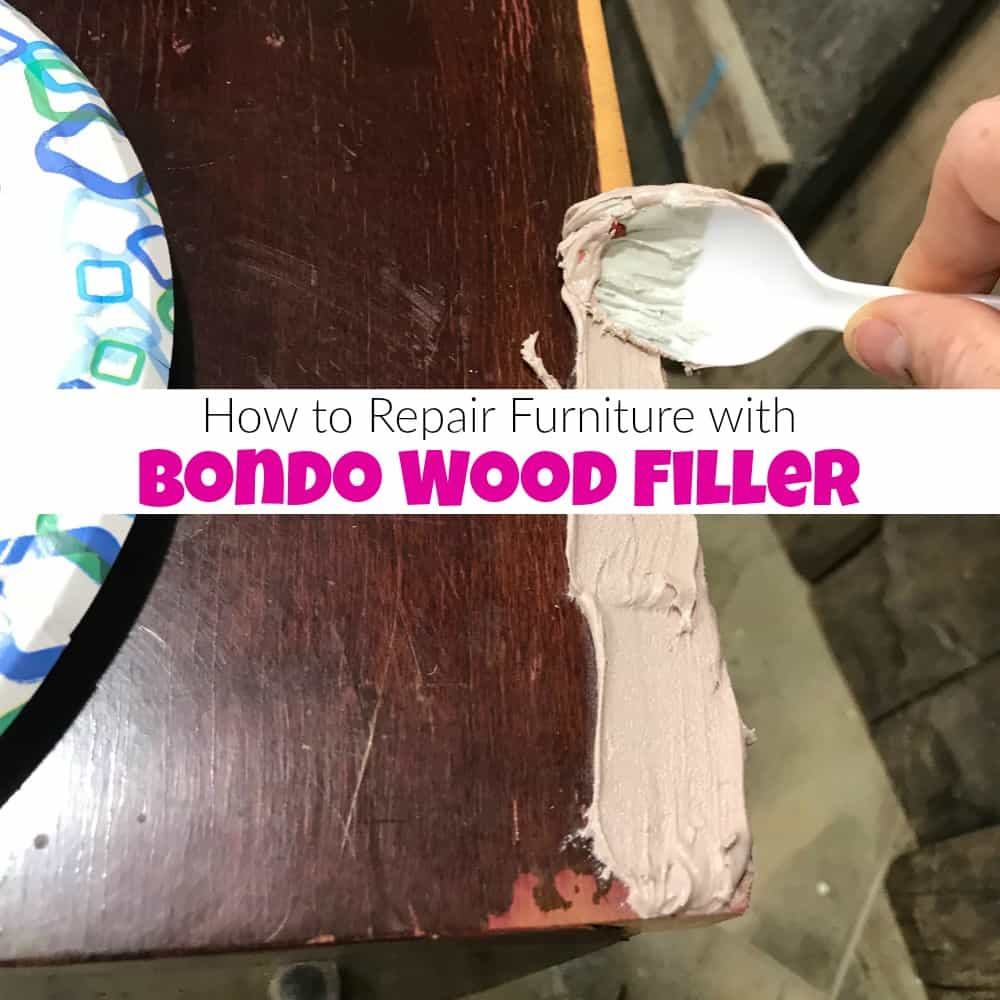
Strengthen the Repaired Broken Table
Now that the broken pieces are glued back into place we need to strengthen them. The wood glue will hold them but by not adding anything else you risk them breaking off again. To reinforce the decorative wood trim on top I am using Bondo. Yep, it’s not just for cars. This is the Bondo that I am using (HERE). Keep in mind that it is NOT non-toxic and can actually have a rather strong odor. Make sure to use it in a well-ventilated area.

I make sure to mix the Bondo on a paper plate and apply to the areas where the wood previously split.

Make sure to apply the Bondo on both sides for full support.

I also suggest wearing protection on your hands while doing this, I use disposable rubber gloves.

Sanding Dry Bondo
Once the Bondo is fully dried you will need to sand it smooth. I am using my Dremel rotary tool for this step. This is the very basic Dremel that I have, it comes with a few different sized bits and tips (HERE).

I pick through the bits and tips until I find one that works nicely for the job. You want to be able to sand your Bondo smooth and get into the crease of the table without removing all of your Bondo.

This one works well and allows me to sand where I need to while keeping the repaired pieces in place and secure.

As it turns out there is also a small area on the side of the table that needs repair as well. No one likes chipped veneer, but it’s an easy fix.

I realized this after I had already cleaned up from repairing the top area. So for this small section, I am using my small spot putty wood Bondo. You can get it HERE.

Once dry this area can be sanded smooth with standard sandpaper since it is flat.

For more projects and ways to use Bondo to repair furniture, make sure to check out How to Repair Furniture with Bondo Wood Filler.
Prepping Your Furniture For Paint
Now that all of our repairs are made we can move on to cleaning and prepping the table for paint. The entire table is sanded with 150 grit sandpaper.

Once all of the sanding is complete you may want to vacuum the dust with a shop vac before cleaning. I use a simple shop vac like this one HERE.

Make sure to follow up with a thorough cleaning. You can use an old toothbrush to clean in the detail areas on the front of the doors.

As well as the hard to reach decorative areas on the sides.

Your table is all repaired, sanded and cleaned.

How to Prevent Bleed Through When Painting Mahogany
We are painting mahogany and mahogany has a reputation for bleeding through the paint. To take a preventative measure we will be using Boss from Dixie Belle. Boss is made to Block Odors, Stains and Stop bleed through. You can get Boss HERE.

The cool thing about BOSS is that it goes on white and dries clear. BOSS is applied to the entire table, inside and out, front and back.

You can see here as it dries, it changes from white to clear.

Click here to Pin this post for later.
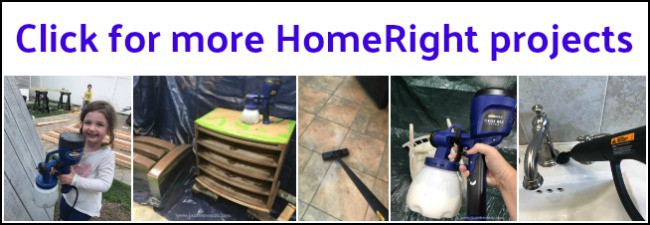
Setting Up to Spray Paint Furniture with Our Paint Sprayer
Can we finally start to paint this thing?! Let’s get set up. These are the main things that I am using to spray paint this table with the best paint sprayer in town. I am using my:
- HomeRight Finish Max Extra paint sprayer.

- and my HomeRight spray shelter.


I should tell you that my workshop is in the basement of my home and is rather small. It gets even smaller as I add more tools and furniture in there. 🙂 I also want to make sure that I don’t get paint all over the place when I work. (though it may be too late for that) Maybe, I just don’t want to make any MORE of a mess with paint. That is where the spray shelter comes in. The spray shelter comes in a nifty storage bag to keep it nice and tidy when not in use.

When you take it out of the bag it pops open to the perfect size for chairs, tables, and children.

Spray Painting Furniture with the Best Paint Sprayer
This table is being painted in Bunker Hill Blue from Dixie Belle. You can get this gorgeous blue along with so many other paint colors, stains and products online HERE.

Add some paint into your paint sprayer canister to get started. If you need to dilute your paint I do not use a specific ratio, but rather I aim for the consistency of yogurt. 😉

Wipe away any excess and screw the paint canister on to the paint sprayer. Plug in your paint sprayer and we are all set.

Here is a video showing you how I use the HomeRight paint sprayer. Please bear with me, I decided to include my bloopers, blunders, and mistakes to share the real life on how some projects go rather than just the easy and pretty.
Click here to Pin this post for later.
Despite the bloopers and blunders of my own mistakes the HomeRight finish max extra is a fantastic paint sprayer. The great thing about the HomeRight Finish Max Extra is that you can spray paint in all directions. You can spray upwards.

You can spray straight on.

Here is the table with one coat of paint. The coverage is pretty fantastic. Make sure to let your paint dry completely before spray painting the second coat.

Second Coat of Paint with Paint Sprayer
Once your first coat of paint is completely dry we can paint a second coat. Before adding a second coat of paint with our paint sprayer I like to lightly sand the piece with a fine grit sandpaper first.

After you lightly sand make sure to remove any dust by wiping with a lint free cloth. These are the lint-free cloths that I keep on hand in my shop HERE. I toss them in the washing machine after each use and use them over and over.

Now go ahead and spray paint your table with a second coat of paint using your paint sprayer.

Sealing Your Blue Painted Furniture with a Paint Sprayer
Now that you have two full coats on your furniture we need to seal the project with a clear sealer. I am sealing with a satin clear coat from Dixie Belle.

And yes, I am using the sealer in the paint sprayer! Add your protective sealer into the container of your paint sprayer. Dilute a little if needed, this sealer is very thick so I do have to add a little water.

To make sure you remove any excess clear coat that may pool up in the creases and crevices by lightly brushing with a dry chip brush.

If you have questions about sealing your painted furniture project you can find a full tutorial with video on how to apply clear sealer here: Sealing Painted Furniture

Painting Vintage Hardware
On to the hardware. Obviously, the original hardware is removed but saved for this blue painted table.

The hardware is cleaned and prepped for paint. This is how I clean, prep and paint hardware. Next, the hardware is all painted the same blue as the table and sealed with the same clear satin sealer.

Once completely dry you can put your hardware back onto your painted table.

Personally, I never leave the hardware on when painting furniture. Whether hand painting furniture or painting furniture with a paint sprayer I will always remove the hardware to clean and paint. Even though the hardware and table are all painted the same blue I prefer to paint them separately.


Finishing Touches
As you can now see the table is all painted blue and is not distressed. There is also a pull out drawer shelf thing with wooden tracks. If you have wooden tracks or an area where the wood will rub on wood you will want to make sure to lubricate this.

To do this I am using Wise Owl lemon verbena. The lemon verbena furniture salve is made with hemp seed oil, natural waxes, cold pressed lavender essential oil and lemon verbena essential oils. Basically, it’s all natural and smells really nice. You can also see where I use this product to save the inside of drawers here: How to Save Wooden Drawers with Lemon Verbena You can order lemon verbena online here: lemon verbena.

You will need to use a dry, clean cloth aka old Tshirt to apply your lemon verbena.

Rub some lemon verbena along the wooden track where the wood will rub against wood.

Cleaning Up and Storing Your Spray Shelter
Since we get to use this great spray shelter to keep our paint mess contained you will also need to put it away until next time. Look at how much paint would’ve and could’ve been all over the walls and floor. Oh boy! When using your indoor paint sprayer I would highly suggest grabbing a spray shelter to contain your mess.

First, you will want to wait until the paint is dry and then lay the shelter on its side to fold in half.

Next, you will twist and fold up the spray shelter. This is actually easier than it sounds, but it will fold right back up and can be easily held in one hand.

Go ahead and wrap the black strap around the shelter to keep it together. Otherwise, if you let go your spray shelter will most likely pop back open into the tent position.

Now you can stuff your spray shelter back into the storage bag that it comes with and zip it up.

If for some reason you have a hard time or need a little extra guidance there are instructions sewn right inside the bag to help you.

Click here to Pin this post for later.
Cleaning Your Paint Sprayer
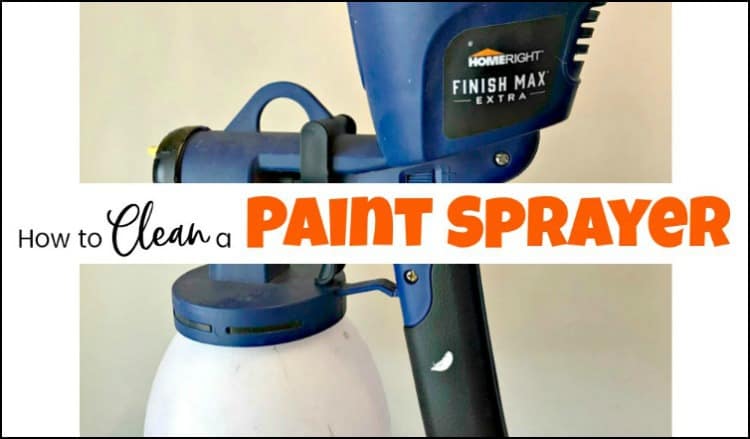
Make sure to clean your paint sprayer after each use. I have a full explanation on how to get the best paint sprayer nice and clean here: How to Clean a Paint Sprayer.
Blue Painted Table Using the Best Paint Sprayer
Now you know how to use a paint sprayer indoors when you are painting furniture. This unique wooden table is looking bold, blue and beautiful without any brushstrokes in the finish.

Check out all of my furniture projects with over 90 painted furniture makeovers: Stunning painted furniture ideas.

Click here to Pin this post for later.


Ready to Get Started on Your Next Project?
Make sure you have what you need. You can get the HomeRight Finish Max paint sprayer HERE.

You can find the HomeRight spray shelter HERE. It does come in a few different sizes, so get whatever size works best for you. For this project, I am using the medium shelter.

And of course, don’t forget your paint.

Wait! Don’t Go! It’s that time of the month again for:
Furniture Fixer-Uppers
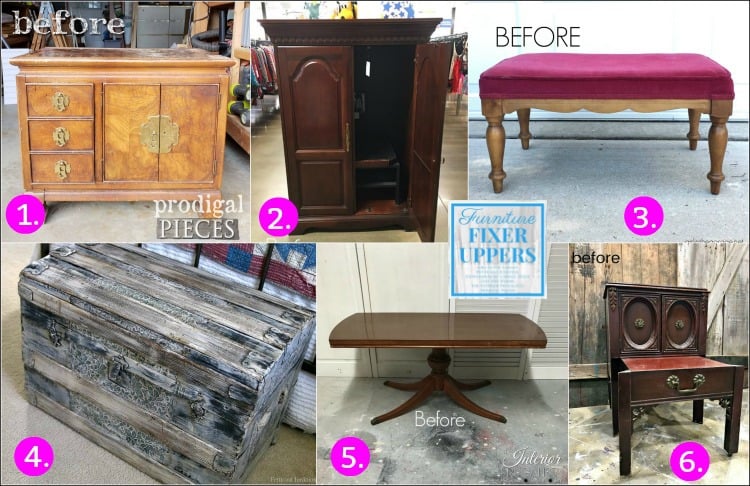
Its that time again where a few of my creative and talented blogger friends and I have joined together in our monthly Furniture Fixer Uppers share. Let’s see what my friends are up to! Make sure to click the links below the image to check out all the amazing projects that my bloggy girls are working on this month.

Don’t Forget – Follow Just the Woods and Share this post to Inspire others:
FACEBOOK * INSTAGRAM * PINTEREST
Stay connected! For more tips and tricks sign up here : [mc4wp_form id=”1340″]


You totally gave this piece new life, Kandice. Wow! I love my HomeRight spayer and shelters too – a must have in my tool aresenal.
Every time I try to subscribe to your site I get the same message “Oops. Something went wrong. Please try again later.”. Help!
This looks so good now, Kandice! The color is beautiful and the sprayed-on finish is fabulous.
Thank you for the detailed instructions. VERY helpful! It turned out gorgeous!
Beautiful. This unique desk has gorgeous detail that looks fabulous painted this shade of blue. What a lucky little boy to have such a unique piece of furniture to use for his creative playtime. Great job!
As someone who also paints furniture in the basement of my home, I can appreciate how handy this tent would be. Laying tarps is definitely a pain in the butt. Love how this interesting table turned out, Kandice. So pretty painted blue! I’m sure your client was thrilled with the makeover.
You and Larissa were on the same page with your beautiful blue today! This is such a stunning piece now!! XO
This is such a great, detailed tutorial Kandice! I love the new blue look and I’m sure your customer was thrilled. The photo staging area looks very pretty too!
This turned out super pretty and love your step by step instructions….really helps!
Wow! Excellent job love what you did with this!